


8
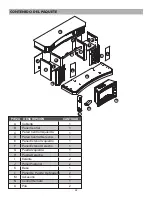
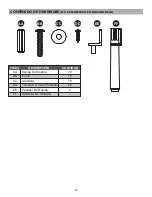
ASSEMBLY INSTRUCTIONS
(CONT’D)
Note:
Before proceeding to the next step, with the help of another person, move the mantel close to
the final desired location.
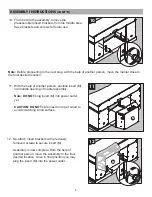
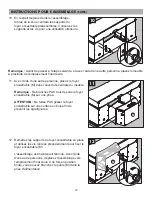
10. From behind the assembly, remove the
preassembled insert brackets from the middle area.
Save brackets and screws for future use.
11. With the help of another person, position insert (M)
into middle opening of mantel assembly.
Note:
DO NOT
plug insert (M) into power outlet
yet.
CAUTION: DO NOT
slide insert on top of wood to
avoid scratching wood surface.
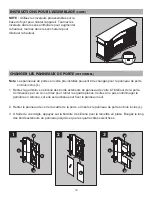
12. Re-attach insert brackets with previously
removed screws to secure insert (M).
Assembly is now complete. With the help of
another person, move the assembly to the final
desired location. Once in final position you may
plug the insert (M) into the power outlet.
2
2
10
1
M
11
1
M
1
12
2