background image


-

 6 – 

 
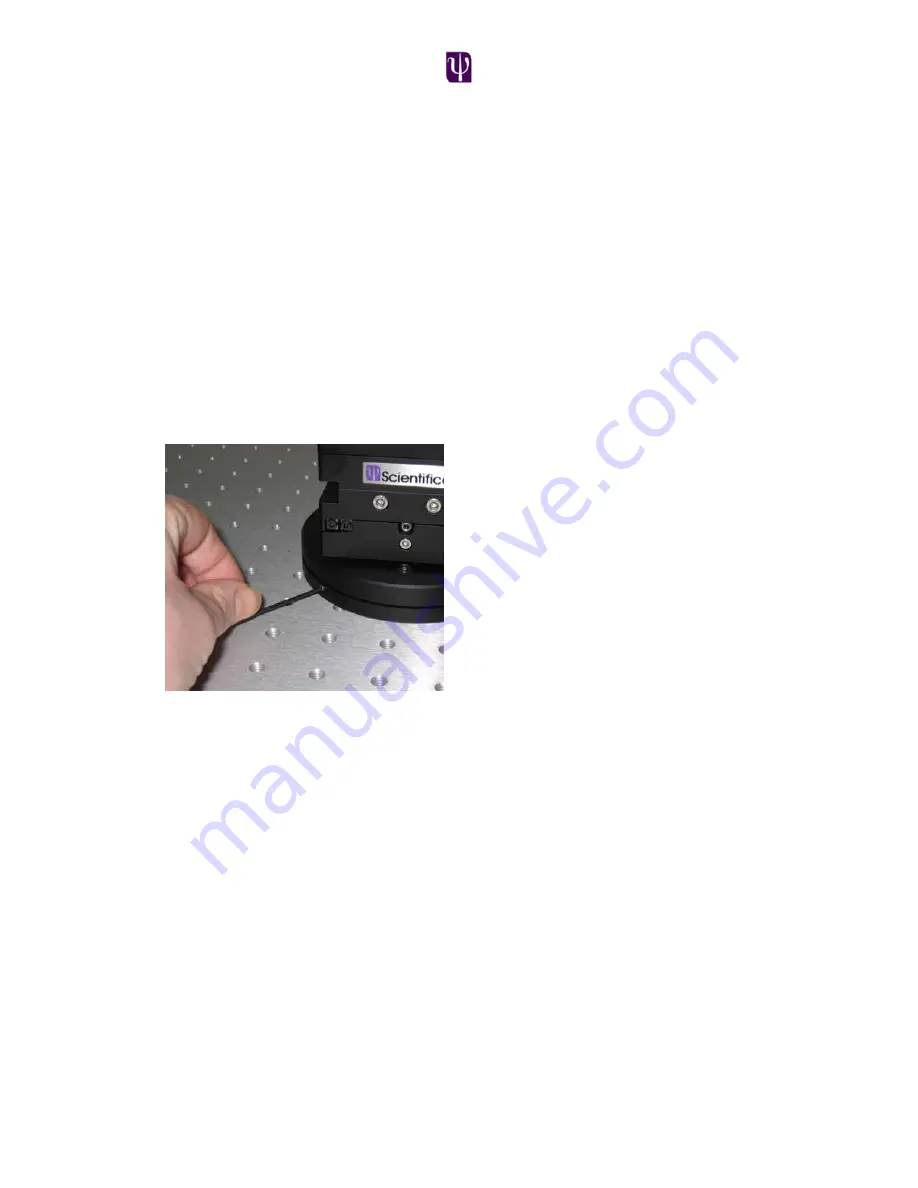
Setting the rotation stages 
 

Each PatchStar manipulator includes two rotation stages which have user 
settable stops. The rotary base has two magnetic stops which allow the user to 
rotate the manipulator away from the experiment and then return to the original 
position without having to undo any locking mechanism or use any tools. The 

vertical rotary stage uses mechanical stops and a locking screw to allow the user 
to rotate vertically. In addition, the vertical rotary stage incorporates a sensor that 
measured the angle that the front plate is set to. The manipulator controller 
automatically reads this angle and uses it to drive the manipulator in the virtual 

fourth axis.  
To set the stops for the rotary base; first ensure that the 2 set screws that fix the 

rotary stop ring are loose thus enabling the manipulator to rotate 360º relative to 
the base plate.  


Rotate the manipulator until one of the magnetic stops engages with its mating 
part. Rotate the manipulator (with the stop engaged) to the required orientation. 
Now tighten the 2 set screws using a 1.5mm allen key to secure the rotary stop 

ring. Ensure that the manipulator can be rotated in the direction and return as 
required. 


Summary of Contents for PatchStar

Page 1: ...1 PatchStar Micromanipulator...

Page 2: ...etain the packaging for future storage or transportation of the system System Components PatchStar Micromanipulator The Scientifica PatchStar is a highly stable positioning system designed for ultra p...

Page 3: ...d away from the microscope The right handed set up essentially mirrors the left handed one Left Handed configuration Right Handed configuration The Patchstar is designed in a modular fashion in order...

Page 4: ...locking knob can be located into the left hand side position Finally the head stage slide can be set to project on the left side of the manipulator This is achieved by loosening the two button headed...

Page 5: ...Ensure that the 2 set screws that fix the rotary stop ring are loose thus enabling the upper plate to rotate 360 There are 4 mounting holes in the lower plate of the base that are accessed by rotatin...

Page 6: ...sensor that measured the angle that the front plate is set to The manipulator controller automatically reads this angle and uses it to drive the manipulator in the virtual fourth axis To set the stop...

Page 7: ...headstage The dovetail slide assembly is mounted to the front of the vertical rotation plate This can be mounted using any pair of the mounting holes on the vertical rotation plate to suit the applica...

Page 8: ...ack Connect the ACC Axis Control Cube or joystick module to the 1U rack Connect the power cord to the rack and mains power outlet Turn the instrument on using the power switch located on the front pan...

Page 9: ...ogonal axes This is used to approach the sample on the axis of the pipette There is a rotary sensor embedded in the vertical rotary stage When the rotation plate is moved the angle of the plate is mea...

Page 10: ...in the Set Home In Offset setting within the LinLab software Mode 2 This allows the user to set a specific position as the Home In point Move the manipulator to the desired Home In position and then...

Page 11: ...then the next would go back to A etc Troubleshooting Manipulator Instability The following is a list of the most common issues liable to cause positional instability 1 Pipette glass is it the right s...

Page 12: ...n locked in place the rotary base magnetic lock should feel firm Any movement or slop in this could cause undesired movement 7 Air conditioning Is there an air conditioning vent close to the set up Th...

Reviews: