background image

• 9 •

5.6 

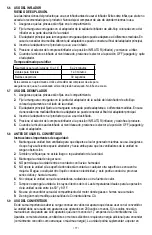
USING THE INFLATOR

WARNING: RISK OF EXPLOSION.

Read instructions of the product being inflated before using the inflator. Avoid overinflation, do not 

exceed the manufacturer’s recommended pressures. Do not leave the inflator unattended during use.

1.  Ensure the battery clips are securely on the storage holders.

2.  Attach the corrugated hose with end adapter to the high-flow inflator outlet located near the 

Compressor/Inflator switch on the back of the unit.

3.  The main accessory adapter attached to the corrugated hose accommodates up to 4 sizes. If another 

size is needed, an additional adapter can be attached to the end of the main accessory adapter.

4.  Insert the adapter into the product to be inflated.

5.  Push the Compressor/Inflator switch to the INFLATOR position and inflate the product.

6.  When the product is inflated to the desired level, push the Compressor/Inflator switch to the OFF 

position and remove the adapter.

Estimated time for inflating

Vehicle tires 13-16"

6-24 minutes

Bike tires

1-3 minutes

Sports balls

30 seconds

These times are approximate. Use the air compressor gauge  

to ensure the proper pressure has been reached. Do not overinflate.

5.7 

USING THE DEFLATOR

1.  Ensure the battery clips are securely on the storage holders.

2.  Attach the corrugated hose with the end adapter to the high-flow deflator outlet, which is located on the 

side of the unit.

3.  The main accessory adapter attached to the corrugated hose accommodates up to 4 sizes. If another 

size is needed, an additional adapter can be attached to the end of the main accessory adapter.

4.  Insert the adapter into the item to be deflated.

5.  Push the Compressor/Inflator switch to the INFLATOR position and deflate the item.

6.  When the product is deflated to the desired level, push the Compressor/Inflator switch to the OFF 

position and remove the adapter.

5.8 

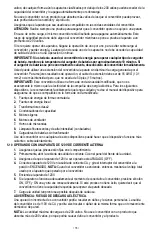
BEFORE USING THE CONVERTER

Important Safety Instructions:

1.  Keep the unit well ventilated, in order to properly disperse heat generated while it is in use.  

Make sure there are several inches of clearance around the top and sides, and do not block the vents 

on the back of the unit.

2.  Make sure the unit is not close to any potential source of flammable fumes or clothing.

3.  Keep the unit dry.

4.  DO NOT allow the unit to come into contact with rain or moisture.

5.  DO NOT operate the unit if you, the unit, the device being operated or any other surfaces that may 

come in contact with any power source are wet. Water and many other liquids can conduct electricity, 

which may lead to serious injury or death.

6.  Do not place the unit on or near heating vents, radiators or other sources of heat.

7.  Do not place the unit in direct sunlight. The ideal air temperature for operation is between 50° and 80° F.

8.  Do not use the converter near an open engine compartment where fumes may accumulate.

9.  Do not modify the AC receptacles in any way.

Summary of Contents for SJ1332

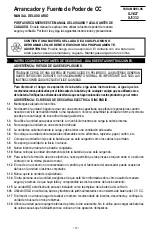
Page 1: ...ese instructions and precautions carefully POR FAVOR CONSERVE ESTE MANUAL DEL USUARIO Y LEALO ANTES DE CADA USO En este manual le explica cómo utilizar la fuente de poder de manera segura y confiable Por favor lea y siga las siguientes instrucciones y precauciones ESSAYER DE GARDER LE MANUEL D INSTRUCTIONS ET LE LIRE AVANT CHAQUE UTILISATION Ce manuel explique comment utiliser l unité d une façon ...

Page 2: ...TIONS 6 FEATURES 6 CHARGING THE INTERNAL BATTERY OF THE JUMP STARTER 7 OPERATING INSTRUCTIONS 7 MAINTENANCE INSTRUCTIONS 11 MOVING AND STORAGE INSTRUCTIONS 11 TROUBLESHOOTING 11 REPLACEMENT PARTS 12 ACCESSORIES 12 BEFORE RETURNING FOR REPAIRS 12 LIMITED WARRANTY 12 ...

Page 3: ...ERÍSTICAS 14 PARA CARGAR LA BATERIA INTERNA DEL ARRANCADOR 15 INSTRUCCIONES DE OPERACIÓN 15 INSTRUCCIONES DE MANTENIMIENTO 19 INSTRUCCIONES PARA EL MANEJO Y ALMACENAMIENTO 19 LOCALIZACIÓN Y SOLUCIÓN DE PROBLEMAS 19 REPUESTOS 20 ACCESORIOS 20 ANTES DE DEVOLVER A REPARACIONES 20 GARANTÍA LIMITADA 21 ...

Page 4: ... CARACTÉRISTIQUES 23 CHARGEMENT DE LA BATTERIE INTERNE DE L AIDE AU DÉMARRAGE 24 CONSIGNES D UTILISATION 24 INSTRUCTIONS D ENTRETIEN 28 INSTRUCTIONS DE STOCKAGE ET EMPLACEMENT 28 DÉPANNAGE 29 PIÈCES DE RECHANGE 29 ACCESSOIRES 29 AVANT DE RETOURNER POUR LES RÉPARATIONS 29 GARANTIE LIMITÉE 30 ...

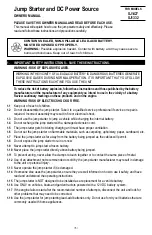
Page 5: ...rpeting upholstery paper cardboard etc 1 7 Place the jump starter as far away from the battery being jumped as the cables will permit 1 8 Do not expose the jump starter to rain or snow 1 9 Never attempt to jump start a frozen battery 1 10 Never place the jump starter directly above battery being jumped 1 11 To prevent arcing never allow the clamps to touch together or to contact the same piece of ...

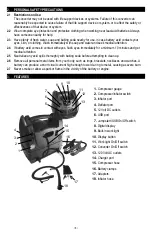
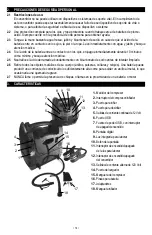
Page 6: ... flush eyes immediately for a minimum 10 minutes and get medical attention 2 5 Neutralize any acid spills thoroughly with baking soda before attempting to clean up 2 6 Remove all personal metal items from your body such as rings bracelets necklaces and watches A battery can produce a short circuit current high enough to weld a ring to metal causing a severe burn 2 7 Never smoke or allow a spark or...

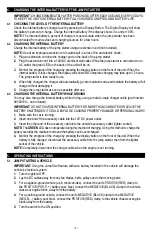
Page 7: ...L BATTERY WHILE DRIVING You may also charge the internal battery while driving using a male to male charger cable part number 94500109 not included IMPORTANT DO NOT CHARGE INTERNAL BATTERY FOR MORE THAN 30 MINUTES OR LEAVE THE BATTERY UNATTENDED IT COULD EXPLODE CAUSING PROPERTY DAMAGE OR PERSONAL INJURY 1 Make sure the car is running 2 Insert one end of the accessory cable into the 12V DC power o...

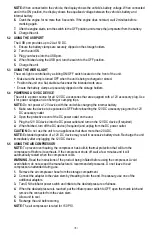
Page 8: ...ice to be powered is OFF before inserting the 12V DC accessory plug into the 12V DC accessory outlet 2 Open the protective cover of the DC power outlet on the unit 3 Plug the 12V DC device into the DC power outlet and turn on the 12V DC device if required 4 When finished turn off the DC device if required and unplug from the DC power outlet CAUTION Do not use the unit to run appliances that draw m...

Page 9: ...let which is located on the side of the unit 3 The main accessory adapter attached to the corrugated hose accommodates up to 4 sizes If another size is needed an additional adapter can be attached to the end of the main accessory adapter 4 Insert the adapter into the item to be deflated 5 Push the Compressor Inflator switch to the INFLATOR position and deflate the item 6 When the product is deflat...

Page 10: ... For best operating results the extension cord should be 16 AWG 1 31 mm2 or larger and no longer than 50 feet IMPORTANT This converter uses a modified sine waveform which is not quite the same as power company electricity For the following devices we strongly recommend that you use caution and check the device s manual to make sure it is compatible with modified sine waveform 1 Switch mode power s...

Page 11: ...nternal battery immediately after purchase after every use and every 30 days All batteries are affected by temperature The ideal storage temperature is at 70 F The internal battery will gradually self discharge lose power over time especially in warm environments Leaving the battery in a discharged state may result in permanent battery damage To ensure satisfactory performance and avoid permanent ...

Page 12: ... with this product that are not manufactured by Schumacher Electric Corporation and approved for use with this product This Limited Warranty is void if the product is misused subjected to careless handling repaired or modified by anyone other than Manufacturer or if this unit is resold through an unauthorized retailer Manufacturer makes no other warranties including but not limited to express impl...

Page 13: ...io o descarga eléctrica 1 3 No utilice la unidad para pasar corriente a un vehículo mientras se carga la batería interna 1 4 No recargue la unidad con una extensión dañada 1 5 La unidad se calienta durante la carga y debe tener una ventilación adecuada 1 6 No coloque la unidad sobre materiales inflamables como alfombras tapicería papel cartón etc 1 7 Coloque la unidad tan lejos de la batería que s...

Page 14: ... médica 2 5 Neutralice el ácido derramado abundantemente con bicarbonato de sodio antes de intentar limpiarlo 2 6 Retire todos los objetos metálicos de su cuerpo anillos pulseras collares y relojes Una batería puede producir una corriente de cortocircuito lo suficientemente alta como para soldar un anillo al metal lo que ocasionaría una quemadura grave 2 7 NUNCA fume o permita la presencia de chis...

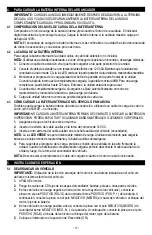
Page 15: ...HA También puede cargar la batería interna durante la conducción utilizando un cable de carga de varón a varón p n 94500109 no incluido IMPORTANE NO CARGAR LABATERÍAINTERNAPOR MÁS DE 30 MINUTOS NI DEJAR LABATERÍASIN SUPERVISIÓN PODRÍAEXPLOTAR Y OCASIONAR DAÑOS MATERIALES O LESIONES CORPORALES 1 Asegúrese de que el vehículo esté en marcha 2 Inserte un extremo del cable auxiliar en la toma de corrie...

Page 16: ...té apagado OFF antes de insertar el enchufe auxiliar de 12V CC en la toma auxiliar de 12V CC 2 Abra la tapa protectora de la toma de alimentación de CC de la unidad 3 Conecte el dispositivo de 12V CC a la toma de alimentación de CC y enciéndalo si es necesario 4 Cuando haya terminado de cargarse apague el dispositivo de CC si es necesario y desenchúfelo de la toma de alimentación de CC PRECAUCIÓN ...

Page 17: ...tador principal 4 Inserte el adaptador en el producto que va a ser desinflado 5 Presione el selector del compresor inflador a la posición INFLATOR inflador y desinfle el producto 6 Cuando el artículo sea desinflado al nivel deseado presione el selector a la posición OFF apagado y quite el adaptador 5 8 ANTES DE USAR EL CONVERTIDOR Instrucciones importantes de seguridad 1 Mantenga ela unidad bien v...

Page 18: ...ispositivos le recomendamos factiblemente que tenga cuidado y revise el manual del dispositivo para asegurarse de que es compatible con la forma de onda modificada 1 Fuentes de energía de forma conmutada 2 Fuentes de energía lineal 3 Transformadores clase2 4 Condensadores de capacidad 5 Motores ligeros 6 Motores de ventilador 7 Hornos de microondas 8 Lámparas flourescentes y de alta intensidad con...

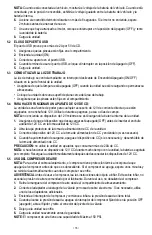
Page 19: ...ales o de inmueble IMPORTANTE No use o almacene la unidad bajo ninguna circustancia en áreas donde puede causar daño alguno en caso de que la batería derrame ácido 7 4 IMPORTANTE CARGUE INMEDIATAMENTE DESPUÉS DE CADA USO MANTENGA LA UNIDAD COMPLETAMENTE CARGADA Cargue la fuente de poder inmediatamente después de comprarla después de cada uso y cada 30 días La temperatura afecta a todas las batería...

Page 20: ...esconecte el aparato de 12V El fusible interno de 20Anecesita ser reemplazado por un técnico calificado La batería de la unidad no retiene la carga La batería está en malas condiciones No recibirá carga Haga un chequeo de la batería 9 REPUESTOS Juego de accesorios del compresor de aire 3 adaptadores de manguera 2299001425Z Juego de accesorios del inflador Manguera para inflador desinflador al extr...

Page 21: ...uada es reparado o modificado por personas que nos sean el Fabricante o si esta unidad es revendida a través de un vendedor minorista no autorizado El Fabricante no realiza ninguna otra garantía incluidas a título enunciativo las garantías expresas implícitas o legales incluidas a modo de ejemplo las garantías implícitas de comerciabilidad o adecuación a un fin específico Asimismo el Fabricante no...

Page 22: ...7 Placez l unité loin de la batterie qui va être utilisé étant que les câbles le permettent 1 8 Ne pas exposer l unité à la pluie ou la neige 1 9 Ne jamais essayer de démarrer une batterie gelée 1 10 Ne placez jamais l unité directement au dessus de la batterie qui va être utilisé 1 11 Pour éviter un arc électrique ne jamais laisser les pinces se toucher entre eux ou mis avec le même morceau de mé...

Page 23: ...ement pendant 10 minutes et consulter un médecin 2 5 Neutraliser l acide avec du bicarbonate de soude avant d essayer de nettoyer 2 6 Retirez tous les objets personnels en métal de votre corps tels que des bagues bracelets colliers et montres Une batterie peut produire un court circuit suffisamment élevé pour souder une bague de métal causant de graves brûlures 2 7 Jamais fumer ou laisser une étin...

Page 24: ...E LA BATTERIE INTERNE PENDANT LA CONDUITE Vous pouvez également charger la batterie interne pendant la conduite en utilisant un câble de chargement mâle mâle Numéro 94500109 non inclus IMPORTANT NE PAS RECHARGER LA BATTERIE INTERNE DE PLUS DE 30 MINUTES OU LAISSER LA BATTERIE SANS SURVEILLANCE IL POURRAIT EXPLOSER ET PROVOQUER DES DOMMAGES MATÉRIELS ET DES BLESSURES 1 Assurez vous que la voiture e...

Page 25: ...ne 1 Assurez vous que le dispositif à alimenter est éteint avant d insérer la prise 12V CC accessoire dans la prise 12V CC accessoire 2 Ouvrez le couvercle de protection de la prise d alimentation CC 3 Branchez l appareil 12V CC dans la prise d alimentation CC et allumez l appareil 12V CC si nécessaire 4 Lorsque vous avez terminé éteignez l appareil CC si nécessaire et débranchez la prise d alimen...

Page 26: ... L adaptateur principal pour accessoires attaché au flexible ondulé est capable de s adapter à 4 dimensions Si une taille différente est requise il faut raccorder un autre adaptateur à l extrémité de l adaptateur 4 Insérer l adaptateur dans le produit devant être dégonflé 5 Appuyez sur l interrupteur Compresseur Gonfleur à la position de gonflage et dégonflage l élément 6 Une fois le produit est d...

Page 27: ... permanente de le convertisseur IMPORTANT Si vous utilisez le convertisseur pour faire fonctionner n importe quel type de chargeur de batterie surveiller la température du chargeur pendant environ 10 minutes Si le chargeur chauffe anormalement le débrancher immédiatement du convertisseur Vous pouvez utiliser une rallonge allant de le convertisseur à l appareil sans faire chuter de façon significat...

Page 28: ...atterie attachées ensemble sur ou autour d un métal ou accrochées aux câbles On peut ranger l appareil aide de démarrage dans n importe quelle position Lorsque l appareil aide de démarrage est ouvert les pinces sont sous tension Une fois l interrupteur d aide démarrage fermé Début et produisent un arc électrique ou des étincelles si elles entrent en contact l une avec l autre Pour prévenir un arc ...

Page 29: ...terie interne n est pas chargée L appareil 12V consomme plus de 20A a un court circuit ou ou le fusible interne a sauté Allumez l appareil 12V Vérifiez l état de charge de la batterie en appuyant sur le bouton situé sur le devant de l unité Voir Controle du Niveau de Batterie Interne section Débranchez le produit de 12V Le fusible interne 20A doit être remplacé par un technicien qualifié La batter...

Page 30: ...is à une manipulation imprudente réparé ou modifié par une personne autre que le fabricant ou si cet appareil est revendu par un détaillant non autorisé Le fabricant ne fait aucune autre garantie y compris mais sans limiter garantie expresse implicite ou légale y compris sans limitation toute garantie implicite de valeur marchande ou la garantie implicite d adéquation à un usage particulier De plu...

Reviews: