•
8
•
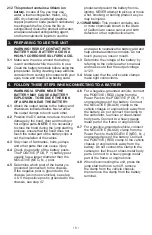
8.2 STARTING A BATTERY WITH LOW
VOLTAGE
If the vehicle’s battery voltage is too low for
the jump starter to detect that the clamps
are connected, there is a manual start
procedure to enable the jump start function.
1. Make sure the clamps are correctly
connected.
2.
Press and hold the
button for
5 seconds. When the display shows
JUMP START READY
, the jump starter
is ready for use.
WARNING!
This overrides a safety feature.
It will energize the clamps and cause
sparking if they are touched together. If the
clamp connections are reversed, damage
to the unit, battery and possibly the car’s
electrical system will occur.
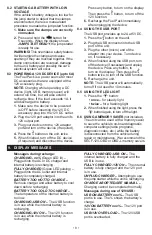
8.3 POWERING A 12V DC DEVICE (up to 6A)
The Fuel Pack is a power source for most
DC accessories that are equipped with a
12V accessory plug.
NOTE:
Charging while operating a DC
device (light, USB, memory saver) will
extend run time, but will also extend
recharge time. If the load exceeds 1A, it
will discharge the battery.
1.
Make sure the device to be powered
is OFF before inserting the 12V DC
accessory plug into the 12V DC outlet.
2.
Plug the 12V port adaptor into the unit’s
12V output port.
3.
Plug your device into the 12V adaptor
port and turn on the device (if required).
4.
Press the
button on the unit, twice.
5.
When finished, turn off the DC device
(if required) and disconnect the device.
Press any button, to turn on the display.
Then press the button, to turn off the
12V function.
6.
Recharge the Fuel Pack immediately
after unplugging the device.
8.4 USING THE USB PORT
The USB port provides up to 2A at 5V DC.
1.
Press the
button on the unit.
2.
Plug the USB connector into the USB
port of the unit.
3.
Plug the other (micro) end of the
adaptor into your device. Turn device
on, if necessary.
4.
When finished using the USB port, turn
off the device (if necessary) and unplug
the device. Press any button, to
turn on the display. Then press the
button twice, to turn off the USB function.
5.
Recharge the unit.
NOTE:
The USB power will automatically
turn off if not used for 10 minutes.
8.5 USING THE LED LIGHT
1.
Press the
button:
• once –
for steady light
• twice –
for a flashing light
2.
When finished using the light, press the
button again, to turn off the light.
8.6 USING A MEMORY SAVER
(not included).
The unit can be used with a memory saver
to save the vehicle’s on-board diagnostic
computer settings (radio programs,
diagnostic codes, etc.) while the battery
is disconnected from the vehicle during
repair or maintenance. We recommend the
SECF-12V-OBD or OBD-L memory savers.
9. DISPLAY MESSAGES
Messages during recharge:
CHARGING - xx% (
Green LED lit) –
Plugged into the AC or DC charger and
internal battery is recharging .
FULLY CHARGED
(Green LED pulsing) –
Plugged into the AC outlet and internal
battery is completely charged.
BATTERY TOO HOT TO CHARGE –
Remove charger and allow battery to cool
down before recharging.
BATTERY TOO COLD TO CHARGE –
The temperature of the internal battery is
too low.
CHARGING-USB ON –
The USB function
is in use while the internal battery is
recharging.
CHARGING-12V ON –
The 12V function
is in use while the internal battery is
recharging.
FULLY CHARGED-USB ON –
The
internal battery is fully charged and the
USB is in use.
FULLY CHARGED-12V ON –
The internal
battery is fully charged and the 12V port
is in use.
UNPLUG CHARGER –
Attempting to use
the jump starter while the unit is recharging.
CHARGE ABORTED-SEE MANUAL –
Charging cannot be completed normally.
Messages during use of 12V/USB:
USB ON-BATTERY xxx% –
The USB
port is in use. The % shows the battery’s
charge.
12V ON-BATTERY xxx% –
The 12V port
is in use.
USB/12V OVER LOAD –
The 12V/USB
port is overloaded.
Summary of Contents for SL1316
Page 22: ...22...


