


international 21
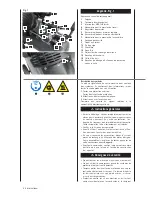
Assembly
Handle
The compressor handle is to be assembled as follows:
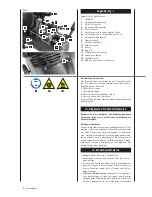
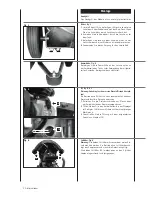
Wheels, Fig. 3
1
When mounting the wheels (12), begin by placing a
wheel bolt with a washer through the wheel. Then insert
a washer and a hex head nut.
2
Slide the wheel through the clip under the tank.
3
Then fasten it with a disc, a safety glass, and a nut and
tighten them together.
4
Repeat this process for the second wheel.
Rubber Bumper, Figure 4
Secure the rubber bumper on the bracket on the front side
of the tank. Use the enclosed screws, washers, and nuts.
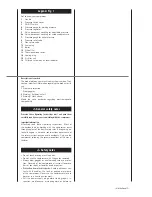
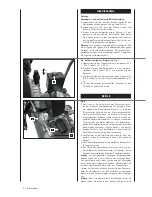
Oil, Figure 5, 5.1
Warning: It is imperative that you check the oil level before
using the machine for the first time!
Operation of the machine without oil will cause irreparable
damage and invalidate the guarantee.
1
Remove the plastic oil filler plug located in the crank
box of the compressor housing.
2
Fill the crankcase with oil, until the oil level in the oil-
level indicator (16) reaches the centre of the circular
marking.
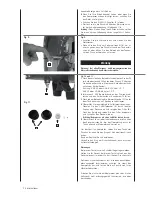
3
Close the opening using the sealing plug (14) included
in the delivery.
Air filter, Fig. 6
Warning: Both air filters must be mounted before the first
use.
Operation without air filters damages the compressor
and the warranty will lapse.
Both air filters (15) are screwed in and tightened at the
top of the cylinder heads.
Summary of Contents for HC 53dc
Page 115: ...international 115 ...
Page 140: ...140 international ...
Page 141: ...international 141 ...
Page 142: ...142 international ...
Page 143: ...international 143 ...


