4
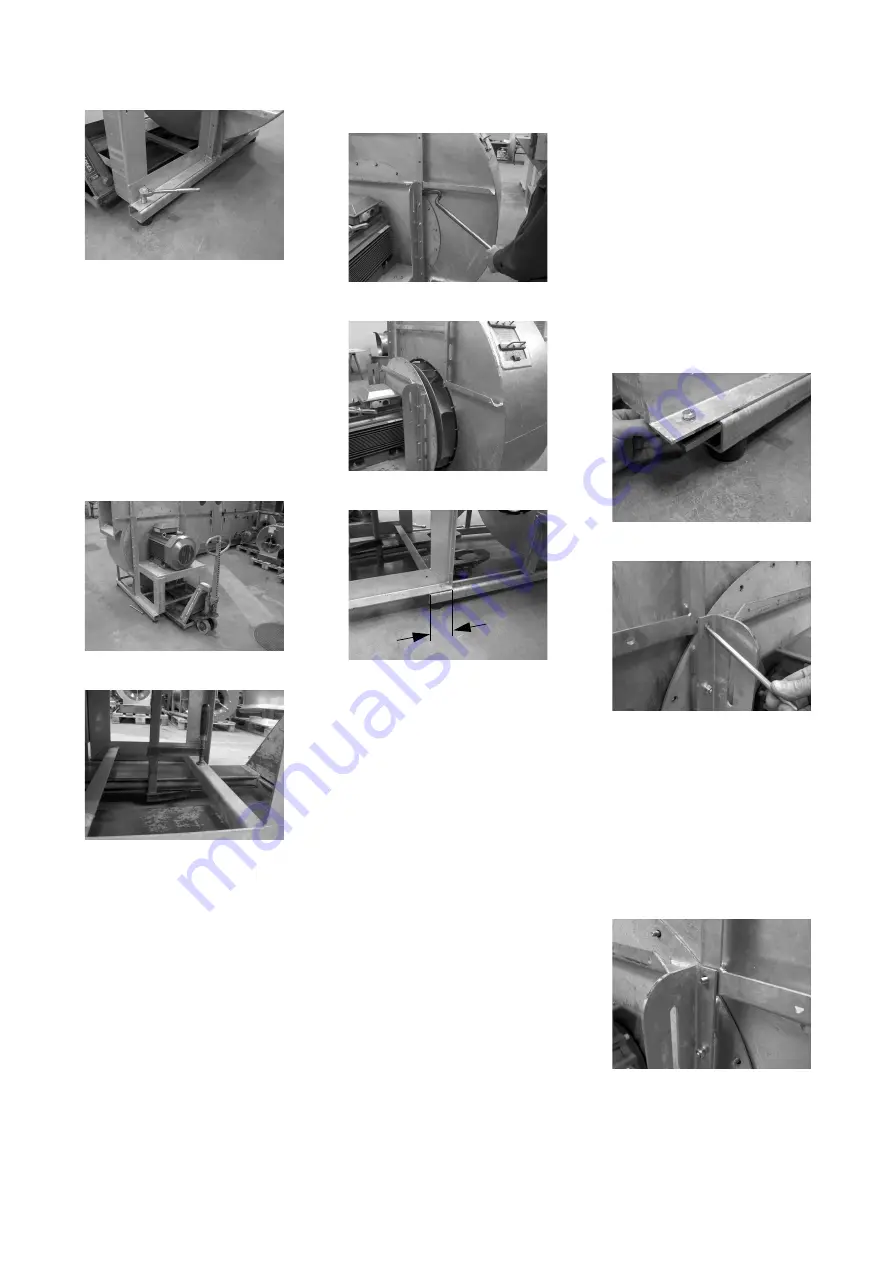
2. Place a pallet truck or similar
support under the motor brack-
et. See fig. 8. Attach a bench
screw to the front support to pre-
vent the motor bracket and rotor
from falling backwards when
they are retracted from the fan
housing. See fig. 9.
Support the rear, if necessary, to
keep the motor bracket horizon-
tal.
3. Pull rotor and motor bracket out
of the fan housing. It may be nec-
essary to use a crowbar to loosen
the sealing plate from the hous-
ing. See fig. 10 and 11.
Check that the pallet truck is set
to the correct height.
When retracting the rotor, it is
recommended to stop 100 mm
before the motor bracket slides
off the guide rails. See fig. 12.
4. Clean the rotor carefully as dirt
and coatings causes imbalance.
Also check that the sealing plate
rubber seal is intact. If the seal is
damaged, it must be replaced.
The impeller is dismantled and reas-
sembled as described in section “5.6
Shaft seal” under “Dismounting”
and “Mounting” respectively.
5.5 Mounting of motor with
impeller from motor side
1. Push the palletizer with motor
bracket towards the fan housing.
Correct the nuts so that they may
slide in the rails. See fig. 13.
When the motor bracket is ap-
prox. 20 mm from the fan hous-
ing, align it so that the bolts are
opposite the holes. Use, for ex-
ample, a conical arbor. See fig.
14.
Then push the parts completely
together.
2. Mount the bolts from the fan
housing supports for the motor
bracket. See fig. 15. Then insert
all sealing plate nuts.
Tighten the sealing plate nuts to
a torque of 25 Nm. See fig. 16.
Finally, fasten the bolts in the
bottom of the motor bracket to
the guide rails. See fig. 7.
Fig. 7
Fig. 8
Fig. 9
Fig. 10
Fig. 11
Fig. 12
100 mm
Fig. 13
Fig. 14
Fig. 15


