background image

Defroster 

Defroster 

Defroster type 

There are two types of defrosters according to circulation modes. 

Internal Circulation Defroster 

In case of ample moisture and easy frosting of front windshield, it 

directly heat the air in the vehicle to defrost.


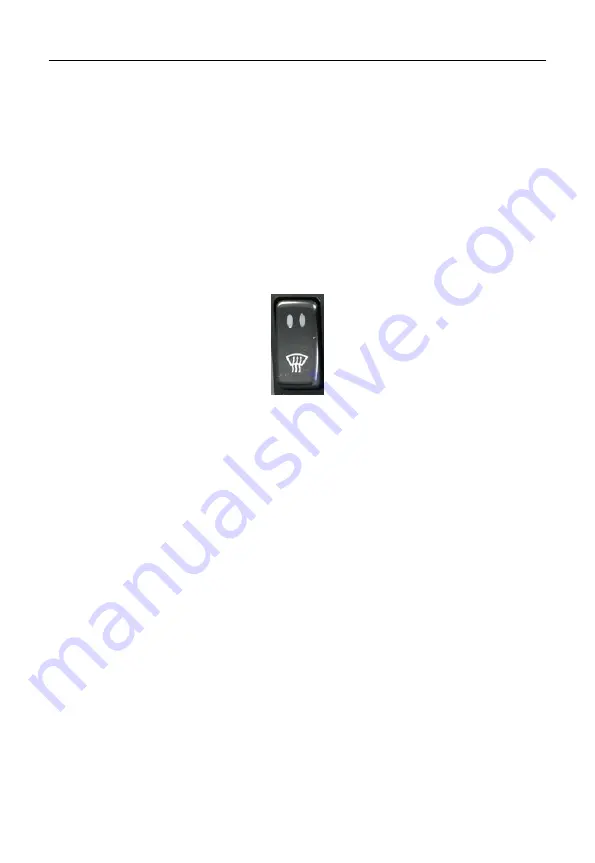
To initiate the defroster, press the switch lightly for low air speed 

and further pressing to the second level will lead to the higher 

defrosting intensity. 

Internal & External Defroster: 


In case of low temperature in the vehicle, it  adopts  internal 

circulation mode and increase the air temperature to deice and defrost. 

In case of temperature increase in the vehicle with ample moisture, 

open the external circulation cable (see Figure below) to let air outside 

the vehicle come inside to reduce the hot wind moisture for defrosting. 

In this way, frost is not easily formed when the air is blown to the front 

windshield. 


78 

Summary of Contents for Higer A80

Page 1: ...structions and keep the operating instructions within the vehicle Correct operation and maintenance can result in good performance and longer service of the coach as well as claim permission This driv...

Page 2: ...Driver s Seat 17 Passenger s Seat 20 Courier Seat 22 Rear View Mirror 23 Pneumatic Luggage Compartment 25 Passenger Area 28 Electronic Clock 30 Microphone Amplifier 33 DVD 34 LCD 62 Reverse Monitor 63...

Page 3: ...Catalog Webasto Water Heater optional 90 Refrigerator optional 96 Toilet optional 99...

Page 4: ...Vehicle Identification Vehicle Identification Nameplate The coach body nameplate is riveted on the seal panel behind the front passenger door 1...

Page 5: ...glazing front windshield the rest is tempered glass Electrical apparatus 24V negative grounded A C system Type Roof mounted condenser and evaporator Cooling power kw 30 Refrigerant R134A Inner equipme...

Page 6: ...Specification Inner equipment Front xenon headlamps Optional Daylight lamp LED night lamp Sealed luggage rack Optional Imported skid proof floor leatheroid Composite floor Guardrail CAN 3...

Page 7: ...ure 1 Front fog lamp 7 Passenger door pump 2 Headlamps 8 Front passenger door 3 Decoration panel 9 Front wheel 4 Windscreen wiper 10 Luggage compartment 5 Windscreen 11 Rear wheel 6 Rear view mirror 1...

Page 8: ...recorder 10 Instrument cluster 3 Microphone amplifier 11 Headlamp knob 4 DVD 12 Emergency stop switch 5 Rocker switch Centre console 13 Clutch fluid filling port 6 Reverse monitor 14 Rocker switch L...

Page 9: ...andle will automatically turns back by 90 and the lock pin extends out Turn the key counterclockwise by 90 and then withdraw the key Rotate the lock cover to cover the key hole Lock the door Rotate th...

Page 10: ...place the battery in the remote control when the indicator light becomes dim or the control distance is reduced drastically Each remote control is coded to ensure its uniqueness Each new coach is deli...

Page 11: ...witch on Dashboard The battery master switch if turned on by pressing the lower edge will connect to bulk of the electrical system to the battery The driver can control the doors with the rocker switc...

Page 12: ...ng the passenger door 2 If the passenger door is obstructed by any person or objects during closing it will re open automatically 4 Emergency Switch Outer emergency switch Proceed as follows to emerge...

Page 13: ...itch Proceed as follows to emergency open the door 1 Turn the rotary control clockwise 2 Open the door Note The mechanical lock in the door must be unlocked to be able to open the door Otherwise the r...

Page 14: ...Name Remark 1 Emergency Stop Switch Actuate only when the vehicle has been brought to a stop 2 Headlamp Knob 0 position marker lamps and headlamps 3 Hazard Warning Signal Used only during emergency wi...

Page 15: ...lk of the electrical system to the battery 5 Instrument Cluster Controls Button 1 Time setting 2 Reset 3 Decrease 4 Increase 6 Front Fog Lamp Switch 7 Rear Fog Lamp Switch 8 Passenger Door Switch 9 LC...

Page 16: ...Switch 11 Windshield Electrical Defroster Switch 12 Aisle Light Switch 13 Ceiling Light Switch 14 Driver s Light Switch 15 Reading Light Switch 16 Night Illumination Light Switch 17 Toilet Master Swi...

Page 17: ...artment Lamp Switch 20 Horn Shift Switch Switch between air and electric horn 21 Water Pump Switch Turn on or off the heating system water pump 22 Rear View Mirror Defrost Switch 23 Radiator Fan Switc...

Page 18: ...Check the External Lighting Switch Check if the external lightings work well 27 Cruise Control Switch Control the vehicle cruise at predetermined speed 28 White Smoke Limiter Switch 29 Traction Contr...

Page 19: ...eling and restore vehicle to normal height 31 ECAS Total Raising Total Lowering Switch Control the vehicle raising and lowering 32 ECAS Predetermined Height Normal Height Switch Control the vehicle to...

Page 20: ...Pull lever and move seat forward backward Release the lever to lock the seat 2 Slope adjustment Pull lever and adjust the slope by loading unloading the front seat cushion area 3 Seat cushion adjustm...

Page 21: ...roadway and every driver Lever up minimum damper force Lever down maximum damper force 7 Height adjustment Pull or push lever and adjust the seat in desired height 8 Integrated pneumatic system IPS Pr...

Page 22: ...RI seat has to be installed or repaired by specialists under consideration of the specific country s regulations 3 We point out that this seat is a safety component Any modifications to the seat and d...

Page 23: ...ger s Seat 1 Cup holder 2 Mesh pocket 3 Footrest 4 Safety belt 5 Adjusting button 6 Armrest Armrest The armrest can be raised and lowered A Raise lift up the armrest B Lower 1 Lift the armrest upwards...

Page 24: ...Passenger s Seat Backrest Pressing button 1 or pulling handle backward to adjust the angle of backrest Transverse movement Pressing the button to move seat in transverse direction 21...

Page 25: ...cushion so that the seat is available for use Caution The safety belt should not be twisted between the seat cushion and armrest 2 Fold courier seat Pull both armrests upw a the seat is folded Note Th...

Page 26: ...and upper mirrors can be defrosted electrically 2 Outside rear view mirror adjustment knob The ignition switch should be turned to ON before this knob can function When the white mark points to L or R...

Page 27: ...only when the ignition switch is at the ON position Press the lower edge with symbol of the switch to defrost the rear view mirror and to switch off press the upper edge Caution Switch off the defrost...

Page 28: ...right side D Rear luggage compartment door right side Press the button for the luggage compartment door you want to open or close 2 Compartment luggage rocker switch 1 Front luggage compartment door...

Page 29: ...or on the left hand side of the vehicle 1 Right luggage compartment door 2 Left luggage compartment doors Turn the rotary control clockwise to the vertical position for the door s you want to open man...

Page 30: ...e pressure drop to 0 6Mpa If the pressure is too low rotate the button clockwise Warning Open the pneumatic luggage compartment door only when the vehicle is parking Do not operate the door with any p...

Page 31: ...i t ches get off l oudspeaker Reading light control When the reading lights master switch is turned on the passengers can press the button and t o operate the relevant reading lights Air flow regulat...

Page 32: ...Passenger Area Get off When the STOP button is activated an alarm and flashing of indicator on the instrument cluster will be initiated to let driver be aware 29...

Page 33: ...racy The annual error ratio is less than 1minute 5 The meterage range for temperature and humidity are 0 C 40 C 10 95 RH The limits for temperature readings are 9 C 55 C If the temperature is between...

Page 34: ...ess the button the hour will plus one by one Press M to modify minute The operation is as same as 1 Press S to reset or transform the option of the clock Caution When setting the time the digit displa...

Page 35: ...he temperature and humidity will be displayed for 15 seconds each You may choose to change the displayed information on the clock by pressing the S button however the clock will revert to it s default...

Page 36: ...integrated into it the microphone amplifier if turned off the DVD stops working as well 2 VOL2 turn the knob to adjust the volume of guide micphone 3 MIX turn the knob to adjust reverberation 4 VOL1 t...

Page 37: ...have parked the car for a long time in hot or cold weather wait until the temperature in the car becomes normal before operating the unit Keep the volume at a level at which you can hear outside warn...

Page 38: ...zine or alcohol This unit cannot play 3 inch 8cm discs Never insert a 3 inch disc contained in the adapter or an irregularly shaped disc The unit may not be able to eject it Panel controls Power on of...

Page 39: ...nd press to be flush with the panel 6 Radio station auto preset 7 Band switch FM1 FM2 FM3 MW1 MW2 Radio mode 8 Remote sensor 9 Track playback 1 button Play Pause 2 button Intro play 10 sec 3 button Tr...

Page 40: ...e the knob to adjust level Long press to enter into setting menu then each press changes the mode 14 Short press to switch to clock display press again to exit Long press to enter clock setting 15 Lou...

Page 41: ...itle DVD only 3 Power on off 4 Setup 5 Menu cursor 6 Enter 7 Program 8 Digit area 9 Short press to select audio menu and rotate the knob to adjust level Long press to enter into setting menu then each...

Page 42: ...scan Radio auto preset 22 DVD audio VCD audio L R ST 23 Short press to switch to clock display press again to exit Long press to enter clock setting Return to previous menu setting menu 24 Angle DVD...

Page 43: ...e button type lithium battery with the mark facing upward Insert the battery holder into the remote control General operation Switching on and off 1 Press to turn on the unit 2 Press SRC once or more...

Page 44: ...tting 1 Press DISP more than 2 seconds minute display blinks then rotate the knob to set minute 2 Press the knob once hour display blinks then rotate the knob to set hour 3 Press DISP again to exit Au...

Page 45: ...the EQ Mode will revert to Off When the equalizer function is activated the most recently selected bass treble levels cannot be adjusted When the equalizer function is not active the unit will return...

Page 46: ...his option allows you to select radio FM mono stereo AREA SET This option allows you to select the appropriate frequency spacing for your area Rotate the knob to choose USA or Europe Radio mode Select...

Page 47: ...buttons the unit will seek continuously Preset Mode Six numbered preset buttons store and recall stations for each band The stored stations 1 6 for the current band can be viewed on the screen Storing...

Page 48: ...utton numbers 1 6 to select the corresponding stored station USB SD MMC MP3 Mode 1 Load SD MMC Card Open the panel and insert the SD MMC card into the slot Close the panel the unit will read the file...

Page 49: ...e into the USB jack The unit will read the file in the USB device automatically 4 Take out USB Device Press the SRC button to non USB mode and take out the USB device from the USB jack Note USB functi...

Page 50: ...slot but is not playing press the SRC button on the front panel or on the remote control to switch to the DISC source To play files from an SD or USB that is already inserted choose the CARD or USB s...

Page 51: ...er ejecting the disc the unit reverts to radio mode You can eject a disc with the unit powered off The unit remains off after the disc is ejected Disc Playback 1 When disc inserted display shows LOAD...

Page 52: ...h of each track is 99 minutes 59 seconds Supported sampling frequency for MP3 disc 8KHz to 48KHz 44 1KHz preferably Supported bit rates of MP3 disc are 32 320 kbps 128 kbps preferably Disc and File NO...

Page 53: ...s Media Audio music files are digital audio files that are compressed to allow more files to be stored This unit can play MP3 WMA and video directly from files contained on a CD R RW DVD ROM DVD RW DV...

Page 54: ...A file name entered with characters not on the code list may not play correctly Electronic Shock Protection 10 seconds for CD DA CDA 45 seconds for MP3 recorded at 44 1kHz 128kbps 90 seconds for WMA...

Page 55: ...es not display folders containing only other folders In the example above the unit will display folders 3 4 6 and 8 but not 2 and 7 since they do not contain since any tracks directly Folder 5 is not...

Page 56: ...ay all the tracks in random order 1 During playback press RDM once or more RDM icon will appear on the display 2 Press RDM again to select normal playback Repeat During playback press REPEAT or RPT on...

Page 57: ...ge starts to replay Press A B once again to exit Display shows A B CANCEL Pause During playback press to pause playback The sound will be muted Display PAUSE in the TV screen display and blink PAUSE o...

Page 58: ...Use to select desired item Use digit button to select number Press ENTER to confirm Program Press PROG to enter program list Use or cursor and digit button to enter number For DVD and File disc select...

Page 59: ...ct audio language to listen if the DVD has multiple audio languages VCD Audio Select Press R L to select audio channel to listen DVD Subtitle Select Press SUB T to select the subtitle language to show...

Page 60: ...elect then press ENTER to play DVD Angle Select Press ANGLE to select different angle to view if the DVD has multiple angle views Zoom Press ZOOM button the picture will be zoomed accordingly DVD Setu...

Page 61: ...will be cut 4 3 Letter Box For 4 3 TV black bars will appear on top and bottom 16 9 For 16 9 wide screen TV PASSWORD 1 Press number button 0000 on the remote control then press the ENTER button to con...

Page 62: ...only under the password unlocked status and the limits can be worked only under the password locked status DOWNMIX LT RT STEREO VSS Select composite audio output from 2 channel speaker system DEFAULT...

Page 63: ...guage that you are familiar with to display DVD subtitles If the DVD disc has the subtitle file in the selected language the subtitle will be displayed in the selected language If the DVD disc does no...

Page 64: ...m 0 to 12 CONTRAST Set the contrast of the video output with from 0 to 12 HUE Set the hue of the video output with from 6 to 6 SATURATION Set the saturation of the video output with from 0 to 12 SHARP...

Page 65: ...e rocker switch and the LCD begins to rotate after being electrified for three seconds 2 LCD rotate switch Press the side with mark of the rocker switch the LCD unfold press the other side the LCD fol...

Page 66: ...as far as possible away from the magnetic objects such as speaker Turn off the power first when something or liquid fall into the monitor and then send it to professional mechanic to repair Make sure...

Page 67: ...Rear monitor priority When selecting reverse gear the display will automatically switch into the picture of the rear monitor 3 Common troubleshooting Problem Solution No display Check the power line...

Page 68: ...densation of water will occurs in the evaporator which will result in greater amount of water dripping out of the evaporator drain hoses The filter in the return air grid retains dirt Circulated air a...

Page 69: ...crease button L3 Outside temperature indicator S3 Decrease button L4 Display S4 Return air Fresh air button L5 Error indicator S5 Adjust air volume button L6 Cooling indicator S6 Power on off button L...

Page 70: ...r blowers speed b Cooling Mode When cooling mode switch on cooling indicator flashes and after 9 seconds it will light on When the room temperature is higher than the setting temperature at 1 starts c...

Page 71: ...reheat function can be activated again Press the increase and decrease button at the same time again switch reheat mode Fresh air operation Fresh air return air can only run in automatic mode can t s...

Page 72: ...rature setting When required temperature indicator light on the required temperature flashes on the display then press the increase or decrease button to adjust the required temperature The required t...

Page 73: ...en temperature is lower than 30 sensors will be circuit E1 C1 room temperature sensor is open circuit no cooling no heating E2 C2 room temperature sensor is short circuit cooling no heating E3 C3 outs...

Page 74: ...on off button S2 Return air Fresh air Auto Button L1 Indicator light AC AC ready Thawing frost indicator light S3 Decrease button L2 LP HP error indicator light S4 Increase button L3 Room temperature...

Page 75: ...r all press S5 again or after 3 seconds you can switch back to room temperature setting mode The required room temperature adjusted range is from 15 to 32 C Adjust air volume The required air volume c...

Page 76: ...start working When the cooling system stop working the compressor stop working first and after 5 seconds the fan stop running In ventilation operating mode the cooling system can not work Thawing fro...

Page 77: ...e of over and lacking voltage of the power supply you will get a warning sound the control unit is blinking and will shut down all power supply at the same time LE means lacking voltage HE means over...

Page 78: ...ystem and dependent system The independent heating system refers to a heating mode that the fuel burns in a special mechanism to heat and circulate the water The dependent heating system refers to a h...

Page 79: ...the available range is 5 40 When the interior temperature is below 5 the thermostat will turn on automatically when the interior temperature is above 40 the thermostat will turn off automatically Ind...

Page 80: ...set temperature which is 20 original the interior temperature could be reset after 2 seconds If the user wants to reset the temperature press the up down button until the wanted temperature shows up...

Page 81: ...essing to the second level will lead to the higher defrosting intensity Internal External Defroster In case of low temperature in the vehicle it adopts internal circulation mode and increase the air t...

Page 82: ...ncrease the air temperature to deice and defrost When interior temperature increases with ample moisture press the below side to adopt external circulation mode and the air outside the vehicle can com...

Page 83: ...CAS lifting system and other electrical control units for chassis and coach body are located in the Scania electric centre in the front of luggage compartment The electric centre is secured by the red...

Page 84: ...Electrical Part The fuse box is in a compartment that under the driver s area Connecting position 81...

Page 85: ...eiling wire harness connects with instruments wire harness in the compartment under the auxiliary dashboard The chassis wire harness connects with instrument wire harness under the glove compartment n...

Page 86: ...Safety Equipment Safety Equipment 1 Safety Belt Tow point safety belt Three point safety belt Function of safety belt Protect the driver and passengers in an emergency Operation 83...

Page 87: ...ng under the arm or at the waist Note 1 The seat belt should not be twisted 2 Damaged seat belt should not be repaired but replaced 3 Over inclination will prevent the seat belt from normal extension...

Page 88: ...ugher than the edges knock the edge especially from the top middle by directing the hammer hitting tip at an angle Continue hitting until cracks appear and the glass is broken The heels of female shoe...

Page 89: ...eration 1 Pull out the safety pin completely from the handle 2 Press the handle directing nozzle towards the fire to extinguish the fire Note 1 Ensure that the fire extinguisher is with a valid certif...

Page 90: ...ne side of the roof hatch for ventilation 2 Pull the protruding handle downwards to close it 3 In an emergency pull the red emergency handle downwards on both sides and lift the hatch until it can be...

Page 91: ...Safety Equipment 6 Using the Correct Amperage Fuse When replacing fuses it is important not to use over rated fuses as it may cause overheating and fire 88...

Page 92: ...Driver Area Radiator Driver Area Radiator optional 1 Turn on off button 2 Increase button 3 Decrease button 4 Temperature display rear 1 1 1 2 3 4 89...

Page 93: ...e timer only one of which can be activated When the ignition switch is on the display shows the present time and date and all the signals on the display are flashing When switch on the heater all the...

Page 94: ...e preset by the timer Set time Press the button for over two seconds and adjust the time and date with the buttons and Check time Press the button while the ignition switch is off Set the ON time Pres...

Page 95: ...with and one minutes to two hours when the heater is running and the vehicle is switched off Set alarm clock Set the alarm clock with the timer Press the button repeatedly to get the signal and set th...

Page 96: ...Reason The flame is off while running Measure Turn off the heater and turn on it again Reason The heater turns off because of overheating such as lack or no coolant Measure Fill the coolant and press...

Page 97: ...ch failure or overheating F12 Ignition sensor failure Attention 1 Make sure that all the valves of the oil return pipe are switched on before running the heater 2 When replacing the coolant fill the r...

Page 98: ...by the professional before the coming of the cold season 6 The heater should be turned off under the situation as follows Gas station or warehouse The place collecting combustible gas or dust Sealed...

Page 99: ...mended refrigerant temperature is 10 2 Operation Instructions Press down ON the refrigerator start working and the power light shining When the cool protect lamp bright green the refrigerator works no...

Page 100: ...e has a large electric current when it is in operation therefore the power cord for the machine must have an allowance and be connected in a reliable manner When replacing the fuse please comply with...

Page 101: ...lure may occur with under voltage warning sound If this machine is found of abnormal start up it is very likely to be caused by too long power supply wire please increase wire sectional area or reduce...

Page 102: ...Toilet optional Structure 1 Mirror 2 Paper towel holder 3 Soap dispenser 4 Waste paper basket 5 Washbasin 6 Tap 7 Toilet flush button 8 Toilet alarm button 9 Ventilation fan inside the cabin 10 Closes...

Page 103: ...porarily Lighting Two ways control the lighting One is constant bright light controlled by the switch on the instrument cluster The other is auxiliary illuminating light which can be turned on when a...

Page 104: ...or light on means it is in use Meanwhile the indicator light on the toilet door will indicate whether it is in use by showing Occupied or not Indicators on dashboard When the emergency button in the t...

Page 105: ...sh the flush button the drain valve will open and the waste in the toilet will be flushed into the holding tank The drain valve will automatically close to prevent any foul odor from getting into the...

Page 106: ...pe and the water level warning system Check whether the tank is full before use If not please turn on the ball valve and fill the tank with enough water When the water level warning system alarms plea...

Page 107: ...lation fan cabin and press the evacuate button to drain the sewage In low temperature below 0 do this as well Notes 1 Make sure of the correct wiring of the power supply and water level sensor 2 Press...

Page 108: ...lass parts with wet cloth 7 If the toilet is not in service for a long time turn off power and water pump switch in electrical units box 8 When the coach is parked outside in very cold weather please...

Reviews: