background image

Customer Helpline

 1300 889 028

6

Safety Information 

Important

 - Please read these instructions fully before starting assembly

General Power Tool Safety Warnings

5)  Battery tool use and care 
a)  Recharge only with the charger specified by the manufacturer. 

A charger that 

is suitable for one type of battery pack may create a risk of fire when used with 

another battery pack. 

b)  Use power tools only with specifically designated battery packs. 

Use of any other 

battery packs may create a risk of injury and fire. 

c)   When battery pack is not in use, keep it away from other metal objects, like 

paper clips, coins, keys, nails, screws or other small metal objects, that can 
make a connection from one terminal to another. 

Shorting the battery terminals 

together may cause burns or a fire.

d)  Under abusive conditions, liquid may be ejected from the battery; avoid 

contact. If contact accidentally occurs, flush with water. If liquid contacts eyes, 
additionally seek medical help. 

Liquid ejected from the battery may cause 

irritation or burns. 

e)  Do not use a battery pack or tool that is damaged or modified. 

Damaged or 

modified batteries may exhibit unpredictable behaviour resulting in fire, explosion 

or risk of injury. 

f)   Do not expose a battery pack or tool to fire or excessive temperature. 

Exposure 

to fire or temperature above 130 °C may cause explosion. 

g)  Follow all charging instructions and do not charge the battery pack or tool 

outside the temperature range specified in the instructions. 

Charging improperly 

or at temperatures outside the specified range may damage the battery and 

increase the risk of fire. 

6)  Service
a)  Have your power tool serviced by a qualified repair person using only identical 

replacement parts. 

This will ensure that the safety of the power tool is maintained. 

b)  Never service damaged battery packs. 

Service of battery packs should only be 

performed by the manufacturer or authorized service providers.

GENERAL CHAIN SAW SAFETY WARNINGS:

a)  Keep all parts of the body away from the saw chain when the chain saw is 

operating. Before you start the chain saw, make sure the saw chain is not 
contacting anything. 

A moment of inattention while operating chain saws may 

cause entanglement of your clothing or body with the saw chain.

b)   Always hold the chain saw with your right hand on the rear handle and your 

left hand on the front handle. 

Holding the chain saw with a reversed hand 

configuration increases the risk of personal injury and should never be done.

c)   Hold the power tool by insulated gripping surfaces only, because the saw chain 

may contact hidden wiring. 

Saw chains contacting a “live” wire may make exposed 

metal parts of the power tool “live” and could give the operator an electric shock.

d)   Wear safety glasses protection. Further protective equipment for hearing, head, 

hands, legs and feet is recommended. 

Adequate protective clothing will reduce 

personal injury by flying debris or accidental contact with the saw chain.

Summary of Contents for 609909

Page 1: ...tructions contain important information that will help you get the best from your Chain Saw ensuring it remains safe to operate If you need help or have damaged or missing parts call the Customer Help...

Page 2: ...lpline 1300 889 028 2 Contents Safety Information 3 InTheBox 15 Accessories 16 Assembly 16 BeforePuttingIntoOperation 20 Operating Instructions 21 Maintenance 23 Troubleshooting 26 Technical Data 27 W...

Page 3: ...ste batteries as unsorted municipal waste Li Ion battery This product has been marked with a symbol relating to separate collection for all battery packs and battery pack It will then be recycled or d...

Page 4: ...t with earthed or grounded surfaces such as pipes radiators ranges and refrigerators There is an increased risk of electric shock if your body is earthed or grounded c Do not expose power tools to rai...

Page 5: ...er at the rate for which it was designed b Do not use the power tool if the switch does not turn it on and off Any power tool that cannot be controlled with the switch is dangerous and must be repaire...

Page 6: ...ons and do not charge the battery pack or tool outside the temperature range specified in the instructions Charging improperly or at temperatures outside the specified range may damage the battery and...

Page 7: ...d chain Improperly tensioned or lubricated chain may either break or increase the chance for kickback k Cut wood only Do not use chain saw for purposes not intended For example do not use chain saw fo...

Page 8: ...r kickback d Follow the manufacturer s sharpening and maintenance instructions for the saw chain Decreasing the depth gauge height can lead to increased kickback RESIDUAL RISKS Even with the intended...

Page 9: ...inching either the saw chain or the guide bar when the second notch X is being made 3 Felling back cut Make the felling back cut Y at least 50 mm higher than the horizontal notching cut as illustrated...

Page 10: ...es under tension should be cut from the bottom up to avoid binding the chain saw Figure 2 5 Bucking a log Bucking is cutting a log into lengths It is important to make sure your footing is firm and yo...

Page 11: ...one end as illustrated in Figure 4 cut 1 3 the diameter from the underside underbuck 1 Then make the finished cut by overbucking 2 to meet the first cut 2 2 3 1 1 3 Figure 4 When the log is supported...

Page 12: ...n the uphill side of the log as illustrated in Figure 6 When cutting through to maintain complete control release the cutting pressure near the end of the cut without relaxing your grip on the chain s...

Page 13: ...of water and seek medical advice f Seek medical advice immediately if a cell or battery pack has been swallowed g Keep battery pack clean and dry h Wipe the battery pack terminals with a clean dry clo...

Page 14: ...your charger is matching the local AC supply 6 The charging device must be protected from moisture 7 Do not use the charging device outdoors 8 Do not short out the contacts of battery or charger 9 Res...

Page 15: ...tery pack release button Battery pack Oil filler cap Guide bar Chain Bar and chain storage transportation cover sheath Chain cover Cover tightening stick Chain tensioning outer rim Drive sprocket Bar...

Page 16: ...loosen the cover See A2 4 Grip the chain tensioning outer rim and cover tightening stick turning them anti clockwise to completely remove the cover See A3 A1 A2 A3 A6 A4 A5 Assembly Accessories Bar an...

Page 17: ...l parts are seated properly Make sure the drive links are fully seated in the drive sprocket See A7 avoiding a kink as shown in Fig A8 If kink occurs pick up on the chain at the guide bar just ahead o...

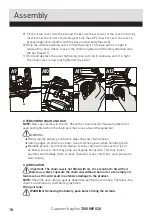
Page 18: ...first used and tighten when the chain becomes loose around the guide bar WARNING Removing the battery pack before adjusting saw chain tension Cutting edges on chain are sharp Use protective gloves wh...

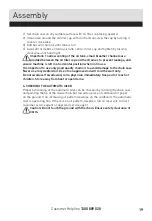
Page 19: ...is important to use only good quality chain oil to avoid damage to the chain saw Never use recycled old oil Use of non approved oil will void the warranty Do not swallow If swallowed call a physician...

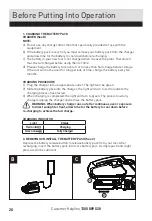
Page 20: ...6 months CHARGING PROCEDURE 1 Plug the charger into an appropriate outlet The light will be green 2 Slide the battery pack into the charger the light will turn to red to indicate the charging process...

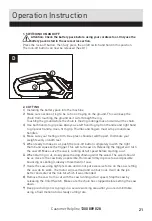
Page 21: ...et shoulder width apart Distribute your weight evenly on both feet 5 When ready to make a cut push the lock off button completely in with the right thumb and squeeze the trigger This will turn saw on...

Page 22: ...e Only cut one log at a time Do not bury the guide bar nose or try plunge cut boring into wood using guide bar nose Watch for shifting of wood or other forces that may pinch chain Use extreme caution...

Page 23: ...of saw Check for alignment or binding of moving parts Check for broken or damaged parts Do not use chain saw if damage affects safety or operation Have damage repaired by authorized service center 3 M...

Page 24: ...sprocket hole When rail top is uneven use a flat file to restore square edges and sides File Rail Edges and Sides Square Worn Groove Correct Groove Replace the guide bar when the groove is worn the g...

Page 25: ...aintenance or service to this tool Always remove the battery pack before performing any service or maintenance on this tool NOTE It is not necessary to remove the chain or bar when lubricating the gui...

Page 26: ...e machine in a cool ventilated place to cool it down Applying relatively less pressure while cutting Contact service agent Contact service agent Contact service agent Dry chain No oil in reservoir Ven...

Page 27: ...V Bar length 10 250 mm Chain speed 4 5 m s Oil tank capacity 80 ml Weight chain bar included 3 17kg not included battery Protection class II Charger input ACG1804G 100 240V 50 60Hz 10W Charger output...

Page 28: ...repaired or replaced if the goods fail to be of acceptable quality and failure does not amount to a major failure To claim the warranty take the product to the front Service Desk of your nearest store...

Reviews: