SBOX LVW06-46T Installation Manual Download Page 3

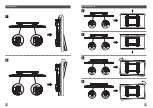
1. Product Dimensions

95mm

670mm

416mm

276mm

344mm

304mm

575mm

525mm

475mm

425mm

375mm

325mm

275mm

225mm

175mm

125mm

75mm

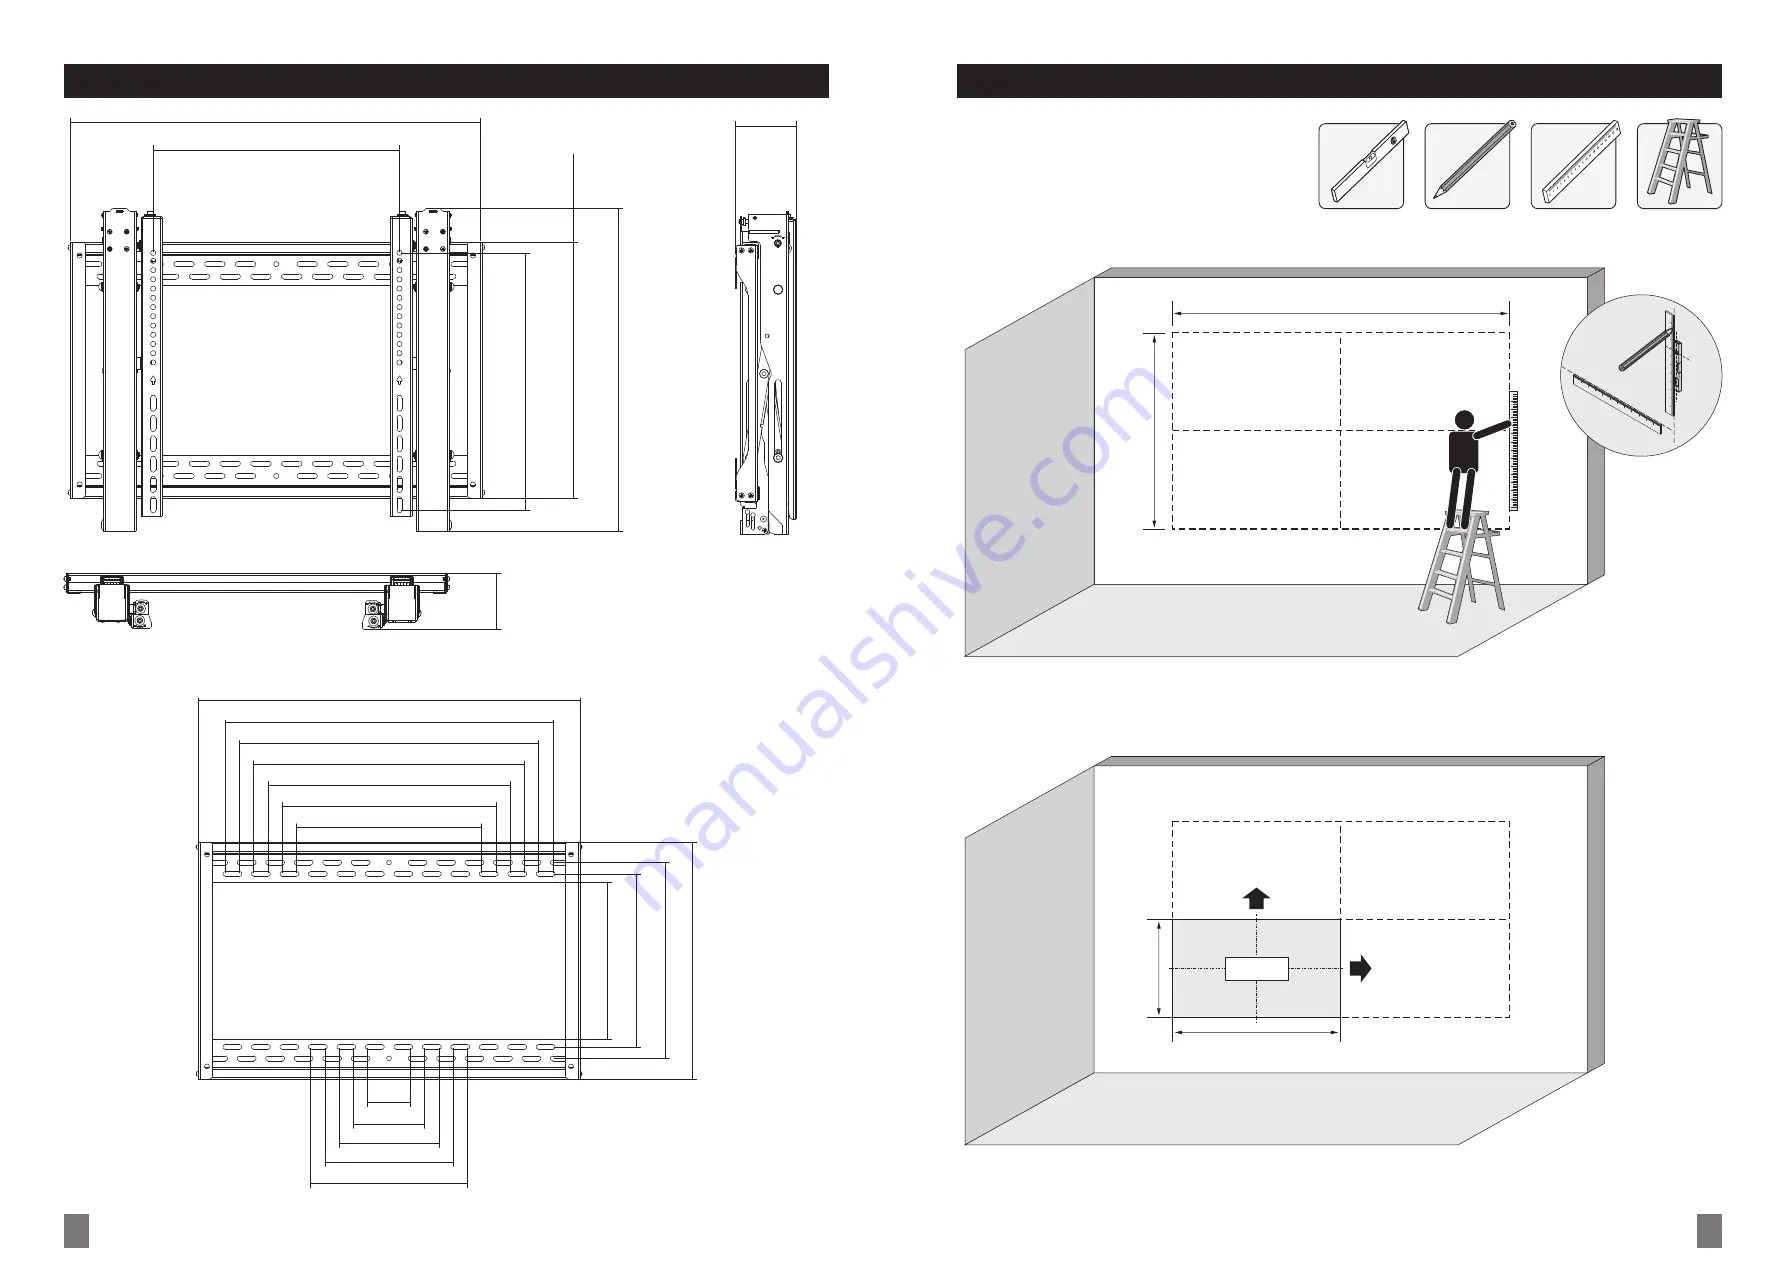
2. Video Wall Installation

X=Length of display Y=Height of display

2X

2
Y

Star

X

Y

4

3

670mm

Min200mm-Max600mm

524mm

Min200mm-Max418mm

416mm

54mm

95mm

Summary of Contents for LVW06-46T

Page 1: ...the bracket is secure and safe to use at regular intervals at least every three months Please contact your distributor if you have any questions F C A U T I O N DO N OT E X C E E D R AT E D L IS T E D...

Page 2: ...equipment and all attached hardware and components Always use an assistant or mechanical lifting equipment to safely lift and position the equipment Tighten screws firmly but do not over tighten Over...

Page 3: ...mm 276mm 344mm 304mm 575mm 525mm 475mm 425mm 375mm 325mm 275mm 225mm 175mm 125mm 75mm 2 Video Wall Installation X Length of display Y Height of display 2X 2 Y Star X Y 4 3 670mm Min200mm Max600mm 524m...

Page 4: ...and components 3 Assembling the Wall Plate 4 For Solid Brick and Concrete Wall Mounting Drill pilot holes 2 Mark the exact location of mounting holes 1 60mm 2 4 60mm 2 4 10mm 3 8 X X Screw the wall pl...

Page 5: ...B M C M F 1 1 Allen key ball joint Remove the Allen key from the pop out adapter brackets Push the pop out arm until the ball joint snaps into place Top of the display Note With the arrow pointing up...

Page 6: ...pe of screen or or or M C M G M H 6 Hooking the Display onto the Wall Plate 7 Adjustment Push the display to left or right to enable fast alignment Micro Adjustment 1 1 1 1 Turn the locking plates dow...

Page 7: ...Tilt adjustment Height adjustment 1 2 3 4 1 2 12 11...

Page 8: ...l X X X X Note Install adjust the displays by the numerical order given 4 1 3 2 1 2mm F Note Use the plastic locking piece to measure and keep a 1 2 mm gap between displays 1 2mm 1 2 14 13 Use the lon...

Reviews: