Page 2
1. Apply cartridge placement sticker
over the existing one on the cartridge
cover.
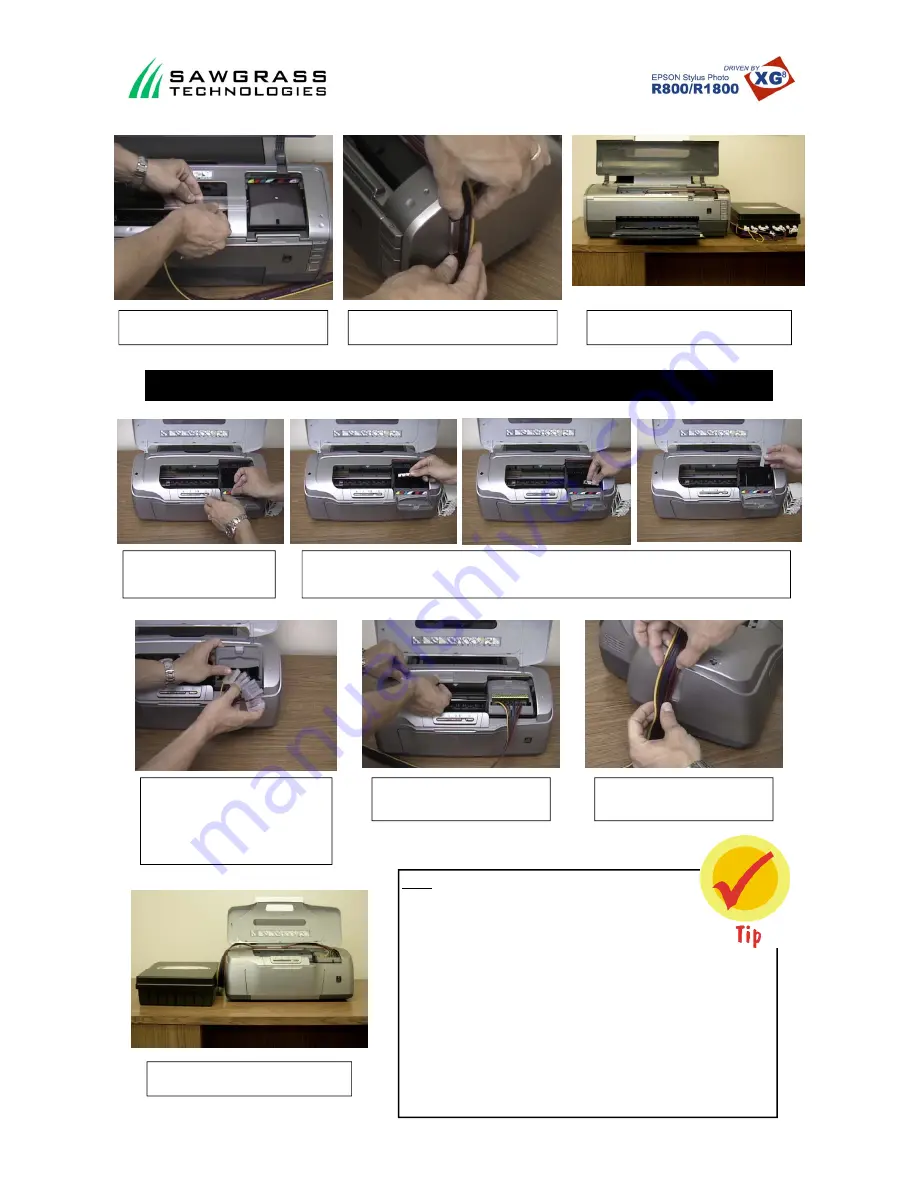
8. Place the large tube holder in the middle of the
gray bar and attach it to the printer.
9. Attach the short tube holder to the right of the
printer where the tubes hang down.
10. Congratulations you have successfully in-
stalled a R1800 Quick Connect II ink system.
R800 Printer Setup Instructions
2. Install the cartridge chips as shown above. Start by lining up the chip with the yellow dot with the yellow ink slot in the
cartridge bay. Next line up the chip with the black dot with the black slot in the cartridge bay. Finally insert the plastic
cross bars into place by sliding the notched end into the back of the chip holders.
4. Attach the long tube holder to the printer
on the top left hand corner next to the ink
symbol.
3. Gently slide the cartridges through the hole
in the cartridge cover. Start with the yellow
cartridge on the left and attach the cartridges in
this order: .
(from left to right) -
Yellow, Magenta, Cyan, Light Cyan, Black,
Red, Blue, Light Magenta
5. Attach the short tube holder to the right
of the printer where the tubes hang down.
6. Congratulations you have successfully installed
a R800 Quick Connect II ink system.
Tips:
•
Make sure you install Power Driver XG from the CD that came
with your Quick Connect II system. Refer to the Power Driver
XG documentation and video tutorial on how to use Power
Driver XG.
•
Perform a nozzle check from Power Driver XG. A few cleanings may be neces-
sary to get a good nozzle check.
•
You may want to remove the printer lid or leave it open at all times.
•
You may have a little air in your lines but this will clear after a few prints.
•
If you are going to leave your system without using it for several days you should
clamp your lines with the tube clamps.
•
Do not raise the ink box higher than the printer.


