background image

13

MENU

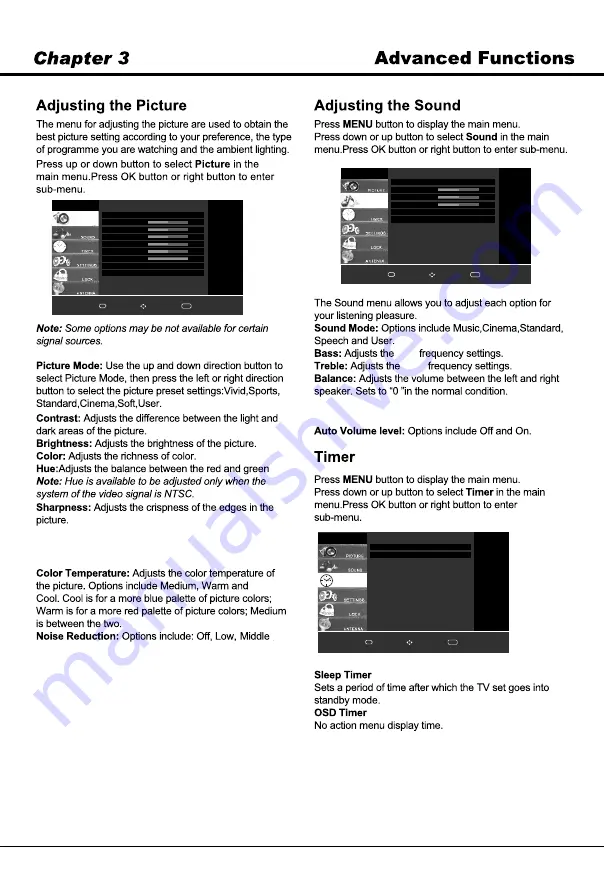
Picture Mode

Standard

Cool

Middle

100

Contrast

Brightness

Color

Hue

Sharpness

Backlight

Color Temperature

Noise Reduction

Access

Select

Return

OK

MENU

PICTURE

50

50

50

50

50

Backlight: 

This option can be used to adjust the 

Audio Only: 

TV will deliver only sound and screen will 

Note: 

It turns off automatically without signal in 10 minute. 

Intensity of the backlight, depending on room lighting.

be turned off.

Use the left or right direction button to adjust.

and High.

MENU

Access

Select

Return

OK

MENU

Sleep Timer

Off

OSD Timer

20 S

TIMER

Access

Select

Return

OK

MENU

Sound Mode

Standard

Bass

Treble

Balance

Audio Only

Auto Volume Level

Off

Off

0

50

50

SOUND

MENU

Low

High

Summary of Contents for XT-43S7300F

Page 1: ...f this Manual or much further contents go to product page at our website www sanyoappliance in Thank you for purchasing this Sanyo product Please read these instructions carefully before operating this Product and retain them for future reference The images shown in this manual are for illustrative purpose only XT 43S7300F T 1218 01 Y EA R S ...

Page 2: ...le maintaining optimum picture quality Changes to certain functionalities of this television TV Guide Picture sound etc may change the power consumption Depending upon such changed setting eg Retail mode the power consumption may vary which possibly could exceed the stated energy consumption To reset the television to Star rating qualified settings select Home mode from the initial set up procedur...

Page 3: ...3 ...

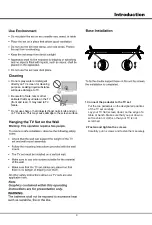
Page 4: ... not scratched 2 Fasten and tighten the screws Carefully put in screws and fasten them securely Do not spray water or detergent directly on TV screen for cleaning purpose Leaking liquid substance will cause damage to TV Be careful of cats rats or other animals that may urinate on the TV front and rear It may lead to TV failure Do not use sharp or hard objects finger nails knife and etc on TV scree...

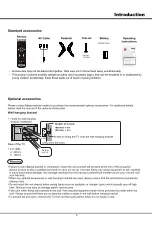
Page 5: ...ic Copy of this Manual or much further contents go to product page at our website www sanyoappliance in Thank you for purchasing this Sanyo product Please read these instructions carefully before operating this Product and retain them for future reference The images shown in this manual are for illustrative purposes only M6 22 Screw M6 18 Screws 43 Y EA R S ...

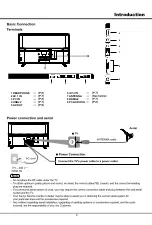
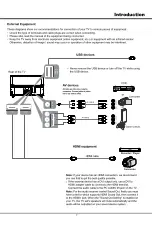
Page 6: ...SBx2 AV OUT ANTENNA 8 HDMIx2 7 6 5 9 PC AUDIO IN HEADPHONE AV 1 IN PC IN 6 1 2 3 4 5 6 7 8 9 1 2 3 4 PC IN VIDEO L R AV 1 IN HEADPHONE PC IN AUDIO IN USB1 USB2 AV OUT AV 2 IN ANT HDMI 2 HDMI 1 Sound Out ...

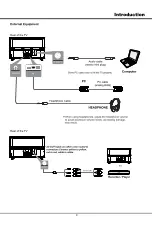
Page 7: ...7 1 AV 1 IN AV 2 IN USB 2 USB 1 ...

Page 8: ...8 PC IN ...

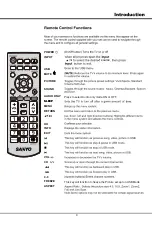
Page 9: ...ress to select Audio only mode ON or OFF This key will function to freeze the Picture except on USB Mode AUDIO ONLY POWER INPUT USB MUTE PICTURE SOUND SLEEP SLEEP MENU RETURN OK INFO EXIT VOL CH 0 9 FREEZE ASPECT ...

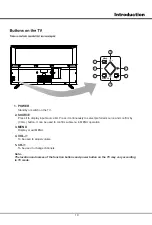
Page 10: ...put source list Press it continuously to select preferred source and confirm by VOL button It can be used to confirm submenu in MENU operation MENU To be used to change channels VOL To be used to adjust volume CH Note The location and names of the function buttons and power button on the TV may vary according to TV mode SOURCE ...

Page 11: ...11 red ...

Page 12: ...12 43 25 MHz OK Programme Edit OK MENU Access Select Return OK MENU Fav BG I L MN Fav Fav ...

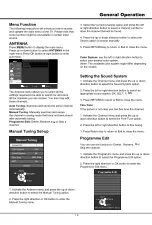
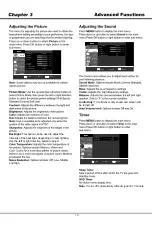
Page 13: ...Only TV will deliver only sound and screen will Note It turns off automatically without signal in 10 minute Intensity of the backlight depending on room lighting be turned off Use the left or right direction button to adjust and High MENU Access Select Return OK MENU Sleep Timer Off OSD Timer 20 S TIMER Access Select Return OK MENU Sound Mode Standard Bass Treble Balance Audio Only Auto Volume Lev...

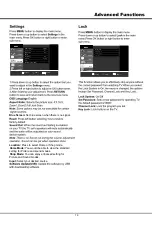
Page 14: ...ccess Select Return OK MENU Lock System Set Password Channel Lock Key Lock LOCK 14 Blue Screen Set blue screen when there is no signal Input Select your desired source Location Press to select Home or Shop mode Home Mode You would be able to view the standard Shop Mode You can enjoy enhanced setting for setting for Picture and sound modes Picture and Sound modes ...

Page 15: ...15 Input Enter Select USB 2 0 Access PHOTO MUSIC MOVIE Previous Next 5 While playing music press to Fast Backward and press to Fast Forward 6 ...

Page 16: ...16 MENU Access Select Return OK MENU Auto Adjust Horizontal Pos Vertical Pos Clock Phase Reset Position 30 20 15 50 PC of ...

Page 17: ...ture Find out and remove the radio interference source Radio frequency interference 1 Lead Pb not over 0 1 by weight 2 Cadmium Cd not over 0 01 by weight 3 Mercury Hg not over 0 1 by weight 6 4 Hexavalent chromium Cr not over 0 1 by weight 5 Polybrominated biphenyls PBBs not over 0 1 by weight Declaration of Conformity with the requirements of the E Waste Management Rules 2016 The Product is in co...

Page 18: ...20 73 600 1920 W x 1080 H 97 0 cm x 8 0 cm x 57 0 cm TV only 7 5 kg Net With Pedestal 7 4 kg Net TV only 16 W 8 W 8 W PAL SECAM NTSC BG DK I L MN B AV 1 IN AV 2 IN RCA PIN Type x 2 RCA PIN Type x 1 AV 2 IN connector x 1 Mini Jack x 1 3 5 mm Jack x 1 10 9 kg ...

Page 19: ......

Page 20: ......
Reviews: