background image

EN-27

Attaching Voice Memos

A maximum of 30 seconds of audio can be recorded as a memo for captured still 
images. The voice memo can be recorded only once.

1. Press the 

 button.

„

The last image appears on the screen.

2. Select the image to which you want to attach the voice memo with the 

e

 / 

f


buttons.

3. Press the 

 button.

4. Select [Voice Memo] with the 

c

 / 

d

 buttons, and press the 

 button.

5. Select [On] with the 

c

 / 

d

 buttons, and press the 

 button.

6. Press the 

 button to exit from the menu.
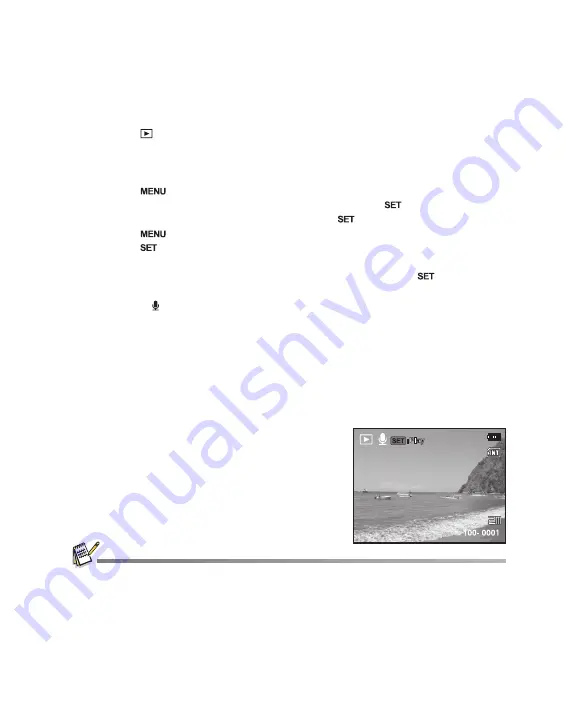
7. Press the  

button.

„

[VOICE RECORDING] is displayed on the screen and recording starts.

8. To stop recording a voice memo as it is being recorded, press the  

button 

again.

„

[VOICE RECORD END] will be displayed momentarily and the recording will 
end. An 

[ ] 

icon is displayed with images that have been recorded with a voice 

memo.

Playing back voice memo

You cannot play sounds because the camera does not support the speaker function. 
Please use PC or other media to play the still images with sounds.

„

Voice memo is only available for still images.

„

To play the video clip back on your computer, you may use either Windows Media Player or Apple 
“Quick Time Player”.

E

E

100- 0001

100- 0001

a

Summary of Contents for VPC-S1085

Page 1: ...INSTRUCTION MANUAL Digital Camera Please read these instructions carefully before using the camera Keep this manual in a safe place for later reference ...

Page 2: ...llation If this equipment does cause harmful interference to radio or television reception which can be determined by turning the equipment off and on the user is encouraged to try to correct the interference by one or more of the following measures Reorient or relocate the receiving antenna Increase the separation between the equipment and receiver Connect the equipment into an outlet on a circui...

Page 3: ...come with your Camera may be different from those described in this manual This is due to the fact that different retailers often specify slightly different product inclusions and accessories to suit their market requirements customer demographics and geographical preferences Products very often vary between retailers especially with accessories such as batteries chargers AC adapters memory cards ...

Page 4: ...ction ask the store of purchase Do not use the Camera in areas near water This might cause fire or electric shock Take special care during rain snow on the beach or near the shore Do not place the Camera on inclined or unstable surfaces This might cause the Camera to fall or tilt over causing damage Keep the batteries out of the reach of children Swallowing the batteries might cause poisoning If t...

Page 5: ... precision instrument Do not drop it strike it or use excessive force when handling the Camera This might cause damage to the Camera Do not use the Camera in humid steamy smoky or dusty places This might cause fire or electric shock Do not remove the battery immediately after long period of continuous use The battery becomes hot during use Touching a hot battery might cause burns Do not wrap the C...

Page 6: ... radio frequency energy and if not installed and used in accordance with instructions may cause harmful interference to radio communications However there is no guarantee that interference will not occur in a particular installation If this equipment does cause harmful interference to radio or television reception which can be determined by turning the equipment off and on the user is encouraged t...

Page 7: ...waste Note If a chemical symbol is printed beneath the symbol mark this chemical symbol means that the battery or accumulator contains a heavy metal at a certain concentration This will be indicated as follows Hg mercury Cd cadmium Pb lead In the European Union there are separate collection systems for used electrical and electronic equipment batteries and accumulators Please dispose of them corre...

Page 8: ...h FCC Standards FOR HOME OR OFFICE USE Model number VPC S1085 Trade Name SANYO Responsible party SANYO FISHER COMPANY Address 21605 Plummer Street Chatsworth California 91311 Telephone No 818 998 7322 This device complies with Part 15 of the FCC Rules Operation is subject to the following two conditions 1 this device may not cause harmful interference and 2 this device must accept any interference...

Page 9: ...e The batteries may feel warm after a long period of continuous use of the Camera or the flash This is normal and not a malfunction The Camera may feel warm after a long period of continuous use This is normal and not a malfunction If the batteries are not to be used for a long period of time remove them from the Camera to prevent leakage or corrosion and store them after no battery power is left ...

Page 10: ...Layout 23 Recording Shots using Face Detection Technology 24 VIDEO MODE 24 Recording Video Clips 24 Playing Back Video Clips 25 PLAYBACK MODE 25 Playing Back Still Images 26 Thumbnail Display 26 Removing Red eye 27 Attaching Voice Memos 28 Protecting Images 29 Erasing Images 30 MENU OPTIONS 30 Capture Menu 33 Video Menu 34 Playback Menu 35 Setup Menu 37 TRANSFERRING FILES TO YOUR COMPUTER 37 Downl...

Page 11: ...ixel CCD this camera is capable of capturing images with a resolution of up to 3648 x 2736 pixels Package Contents Carefully unpack your camera and ensure that you have the following items Common Product Components Digital Camera Instruction manual Software CD ROM USB cable Camera strap Camera pouch 2 x AA size batteries Optional Accessory SD SDHC memory card Accessories and components may vary by...

Page 12: ...EN 11 GETTING TO KNOW YOUR CAMERA Front View 1 Shutter button 2 ON OFF Power button 3 Flash 4 Self timer LED 5 USB terminal 6 Microphone 7 Lens 1 5 7 6 2 3 4 ...

Page 13: ... to video mode 4 Capture menu Video menu Playback menu 5 Compensation Previous image 6 Self timer Self timer 7 Flash Next image 8 If any scene mode is set switches to scene mode selection screen Still image to display image Records voice memo if Voice Memo is On Video clip to play video clip 9 Focus Focus 10 Delete 11 Switches to Video mode Scene mode selection screen Switches to Scene mode select...

Page 14: ... ISO 400 ISO 800 ISO 1600 11 Self timer icon f 2 sec g 10 sec h 10 2 sec 12 Date and time 13 Exposure compensation Backlight correction Adjust exposure value with the e f buttons 14 Capture mode icon Blank Single Continuous AEB Auto Exposure Bracketing Album Shot 15 Slow shutter warning 16 White balance Blank Auto Incand Fluoresc 1 Fluoresc 2 Daylight Cloudy Manual WB 17 Focus setting Blank Auto F...

Page 15: ...alue 12 Aperture value 13 Shutter speed value 14 Protect icon 15 Mode icon Playback mode Video playback 1 Video status bar 2 Elapsed time 3 File number 4 Folder number 5 Sound off icon When the c button is pressed during video playback You cannot play sounds because the camera does not support the speaker function Please use PC or other media to play the videos still images with sounds 6 Play mode...

Page 16: ...h this camera before its initial usage 5 Close the battery memory card cover and make sure it is locked securely To prevent valuable data from being accidentally erased from an SD SDHC memory card you can slide the write protect tab on the side of the SD SDHC memory card to LOCK To save edit or erase data on an SD SDHC memory card you must unlock the card To prevent damaging of an SD SDHC memory c...

Page 17: ...et the correct date and time 1 Press the button and set the camera mode to or or press the button 2 Press the button 3 Select Setup with the f button 4 Select Date Time with the c d buttons and press the button 5 Select the date format with the c d buttons and press the button Select the item s field with the e f buttons and adjust the value for the date and time with the c d buttons The time is d...

Page 18: ...e button The setting will be stored 6 To exit from the Setup menu press the button Formatting the Memory Card or Internal Memory This utility formats the memory card or internal memory and erases all stored images and data 1 Press the button and set the camera mode to or or press the button 2 Press the button 3 Select Setup menu with f button 4 Select Format with the c d buttons then press the but...

Page 19: ...se your image in the LCD monitor Pressing the button zooms in on the subject and enlarges the subject on the LCD monitor Pressing the button zooms out on the subject and provides a wider angle image 4 Press the shutter button Pressing the shutter button down halfway automatically focuses and adjusts the exposure and pressing the shutter button down fully captures the image The focus area frame tur...

Page 20: ...es the influences of hand shaking when you want to capture an image Panorama Select this mode when you want to capture a series of shots then stitch them together with software to make a single photo on the computer Portrait Man Select this mode when you want to capture an image that makes a man stand out against a blurred background Portrait Lady Select this mode when you want to capture an image...

Page 21: ...s mode when you want to capture a sunrise This mode helps keep the deep hues in the scene Splash Water Select this mode when you want to capture photos of splashing water Flow Water Select this mode when you want to capture the soft flowing water Snow Select this mode when you want to capture clear snow scenes without darkened subjects and bluish tint Beach Select this mode when you want to captur...

Page 22: ...xt image 6 Follow the same steps to capture subsequent images in the sequence 7 Finish the sequence by pressing the button or switch to another mode after the last image has been recorded e g Editing with Arcsoft Panorama Maker 4 0 Arcsoft Panorama Maker 4 0 Like magic ArcSoft Panorama Maker 4 turns any series of overlapping photos into a gorgeous panoramic image in just seconds The program does m...

Page 23: ...ter button down fully 4 Once the camera detects a smile it will automatically capture 3 images by default the flash mode setting is set to If the Capture Md is set to Single the camera will only capture an image after it detects a smile When capturing group shots if the number of people is more than 1 the camera will automatically capture the image s when it detects two smiles If the camera does n...

Page 24: ...frames Recording Shots using Face Detection Technology Face Detection Technology can identify and focus on the human faces in the image This advanced function simultaneously detects up to 10 human faces regardless of their position in the scene 1 Press the button and set the camera mode to 2 Press the button and select icon with the e f buttons Press the button The white frame is identified as the...

Page 25: ...g Back Video Clips You can play back recorded video clips on the camera 1 Press the button The last image appears on the screen 2 Select the desired video clip with the e f buttons 3 Press the button A press of the f e buttons during playback allows fast forward play fast reverse play To stop video playback press the d button This stops playback and returns to the start of the video clip To pause ...

Page 26: ...displayed in forward or reverse sequence with the e f buttons To view the previous image press the e button To view the next image press the f button Pressing the button enlarges the image To return to normal magnification press the button An icon is displayed with the video data Video clips cannot be rotated An icon is displayed with images which have an audio memo recorded ...

Page 27: ...e to be displayed at regular size 4 Press the button The selected image is displayed at its regular size An icon may be displayed in a thumbnail Removing Red eye You can use this function to remove the red eye effect after an image is taken 1 Press the button The last image appears on the screen 2 Select the image that you want to edit with the e f buttons 3 Press the button 4 Select Fix Red Eyes ...

Page 28: ...u 7 Press the button VOICE RECORDING is displayed on the screen and recording starts 8 To stop recording a voice memo as it is being recorded press the button again VOICE RECORD END will be displayed momentarily and the recording will end An icon is displayed with images that have been recorded with a voice memo Playing back voice memo You cannot play sounds because the camera does not support the...

Page 29: ...mages When All has been selected is displayed with all the images Canceling the Protection To cancel protection for only one image display the image on which you want to remove the image protection 1 Press the button The last image appears on the screen 2 Select the image that you want to cancel protection with the e f buttons 3 Press the button 4 Select Protect with the c d buttons and press the ...

Page 30: ... all of the images except for the protected images 5 Select Execute with the c d buttons and press the button To not erase select Cancel and press the button 6 To exit from the menu press the button Deleting an image will not affect sequential image numbering For example if you delete image number 240 the next captured image will be numbered 241 even though 240 no longer exists In other words an i...

Page 31: ...e menu The selectable items may vary in different capture modes 5 Select the desired setting with the c d buttons and press the button 6 To exit from the menu press the button Size This sets the size of the image that will be captured 3648 x 2736 2816 x 2112 2304 x 1728 1600 x 1200 640 x 480 ISO This sets the sensitivity for capturing images When the sensitivity is raised and the ISO figure is inc...

Page 32: ...that will be captured Hard Standard Soft Color This sets the color of the image that will be captured Standard Vivid Sepia B W Blue Red Green Yellow Purple Saturation This sets the saturation of the image that will be captured High Standard Low Metering This sets the metering method for calculating the exposure Center Averages the light metered from the entire frame but gives greater weight to the...

Page 33: ...otography On Off Date Print The date of recording can be printed directly on the still images This function must be activated before the image is captured On Off Blank Single Captures one image at a time Continuous Permits continuous capture of up to 3 images AEB Permits 3 consecutive images in the order of standard exposure underexposure and overexposure compensation Album Shot Creates an album l...

Page 34: ...d buttons and press the button 5 To exit from the menu press the button Size This sets the size of the video clip that will be captured 640 x 480 320 x 240 Quality This sets the quality compression at which the video clip is captured Fine Standard Color This sets the color of the video clip that will be captured Standard Vivid Sepia B W Blue Red Green Yellow Purple Audio This sets whether or not t...

Page 35: ...image at a time 3 Sec 5 Sec 10 Sec Rotate If you wish to rotate a still image 90 degrees to the right select 90 if you wish to rotate it 90 degrees to the left select 90 Video clips cannot be rotated 90 90 Protect Refer to the section in this manual titled Protecting Images page 28 for further details Voice Memo Refer to the section in this manual titled Attaching Voice Memos page 27 for further d...

Page 36: ...led Setting the Date and Time page 16 for further details Language Refer to the section in this manual titled Choosing the Language page 17 for further details Auto Off If no operation is performed for a specific period of time the power to the camera is automatically turned off This feature is useful for reducing battery usage 1 Min 2 Min 3 Min Off Beep This sets whether or not to mute the camera...

Page 37: ...ecomes brighter with the c button and darker with the d button The adjustment range is from 5 to 5 Format Refer to section in this manual titled Formatting the Memory Card or Internal Memory page 17 for further details Media Info This displays the free capacity of the internal memory or the memory card Sys Info This displays the firmware version of the camera Sys Reset This returns all basic setti...

Page 38: ...assigned drive letter e or higher 7 Double click on the removable disk and locate the DCIM folder 8 Double click on the DCIM folder to open it to find more folders Your recorded images and video clips will be inside these folders 9 Copy Paste or Drag N Drop image and video files to a folder on your computer Mac users Double click the untitled or unlabeled disk drive icon on your desktop iPhoto may...

Page 39: ...ing an entire group of pictures with one click automatically organizing the photos into the proper order then seamlessly stitching the photos into a panoramic masterpiece that you can print share or post to the web Create horizontal vertical and 360 panorama pictures all within this one amazing program To install software 1 Insert the CD ROM that came with the camera into your CD ROM drive The wel...

Page 40: ...ical zoom lens Aperture range 2 9 W 5 4 T Focal length 6 4mm 19 2mm equivalent to 38mm 114mm on a 35mm camera Focus Range Macro Wide 0 05m to infinity Tele 0 4m to infinity Shutter speed 1 1 2000 sec Sensitivity Still image Auto ISO 64 200 Manual ISO 64 100 200 400 800 1600 Sensitivity is measured in compliance with the ISO standard ISO12232 2006 Digital zoom 6x Capture mode 4x Playback mode Flash...

Page 41: ...8 1158 2319 4654 Standard 19 93 187 376 755 1511 3025 6071 Economy 20 97 195 393 787 1577 3157 6335 2304 x 1728 Fine 26 124 250 502 1006 2015 4034 8095 Standard 28 133 268 538 1078 2159 4321 8671 Economy 33 155 313 629 1260 2524 5051 10136 1600 x 1200 Fine 50 235 472 949 1901 3805 7615 15281 Standard 58 271 545 1094 2192 4388 8783 17624 Economy 64 295 594 1192 2388 4781 9568 19200 640 x 480 Fine 1...

Page 42: ...onitor LCD monitor is dark Adjust the brightness of the LCD monitor in the menu Although it is set to auto focus it does not focus The lens is dirty Wipe clean with a soft dry cloth or lens paper The distance to the subject is smaller than the effective range Get your subject within the effective focus range The contents on the memory card cannot be played back You played back a memory card that w...

Page 43: ...played on the monitor 1 Select the item you want to configure with the c d buttons and press the button Images Select whether you want to print specific image or all images You may also select the printing number for a specific image Date Print According to the printer type select whether you want to print the image with date imprint or not Paper Size Select the desired paper size according to the...

Page 44: ...rint with the c d buttons and press the button to start printing 6 The printing starts and the figure shown on the right hand side appears COMPLETE will be displayed temporarily reminding you that the printing procedure is finished If an error is detected during the connection i e a printer hardware problem between camera and printer PRINT ERROR will be displayed If an error is detected during the...

Page 45: ......

Reviews: