background image

59


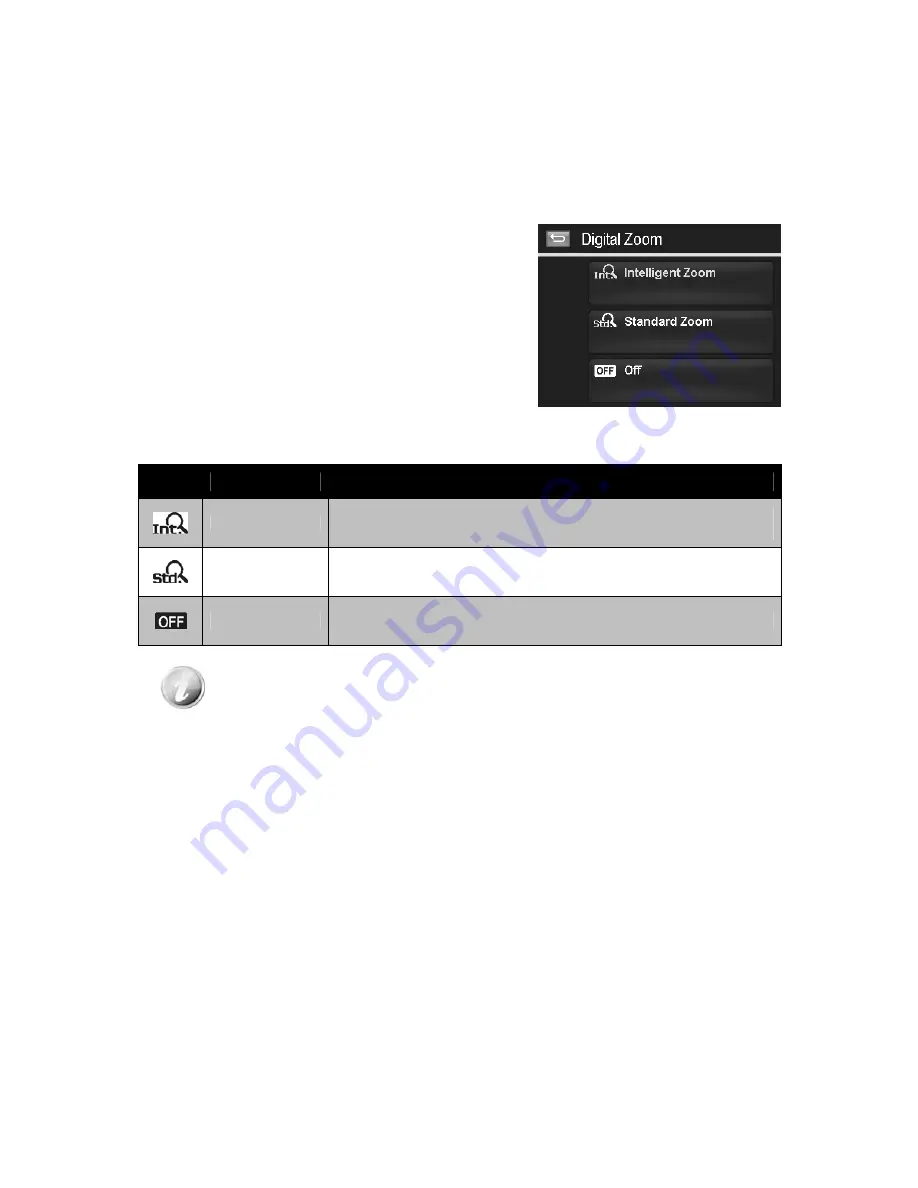
Setting the Digital Zoom 

This feature controls the digital zoom mode of your 
camera. 
Your camera enlarges an image using the optical zoom 

first. When the zoom scale exceeds 5x, the camera uses 
digital zoom. 


To set Digital Zoom 

1. From the Record menu, tap 

Digital Zoom

2. Tap the desired option button to apply. 


The table below shows the available Digital Zoom settings. 


Icon


Item


Description


Intelligent Zoom


Enlarges the image digitally with almost no distortion. This feature is 
available for still images only.


Standard Zoom 

Enlarges all image sizes up to a maximum of 5x in 

preview

, but the 

image quality deteriorates.


Off 

Uses the optical zoom only.


• 

Digital Zoom is not available in Face tracking on, ISO6400, Speedy Burst, Movie, 

and Voice Recording modes. 

• 

The maximum Intellect zoom scale varies depending on the image type and 

resolution. 


Summary of Contents for VPC-E1600TP

Page 1: ...14 Mega Pixels Digital Camera INSTRUCTION MANUAL VPC E1600TP Please read these instructions carefully before using the camera Keep this manual in a safe place for later reference ...

Page 2: ...l 11 Introduction 12 System Requirements 12 Main Features 12 Package Contents 13 Camera Views 14 Camera Buttons 16 Onscreen Touch Buttons 16 Camera Memory 17 Getting Started 18 Attach the Camera Strap 18 Inserting the Battery 18 Inserting an SD SDHC Memory Card 19 Charging the Battery by USB 20 Turning the Power On and Off 21 Initial Settings 21 Modes 22 Using the Touch Screen 23 Touch screen Layo...

Page 3: ...Balance 52 Setting ISO 53 Setting Metering 54 Setting AEB 54 Setting AF area 55 Setting AF Lamp 55 Setting Sharpness 55 Setting Saturation 56 Setting Contrast 57 Setting Flash 57 Setting Drive Mode 57 Setting Focus Mode 57 Setting Color Mode 58 Setting the Digital Zoom 59 Setting the Date Stamp 60 Setting Auto Review 60 Recording Videos 61 Playback 64 File Navigation 64 Viewing in Single Navigatio...

Page 4: ... Time 85 Setting Language 86 Setting File Numbering 86 Setting TV Out 86 Setting LCD Brightness 87 Setting Memory Kit 87 Reset All 87 Auto Rotation 88 Making Connections 90 Connecting the Camera to a TV 90 Connecting the Camera to a PC 90 Connecting the Camera to a Printer 92 Setting the Print Mode Menu 93 Appendix 94 About Folder and File Names 94 Troubleshooting 94 Specifications 95 Battery Life...

Page 5: ...stalled and used in accordance with the instructions may cause harmful interference to radio communications However there is no guarantee that interference will not occur in a particular installation If this equipment does cause harmful interference to radio or television reception which can be determined by turning the equipment off and on the user is encouraged to try to correct the interference...

Page 6: ...ratures Do not touch the camera lens Do not expose the lens to direct sunlight for extended periods Do not use abrasive chemicals cleaning solvents or strong detergents to clean the product Wipe the product with a slightly damp soft cloth Safety Instructions Read and understand all Warnings and Cautions before using this product Warning Do not disassemble change or repair the camera This might cau...

Page 7: ...se excessive force when handling the camera This might cause damage to the camera Do not use the camera in humid steamy smoky or dusty places This might cause fire or electric shock Do not remove the batteries immediately after long period of continuous use The batteries become hot during use Touching a hot battery might cause burns Do not wrap the camera or place it in cloth or blankets This migh...

Page 8: ...ce to radio communications However there is no guarantee that interference will not occur in a particular installation If this equipment does cause harmful interference to radio or television reception which can be determined by turning the equipment off and on the user is encouraged to try to correct the interference by one or more of the following measures Reorient or relocate the receiving ante...

Page 9: ...l be indicated as follows Hg mercury Cd cadmium Pb lead In the European Union there are separate collection systems for used electrical and electronic equipment batteries and accumulators Please dispose of them correctly at your local community waste collection recycling centre Please help us to conserve the environment we live in Manufacturer and Address SANYO Electric Co Ltd 5 5 Keihan hondori 2...

Page 10: ...ce Product design and specifications are subject to change without notice This includes primary product specifications software software drivers and user s manual This User Manual is a general reference guide for the product The product and accessories that come with your camera may be different from those described in this manual This is due to the fact that different retailers often specify slig...

Page 11: ...y Use only the provided batteries or type of battery and charger that came with your camera Using other types of battery or charger may damage the equipment and invalidate the warranty When using Li ion battery in this product ensure that they are inserted correctly Inserting the battery upside down can cause damage to the product and possibly cause an explosion When the camera is used for an exte...

Page 12: ...ices or consumable items used with the camera other than those supplied with the camera or those specified by Sanyo Electric Sanyo Electric shall not be held responsible for any losses or loss of revenue resulting from the loss of data caused by the malfunction or the repairing of a malfunction of the camera The images captured with this camera will differ in quality from pictures taken with a sta...

Page 13: ...0C USB port and CD ROM drive For Macintosh Power Mac G3 or later Mac OS 10 3X 10 6 4 or later Mass storage Memory 512 MBor above Q Time player ver 6 0 3 or above USB port and CD ROM drive Main Features 14 mega pixels resolution Up to 5x optical zoom and 5x digital zoom 3 inch touch panel LCD monitor 32MB internal flash memory with optional external SD SDHC card Supports up to 4GB of SD card and up...

Page 14: ...ckage Contents Please check the contents of your camera package It should contain Digital camera Rechargeable battery x 1 pcs USB AC Adapter Camera strap USB cable AV cable optional CD ROM Quick Start Guide ...

Page 15: ...14 Camera Views Front View 1 Flash 2 Self timer LED AF Assist Lamp 3 Lens 4 Microphone Back View 5 LCD Screen 6 Zoom Button 7 LED indicator 8 Playback Button ...

Page 16: ...15 Top View 9 ON OFF Power button 10 Shutter button Bottom View 11 Battery Memory compartment 12 Speaker 13 Tripod screw hole Left Right View 14 USB TV Out 15 Strap ring ...

Page 17: ...ter 9 image calendar thumbnails Playback Press to enable Playback mode or return Record mode Onscreen Touch Buttons The control buttons appear on the touch screen and change dynamically depending on the task you re performing Icon Touch Button Description Record mode Tap to launch the scene mode menu Flash Tap to popup the Flash menu Self timer Burst Tap to popup the self timer burst menu Macro Ta...

Page 18: ...e memory card slot all images videos and audio clips recorded are automatically stored in the internal memory External storage Your camera supports SD cards of up to 4GB in size It also supports SDHC cards with a maximum capacity of 32GB If there is a storage card inserted in the memory slot the camera automatically saves all images videos and audio clips in the external storage card The icon indi...

Page 19: ...ard compartment Please read Battery Information on page 10 before inserting removing batteries 1 Make sure the power is off before inserting the battery 2 Unlock and open the Battery memory card compartment at the bottom of the camera 3 Insert the battery into the compartment with the terminal facing inside the camera with correct orientation as shown ...

Page 20: ...he bottom of the camera 2 Insert the SD SDHC card into the memory card slot with the metallic part facing the back side of the camera 3 Push the SD SDHC card into the memory slot until it clicks into place 4 Close and lock the Battery memory card compartment To remove the SD SDHC card 1 Unlock and open the Battery memory card compartment 2 Gently push the card until it pops out 3 Pull out the card...

Page 21: ...he USB adapter and plug it into a power outlet or with the USB port of PC directly for charging When the battery is charging the LED indicator lights up When the battery is fully charged the LED indicator goes off When the battery is unusual charged the LED indicator flashes rapidly When the camera charges without the battery inside the LED indicator goes off It s recommended not operating the cam...

Page 22: ...de The camera is turned on in Playback mode The zoom lens is not extended To turn off the camera press the Power button Initial Settings When you turn on your camera for the first time you will be asked to do the initial settings of your camera First is the setup of language menu Secondly setup the Date and Time Setting the Language Specify in which language menus and messages are to be displayed ...

Page 23: ...images and videos Holding down the or buttons to change the values continuously Modes Your camera has two modes Record Mode This is the default mode while you turn on the camera every time You are able to take images and record videos audio clips in this mode Playback Mode Press the Playback button after the camera is turned on to view and edit captured images or playback videos and audio clips Th...

Page 24: ...tion 1 AF lamp Indicates AF lamp is enabled 2 Focus area Indicates focus area 3 Zoom indicator Displays zoom 4 Shots remaining Indicates the remaining shots available 5 Battery Indicates battery level 6 Storage media Indicates current storage media in use 7 Shake warning Indicates that the camera is shaking 8 Touch button AF area Face tracking Tap to display the AF area face tracking popup menu 9 ...

Page 25: ...posure settings 19 ISO Displays ISO settings 20 Shutter speed Displays shutter speed settings 21 Aperture value Displays aperture settings 22 Touch button Menu Tap to launch record menu 23 Touch button Macro Tap to display the macro popup menu 24 Touch button Self timer Burst Tap to display the self timer burst popup menu 25 AEB Indicates AEB function is enabled 26 Touch button Flash Tap to popup ...

Page 26: ...storage media in use 6 Touch button Display Tap to switch the display mode of the LCD monitor 7 White balance Displays white balance settings 8 Metering Displays metering settings 9 Movie size Displays movie size settings 10 Touch button Menu Tap to launch record menu 11 Touch button Macro Tap to display the macro popup menu 12 Touch button Pre Record Tap to set pre record on off 13 Touch button P...

Page 27: ... to view the next file 5 Touch button Display Tap to switch the display mode of the LCD monitor 6 Aperture value Displays aperture value of the image 7 Shutter speed Displays shutter speed setting of the image 8 Flash Displays flash setting of the image 9 White balance Displays white balance setting of the image 10 ISO Displays ISO setting of the image 11 Exposure Displays exposure setting of the ...

Page 28: ...Tap to launch playback menu 18 Voice memo Tap to record an attached voice memo for the image 19 Touch button Previous file Tap to view the previous file 20 DPOF Indicates the file is marked for printing 21 Protect Indicates file is protected 22 Playback mode Indicates playback mode 23 Delete Tap to delete the file ...

Page 29: ...D monitor 7 Folder Filename Indicate the location filename of the video clip 8 Date Time Displays the recorded date time of the video clip 9 Video size Indicates the size of video clip 10 Touch button Menu Tap to launch playback menu 11 Touch button Previous file Tap to view the previous file 12 Protect Indicates file is protected 13 Playback mode Indicates playback mode 14 Playing status Displays...

Page 30: ...p to switch the display mode of the LCD monitor 7 Folder Filename Indicate the location filename of the audio clip 8 Date Time Displays the recorded date time of the audio clip 9 Touch button Menu Tap to launch playback menu 10 Touch button Previous file Tap to view the previous file 11 Protect Indicates file is protected 12 Playback mode Indicates playback mode 13 Playing status Displays playing ...

Page 31: ... Full None Guideline The OSD information may vary depending on the record mode type The following icons if enabled are still displayed on the LCD even when OSD off or Guide lines on AEB AF lamp Drive mode Flash and Macro Use the Guide lines to properly set image for capture In Playback mode the LCD display can be changed into any of the following Basic Full None LCD display cannot be changed in th...

Page 32: ...2 Frame the shot using the focus bracket on the LCD monitor See illustration on the right 3 Pressing the Shutter button down halfway automatically focuses and adjusts the exposure and pressing the Shutter button down fully captures the images When the shake warning icon appears hold the camera steadily with your arms at your side or use a tripod to stabilize the camera to prevent blurred images Pr...

Page 33: ...the Digital Zoom on page 59 on how to setup digital zoom To adjusts the optical zoom 1 Press the Zoom button to zoom in or zoom out an image 2 The zoom indicator appears on the LCD monitor Zoom button Press to zoom out Press to zoom in To adjusts the digital zoom 1 Activate digital zoom See Setting the Digital Zoom on page 59 2 Press the T button to optically zoom in to the maximum until it stops ...

Page 34: ...n Item Description Auto Flash The flash fires automatically whenever extra lighting is needed Red eye reduction The flash fires twice to reduce the red eye effect Forced on The flash fires whenever you press the shutter button regardless of lighting conditions Slow sync The flash fires with a slow shutter speed Forced off The flash is turned off Flash function is only available in shooting still i...

Page 35: ...on Your camera supports the four focus modes Icon Item Description Auto Focus With Auto Focus the focus range starts from 0 15m Super Macro This mode is designed for close up photography The focus would be fixed at 4x optical zoom and cannot be adjusted Pan Focus The focus of this mode is in the maximum Depth of Field DOF not designing for close up photography Infinity When Infinity is set the cam...

Page 36: ...ble below shows the available Drive mode settings Icon Item Description 10 Sec Sets a 10 second delay to capture image after pressing the shutter button 2 Sec Sets a 2 second delay to capture image after pressing the shutter button Double Performs delay and capture twice Performs a 10 second delay then captures the image Performs another 2 second delay then captures the image again Burst Performs ...

Page 37: ...focus or red focus failed 4 If the box of main focus target turns green press the shutter full press to take the shot 5 Or release the shutter to re focus target s Up to 10 faces can be detected in the same time How to use Touch shot 1 Tap the onscreen AF Area button and then choose Touch shot 2 Frame the subject with the yellow focus frame on the screen 3 Tap the yellow focus frame and a dotted l...

Page 38: ...s controlled by finger and performs AF and shooting Using the Record Menu The Record menu allows you to change modes and setup other capture settings Record Menu To go to Record Menu 1 Tap the onscreen MENU button to launch the Record Menu 2 Tap or to turn pages 3 Tap the desired option button to enter submenu 4 Configure the settings in the submenu 5 Tap the onscreen button to save and apply chan...

Page 39: ...below shows the available scene mode settings Icon Item Description Auto The simplest way to shoot basic images Settings are adjusted automatically Movie This mode is used to record movie clips Program The camera automatically adjusts suitable shooting settings like shutter speed and aperture values Intelligent Scene The camera detects the shooting conditions and automatically switches to the appr...

Page 40: ...ed for beach and snow scenes Sports This feature captures still images in high speed motions Party This feature is used for wedding or indoor party settings Candlelight This feature is used to capture warm candle light effects Night Portrait This feature is used to capture portrait pictures with night or dark background Soft Skin This feature enhances skin tone thus facial skin appears smooth Flow...

Page 41: ...ess shutter after referring the subject to the reference point Love Portrait This feature uses face tracking to auto detect faces to capture portraits images without the help of others When over two faces are detected AF is automatically activated The camera starts count down and captures a picture in two seconds Self Portrait This feature set zoom to wide end When one face is detected AF automati...

Page 42: ...age and selects the ideal settings Intelligent scene icon After the camera detects the shooting conditions this icon changes to show the detected scene mode The camera changed to Landscape mode automatically To activate Intelligent Scene 1 Select Intelligent Scene from the Scene Mode menu 2 Focus the camera on the subject to capture 3 The camera detects the shooting conditions and switches to an a...

Page 43: ...s long as the shutter button is pressed which allows you to capture a sequence of pictures that are frames apart clearly Make sure you have plenty of memory in your memory card as you will need it when you start shooting Using Party Mode Let the Party mode on It can be difficult to get everyone on a party While you have the whole gang together take a group or family portrait Party mode features on...

Page 44: ...phy Macro focus and Auto Flash are enabled by using Food mode Using Foliage Mode A scenic image such as a garden or forest scene that full of doll green colors is boring In foliage mode the greens blues are brilliantly enhanced making scenic pictures pop out with bright color Using LOMO Mode Original The LOMO mode applies the following effects on the photo 1 Over saturated colors 2 Off kilter expo...

Page 45: ...ined image in lower resolution suited to online posting 1 Select Auction mode from Scene mode menu 2 Choose a pattern by tapping the icon 3 Return the preview screen to start shooting 4 Frame the subject and press the Shutter button to take the first shot 5 Or tap the onscreen Auction button to reset pattern 6 Tap Continue button to proceed the second shot 7 Or tap Cancel button to go back the fir...

Page 46: ...ge 10 Or tap Cancel button to go back last shot 11 The image can be transferred to PC via USB cable Please refer to Connecting the Camera to a PC on page 90 or memory card reader and uploaded to website Auction mode provides 4 kinds of pattern as follow The image is set to low quality and VGA 640x480 size only ...

Page 47: ... a great picture more than having your subjects eyes closed Blink Detection provides you with extra assurance when capturing once in a lifetime moments like holding a trophy with teammates after winning a basketball game If closed eyes are detected a saving confirmation menu appears on the screen allowing you to re take the shot before your subject or subjects move on To activate Blink Detection 1...

Page 48: ... want and press the Shutter button full press which causes 1 3 of semi transparent image of the background to remain on the LCD monitor 2 Tap the button to cancel the semi transparent temporarily image 3 Ask someone else to record a shot of you against your original pre composed background telling him her to compose the image by using the 1 3 semi transparent screen image as a guide 4 Move your po...

Page 49: ...e a shot without pressing the Shutter button Tips to make a great shape by self portrait photography Lean in towards the camera to reduce double chin Angle your body and bend your arms to look slimmer Keep your shoulders back Using D Lighting Mode Active D Lighting mode preserves details in highlights and shadows creating photos with natural contrast Use for high contrast scenes for example when p...

Page 50: ...ss image quickly and easily To stitch the still image 1 Enter Photo Stitch mode and press the Shutter button to take the first shot Then tap the button to select the direction how shots will be stitched 2 A guidance bar appears after taking the first shot Follow the direction displayed on LCD screen to pan the camera Or tap the icon to restart shooting ...

Page 51: ...pears as well You can tap the button to stitch the first two shots or the button to restart shooting 5 Same as step 3 moves the icon to overlap the yellow block and then you can get the third shot and the combined image is generated automatically Now you finish this set of stitch shooting The following settings are fixed in Photo Stitch mode Flash Forced Off Drive mode Off Focus mode Auto focus AF...

Page 52: ...e resolution before you capture the image Changing the Photo Size affects the number of images that can be stored in your memory card The higher the resolution the more memory space is required The table below shows the Photo Size values for still images Icon Pixel Size Printing Size Suggestion Icon Pixel Size Printing Size Suggestion 4320 x 3240 A2 Size 2048 x 1536 4 x 6 4320 x 2880 Standard prin...

Page 53: ...ot otherwise be obtained in circumstances where the difference in brightness between the subject and the background the contrast is large or when the subject that you wish to capture is very small within the scene Available for still images only To adjust EV settings Tap or to turn pages and tap the desired EV value As you tap and turn through the pages you can see the closet 3 adjusting preview o...

Page 54: ...t source cannot be specified Press the shutter button for the camera to automatically adjust the appropriate white balance setting according to the environment Setting ISO This sets the sensitivity for capturing images When the sensitivity is raised and the ISO figure is increased photography will become possible even in dark locations but the more pixelated grainier the image will appear Use a hi...

Page 55: ... the entire frame but gives greater weight to the subject matter at the center Spot A very small portion of the center of the screen is measured and the exposure is calculated Setting AEB AEB stands for Automatic Exposure Bracketing It permits 3 consecutive images in the order of standard exposure under exposure and overexposure compensation To set AEB 1 From the Record menu tap AEB 2 Tap On Off t...

Page 56: ...of the camera see Front View on page 14 emits an red light by half pressing the Shutter button allowing the camera to focus easily To set AF Lamp 1 From the Record menu tap AF Lamp 2 Tap On Off to enable disable AF lamp Setting Sharpness This function allows you to enhance or soften finer details of your images To set Sharpness 1 From the Record menu tap Sharpness 2 Tap the desired option button t...

Page 57: ...ing for rich colors and a lower saturation setting for more natural tones To set Saturation 1 From the Record menu tap Saturation 2 Tap the desired option button to apply The table below shows the available Saturation settings Icon Item Description High Enhance the saturation Normal Normal saturation Low Reduce the saturation ...

Page 58: ...om the Record menu tap Flash 2 Tap the desired option button to apply For more information please refer to Using Flash on page 33 Setting Drive Mode To set Drive mode 1 From the Record menu tap Drive Mode 2 Tap the desired option button to apply For more information please refer to Setting the Drive Mode on page 35 Setting Focus Mode To set Focus mode 1 From the Record menu tap Focus Mode 2 Tap th...

Page 59: ...ptured in black and white Vivid Red Captured image becomes reddish Ideally used to record images like flowers and cars to make them more vivid Vivid Green Captured image becomes greenish Ideally used to record images like mountains and lawns to make them more vivid Vivid Blue Captured image becomes bluish Ideally used to record images like the sky and the ocean to make them look more vivid Color A...

Page 60: ...le below shows the available Digital Zoom settings Icon Item Description Intelligent Zoom Enlarges the image digitally with almost no distortion This feature is available for still images only Standard Zoom Enlarges all image sizes up to a maximum of 5x in preview but the image quality deteriorates Off Uses the optical zoom only Digital Zoom is not available in Face tracking on ISO6400 Speedy Burs...

Page 61: ... shooting when Date Stamp is enabled in AEB Burst mode In vertical or rotated images the date and time on your images still appear horizontally To set Date Stamp 1 From the Record menu tap Date Stamp 2 Tap the desired option button to apply Setting Auto Review The Auto Review function lets you view the captured image right after shooting it If Auto review is enabled the camera will display the cap...

Page 62: ...the limitation depends on the camera model 1 Tap onscreen Record mode button and choose Movie Or from the Record menu tap scene mode and choose Movie 2 Focus your camera on the subject that you want to take 3 Press the Shutter button to start recording 4 Use the Zoom button to zoom in out the subject 5 To pause recording tap the Pause button 6 To continue recording tap the Pause again 7 To stop re...

Page 63: ...rresponding image quality settings Icon Item Description 1280 x 720 1280 x 720 HDTV Support SDHC_Class 6 The length of a single video recording is up to 23 minutes It will automatically stop recording if time is over 640 x 480 High Quality 320 x 240 Normal Web For Internet see Internet Mode on page 62 below When Battery temperature over 55ºC or Lens temperature over 55ºC the camera will stop movie...

Page 64: ...ube video select from the Movie Size function Available recording time for a YouTube video is up to 10 minutes White Balance Metering Color Mode To set above settings please refer to Using the Record Menu on page 37 Pre Record You can catch the first three seconds of action you would have potentially missed Once enable this function the camera starts recording video automatically before pressing s...

Page 65: ... on the LCD monitor To view images videos audio clips follow the steps below 1 Press the Playback button on the camera 2 The LCD monitor displays an image To understand the icons and other information on the screen please see Photo Mode Screen Layout on page 23 Still Image Video Audio Clip 3 Tap the or onscreen buttons to view next previous image video audio 4 To play a video or audio clip tap the...

Page 66: ...ew it in single navigation mode Or you can tap the half hidden displayed image on the left right side of the screen to view previous next file in single navigation mode Drag to scroll images The table below shows the function of onscreen application buttons in photo stream mode Icon Item Description Delete Tap to popup delete confirmation For more information please refer to Delete on page 70 Sear...

Page 67: ...stop it immediately Scroll a row horizontally to the previous next row by tapping the onscreen or button Tap one of the displayed 9 images in the middle of the screen to view it in single navigation mode To quickly scroll to your chosen location drag the pointer of the scroll bar Thumbnail view with drag scroll Pointer Viewing in Calendar Mode To set calendar mode 1 Set the camera to Playback mode...

Page 68: ...ks with still images only In normal view press and hold the Zoom button right T until the desired zoom view The 4 arrows on the LCD monitor indicate that the image is zoomed in You can zoom to view an image up to 12X Drag the enlarged image to desired position Press the Shutter button to close zoom view Draw a circle clockwise counterclockwise in single navigation mode to enlarge the image up to 4...

Page 69: ...layback The screen displays the video frame image in Single navigation mode 7 Tap the button to set repeat on off Volume cannot be adjusted when you Pause or REW FF Onscreen control panel and playing info appears 2 seconds then hide Tap the screen to pop them up Playing Voice Recording 1 Set the camera to Playback mode 2 Tap the onscreen Play button to play the voice recording 3 Tap the button to ...

Page 70: ...de 5 Tap the button to set repeat on off Volume cannot be adjusted when you pause the voice memo Onscreen control panel and playing info appears 2 seconds then hide Tap the screen to pop them up Volume Control This feature controls the audio volume only when a video voice recording or voice memo is playing back To set volume control 1 During playback tap the button to popup the volume bar 2 Slide ...

Page 71: ...move unwanted files in the internal memory or on the memory card Protected files cannot be erased to delete unprotect the file first See Protect on page 78 To delete an image video audio clip 1 Press the Playback button on the camera and locate the desired image by Single navigation or Photo stream mode 2 Tap the onscreen Menu button to launch Playback menu and tap Delete Or tap the onscreen butto...

Page 72: ... delete the voice memo Cancel to abort Up to 200 files can be selected in one time for Delete To delete multiple files 1 Tap the Select button in the delete submenu and the images are displayed in thumbnail mode on the LCD monitor 2 Tap all you desired files to highlight a delete mark 3 Tap the button to popup confirm menu 4 Tap Yes to delete the marked files Cancel to abort To delete all files 1 ...

Page 73: ...eam or thumbnail mode to locate the specific file s Please refer to Viewing in Photo Stream Mode on page 65 or Viewing in Thumbnail Mode on page 66 4 Reset to display all images by Enter Calendar mode then back single navigation Reboot Search by Favorite Favorite groups list in order of Please refer to Favorite on page 74 To know about how to add files into these groups Tap the group button to dis...

Page 74: ...me To view slide show 1 From the Playback menu tap Slide Show The Slideshow menu appears 2 Set the slide show settings 3 Tap onscreen Start button to start the slideshow 4 During slideshow tap the button to pause resume slideshow 5 Or tap the button to exit the slideshow and back to single navigation Slideshow icon appears on screen during the slideshow is playing or pausing or To configure slide ...

Page 75: ... select a group to mark the desired file and return playback mode 4 Repeat step 1 and 2 to remove the desired file from the favorite group 5 Tap Yes to confirm Cancel to abort Quick Retouch The unique feature is designed to create a retouched copy for a still image with the best balance of contrast and saturation To use Quick Retouch 1 Set the camera to Playback mode and locate the desired image b...

Page 76: ...that buildings look as though they are thinner at the top when you shoot from a low viewpoint also a road disappearing into the distance All these are result of perspective distortion and all affected by the angle of view and focusing point Perspective Control allows you to make areas thicker or narrower to correct these distortions To use Perspective Control 1 Set the camera to Playback mode and ...

Page 77: ... images in this function are saved as a new file To set Color Mode for an image 1 Set the camera to Playback mode and locate the desired image by single navigation 2 Tap the onscreen Menu button to launch playback menu and tap Color Mode 3 Tap the or button to select a color level on the image Available filters Sepia B W Negative Mosaic Vivid Red Vivid Green Vivid Blue 4 Tap the onscreen level but...

Page 78: ...tip and the painter tools to edit the picture 5 Tap the X button to Yes Cancel edited image 6 Or Tap the button to save the image 7 Tap Yes to exit the Painter and back to last displayed view Tap Cancel to resume to Painter view How to use the painter tools Use the Pan Tap or to set stroke size or color Use the stamp Tap or to set stamp style or color Use the eraser Tap to set eraser size Use the ...

Page 79: ...pears on the screen 6 Tap the button to playback the voice memo Time left n seconds for recording When you record voice memo to an image with an existing voice memo the old recording file would be replaced by the new one Protect Set the data to read only to prevent images from being erased by mistake A protected file has a lock icon when viewed in Playback mode To protect files 1 From the Playback...

Page 80: ...ect multiple files 1 Tap Select button in the protect submenu the images are displayed in thumbnail mode on the LCD monitor 2 Tap all you desired files to add or remove a lock mark 3 Tap the button to popup confirm menu 4 Tap Yes to change the protect settings Cancel to abort To protect all files 1 Tap Lock all in the protect submenu to popup a confirm menu 2 Tap Yes to lock all files Cancel to ab...

Page 81: ...le key on the Zoom button to change trim size 4 Tap the 4 way indicator on the screen to move trim area to your desired position 5 Tap the button to save the trimmed image as a new image and return single navigation mode NO Description 1 Return button 2 Preview screen 3 4 Way indicator 4 Save button and trimmed size 5 Image area 6 The approx location of the trimmed area Trim function is not availa...

Page 82: ...GA 4 The camera saved the resized image as a new one and return single navigation mode Resize function is not available for images with image size set to VGA Rotate You can rotate a still image 90 180 and 270 degrees To rotate an image 1 Set the camera to Playback mode and locate the desired image by single navigation mode 2 Tap the onscreen Menu button to launch playback menu and tap Rotate 3 Tap...

Page 83: ...the selected image was deleted DPOF DPOF is the abbreviation for Digital Print Order Format which allows you to embed printing information on your memory card You can select the images to be printed and how many prints to make with the DPOF menu in the camera and insert the memory card to the card compatible printer When the printer starts printing it will read the embedded information on the memo...

Page 84: ...n to save DPOF settings To reset DPOF 1 Tap to select Reset DPOF on the DPOF submenu 2 A confirm popup menu appears on the screen 3 Tap Yes to reset DPOF Cancel to abort Active Display The Active Display function allows you to switch photos by shaking the camera when you view them in Single Navigation Shaking the camera upside downside will turn to the next previous photo The order of displaying p...

Page 85: ... and apply changed settings 7 Tap the or button to exit the menu or return main menu anytime Setting Sounds Use the option buttons to control the sounds produced by the camera 1 From the Setup menu tap to select Sounds 2 Configure settings by tapping the option button 3 Tap the button to apply Item Available Settings Description Startup Sound 1 Sound 2 Sound 3 Off Selects the startup sound when ca...

Page 86: ... the LCD Save function to automatically decrease the LCD brightness to conserve battery power When the camera is idle for 20 seconds the LCD darkens Press any button to resume to normal brightness The camera is idle when no buttons are pressed LCD Save though enabled does not function during video playback slideshow video recording and Pre Composition scene mode shooting Setting Date Time Use the ...

Page 87: ...o files in sequence even if the folder is changed Reset Starts from 0001 each time the folder is changed To understand folder and file structure of your camera see About Folder and File Names on page 94 Setting TV Out Use the TV Out function to adjust video output signal to accommodate different regional settings If TV out is not set correctly the image may not display properly on TV Available set...

Page 88: ...ternal memory to the memory card If the images were saved in the internal memory when inserting memory card into the camera You can use Copy to Card function in order to copy all images from the internal memory into memory card If there is no memory card or the internal memory is empty or plug in lock card the Copy to Card function is disabled Reset All Use this function to reset the camera to its...

Page 89: ...ff the rotated image will resume to the original direction and this function will be also disabled To rotate the still image 1 Set to view the still image in Single Navigation in Playback mode 2 Turn the camera to 60 to 90 degrees The still image will be rotated as well 3 Turn the camera clockwise again The still image will not be rotated 4 Repeat to turn the camera until the still image is rotate...

Page 90: ...right as below 2 Press the button right T to zoom in or the button left W to zoom out The function of rotating images is only applicable to still images in Single Navigation Video and audio files are not supported When the still image is zoomed out to the original size it will be displayed in Single Navigation ...

Page 91: ...a 2 Set the TV out to match the TV s video out format See Setting TV Out on page 86 3 Connect the USB AV 3 in 1 cable to the USB port on the bottom of your camera 4 Connect the other end of the cable to the TV s AV input port 5 The LCD monitor turns black and all images and videos are displayed on the TV Connecting the Camera to a PC You can transfer images videos and audio files to your PC 1 Conn...

Page 92: ... the connection while the LCD monitor appears Connecting 6 Connection established after PC MODE appeared on the LCD monitor 7 Access the files in the camera by your PC The camera s internal memory and memory card would display as removable drives in PC After the connection no image is displayed on the LCD monitor ...

Page 93: ...n there is paper in the printer and there are no printer error messages 2 Connect one end of the USB cable to the printer while the other end to USB terminal on the camera 3 The USB mode menu appears on the screen Tap to select the onscreen Printer button 4 Enter the print mode and print the selected images For details on the following page Setting the Print Mode Menu ...

Page 94: ...as thumbnails To set Print Select 1 Tap the or button to scroll and select an image for printing 2 Specify the number of copies Tap or to increase decrease the number 3 Tap the button to set date stamp On Off 4 Tap the button to start printing To set Print All and Print Index Repeat the same steps 2 to 4 then start printing Tap Cancel to abort printing if necessary After the printer has printed al...

Page 95: ...roubleshooting Problem Cause and or Action Camera does not turn on The batteries may be exhausted Charge or replace the batteries Camera turns off automatically Press Power button and playback button to turn on the camera LCD turns dark Press any button except the Power button to turn on the LCD Empty battery icon is displayed on the LCD then the camera turns off Batteries are exhausted please rep...

Page 96: ...type of the battery used may be incorrect or the battery power level is too low Change the battery or charge the battery before using the camera Specifications Sensor SONY 14M 1 2 3 type Lens Focal Length 4 7 W 23 5 T mm 5x optical zoom 5x digital zoom LCD monitor 3 inch touch panel LCD monitor Focusing Range Normal Wide 15cm infinity Tele 60cm infinity Macro Wide 5cm 100cm Tele 60cm 100cm Super m...

Page 97: ...7EV 0 3EV 0EV 0 3EV 0 7EV 1 0EV 1 3EV 1 7EV 2 0EV Metering Multi Center Spot Drive Mode 10 sec 2 sec Double Burst Speedy Burst Off Flash Auto Flash Red eye Reduction Forced On Slow Sync Forced Off Color mode Preview Normal Vivid Sepia B W Vivid Red Vivid Green Vivid Blue Color Accent R Color Accent G Color Accent B Color mode Sepia B W Negative Mosaic Vivid Red Vivid Green Vivid Blue Storage Inter...

Page 98: ...conditions of the battery pack and the conditions of use Especially when used at temperatures below 10 ºC 50 ºF the battery pack operation time is drastically reduced Design and specifications are subject to change without notice AC Adaptor Part No TR 06 Power source SAMYA TECHNOLOGY CO LTD Rated output 5V 700mA Temperature Operation 0ºC to 40ºC Ambient environment Humidity Operation 20 90 RH Supp...

Page 99: ...from the device Then take it to the dealer for service Do not try to repair or open the device yourself Do not use during a storm To avoid the risk of being struck by lightning do not use the devices during a thunderstorm In particular if used in an open field you have an increased chance of being struck by lightning Quickly seek refuge in a place that will protect you from lightning Keep the devi...

Page 100: ... has been become wet may cause a fire electric shock or other accident Do not place on an unstable surface The camera may fall resulting in damage to the camera or injury If the camera has fallen or has been trampled on and its body is damaged turn it off remove the battery and take it to the dealer for repair Using the camera after its body has been damaged may cause a fire or electric shock Do n...

Page 101: ... storage This camera is a precision instrument It should not be used left or stored in a car exposed to the hot sun or where there are extreme changes in temperature or humidity or where it may be exposed to water or dust Operating environment Temperature 0 to 40 C 32 to 104 F operation 20 to 60 C 4 to 140 F storage Humidity 30 to 90 operation no condensation 10 to 90 storage no condensation Do no...

Page 102: ... or an accident WARNING Cautions when plugging in the power cord Securely plug the power cord all the way into the power outlet If the docking station or AC adaptor charger is used with the power cord not fully plugged in heat may be generated and cause a fire Do not use if the power cord is damaged or cannot be correctly plugged into the power outlet Using in this condition may cause a fire or el...

Page 103: ...cord as the heat generated may cause a fire Do not touch the power cord plug with wet hands Doing so may cause an electric shock CAUTION Do not hold the hot part for a long time The device s may become warm during use A low temperature burn may result if you hold the hot part for a long time Do not place on an unstable surface If may fall resulting in damage or injury If the device has fallen or h...

Page 104: ...the card has been swallowed contact your doctor immediately Cautions when handling the cards The cards are precision devices Do not bend drop or subject them to strong forces or shocks Avoid using or storing the cards in places with extremely high or low temperatures subject to direct sunlight in a completely closed vehicle near air conditioners or heaters or in humid or dusty locations Avoid usin...

Page 105: ...her rechargeable batteries are used the batteries may generate heat rupture or leak and result in fire injury burns or damage to surroundings DANGER If there is leaking discoloration change of shape damaged exterior strange odor extreme heat or any other abnormal condition immediately discontinue use and remove the battery from the camera taking care to keep it well away from fire Continuing to us...

Page 106: ...ct it to heat Doing so may cause the insulation to melt damage the gas discharge valve and safety mechanisms or ignite the battery fluid resulting in fire or explosion DANGER WARNING Do not drop hit trample or submit the battery to strong shocks If the safety mechanisms and protective devices are broken an abnormal chemical reaction may occur inside the battery or cause the battery to catch fire e...

Page 107: ...ry fluid or generate heat DANGER WARNING Do not peel or damage the outer casing Damaging the outer case inserting nails hitting with a hammer stepping on the battery etc may cause a short circuit inside the battery or cause the battery to catch fire explode leak or spew battery fluid or generate heat DANGER WARNING If the battery is leaking and the battery fluid gets on your skin or clothing immed...

Page 108: ...escribed recharge time even if the battery pack is not fully charged If you continue to recharge the battery pack it may cause the battery pack to catch fire explode leak or spew battery fluid or generate heat WARNING Charge the battery pack before using it Always recharge the battery pack before using it for the first time or when using it after it has been kept in storage for a long time During ...

Page 109: ...ase consult the laws and regulations in your area for proper battery disposal Lithium ion batteries To conserve the environment and for efficient use of natural resources please discharge the used battery cover the and terminals with tape and recycle the insulated battery CAUTION ...

Page 110: ...f the rechargeable Li ion battery pack Do not use the battery with the outer covering or label removed as doing so may result in malfunction Temperature when using 0 to 40 C 32 to 104 F Do not use leave or store the battery pack near fire or inside a car exposed to the hot sun etc Locations in which the temperature reaches 60 C 140 F or higher At high temperatures the safety mechanisms and protect...

Page 111: ...nings Do not spray insecticides or volatile sprays on the camera Do not let rubber or vinyl objects contact the camera for a long period They may cause deformation discoloration or paint peeling Wipe the monitor with a soft cloth that has been moistened with water and well wrung out Wiping with a cloth soaked with a cleaning substance or chemicals will erode the finish or cause it to peel Caution ...

Page 112: ...the magnetic strips on cards may be damaged Cautions concerning data storage It is recommended that any important data be copied onto a separate media such as a hard disk MO disk or CD R disk Stored data may be lost or corrupted in cases such as those listed below Sanyo Electric will not be held responsible for any damage or lost profits arising from the loss of data If the card is used incorrectl...

Page 113: ...Printed in china ...

Reviews: