-
4
-
1
2
3
8
A
B
4
4
5
6
10
7
13
14
15
16
17
18
19
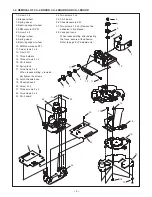
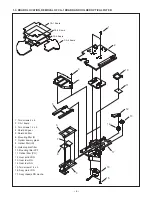
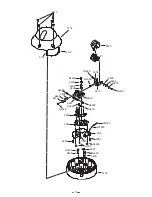
1. DISASSEMBLY
1-1. REMOVAL OF CABINET
1. Four special screws 4 x 16
2. Screw 4 x 4
3. Cabinet top (A:SANYO logo)
4. Two screws
Loosen the screws until the latch
chassis can move.
5. Latch chassis
6. Cabinet bottom (B:opening)
7. Rotate of 90 degrees
8. Rotate of 90 degrees
9. Screw 2 x 4
10. Rotate of 90 degrees
11. Hook onto the projection
12. Spacer camera
13. Rotate of 90 degrees
14. CA-4 board
15. Assy wire (5 pins CN406)
16. Assy wire (2 pins CN403)
17. Assy wire (3 pins CN401)
18. FFC (18 pins CN405)
19. FFC (16 pins CN404)
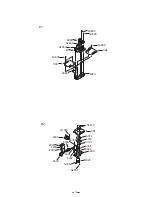
20. Fixer FFC
When reassembling, shape the
FFC as shown in the diagram.
21. Screw 3 x 6
22. Stopper wheel
23. Spring wheel
24. Bearring support wheel
25. Screw 3 x 6
26. Pipe
9
11
12
18, 19
20
21
22
23
24
25
26
Fold upward.
NOTE
Confirm the focus is suitable after
the installation of the cabinet top.

