32
Press the Point
7 8
buttons
to adjust the value.
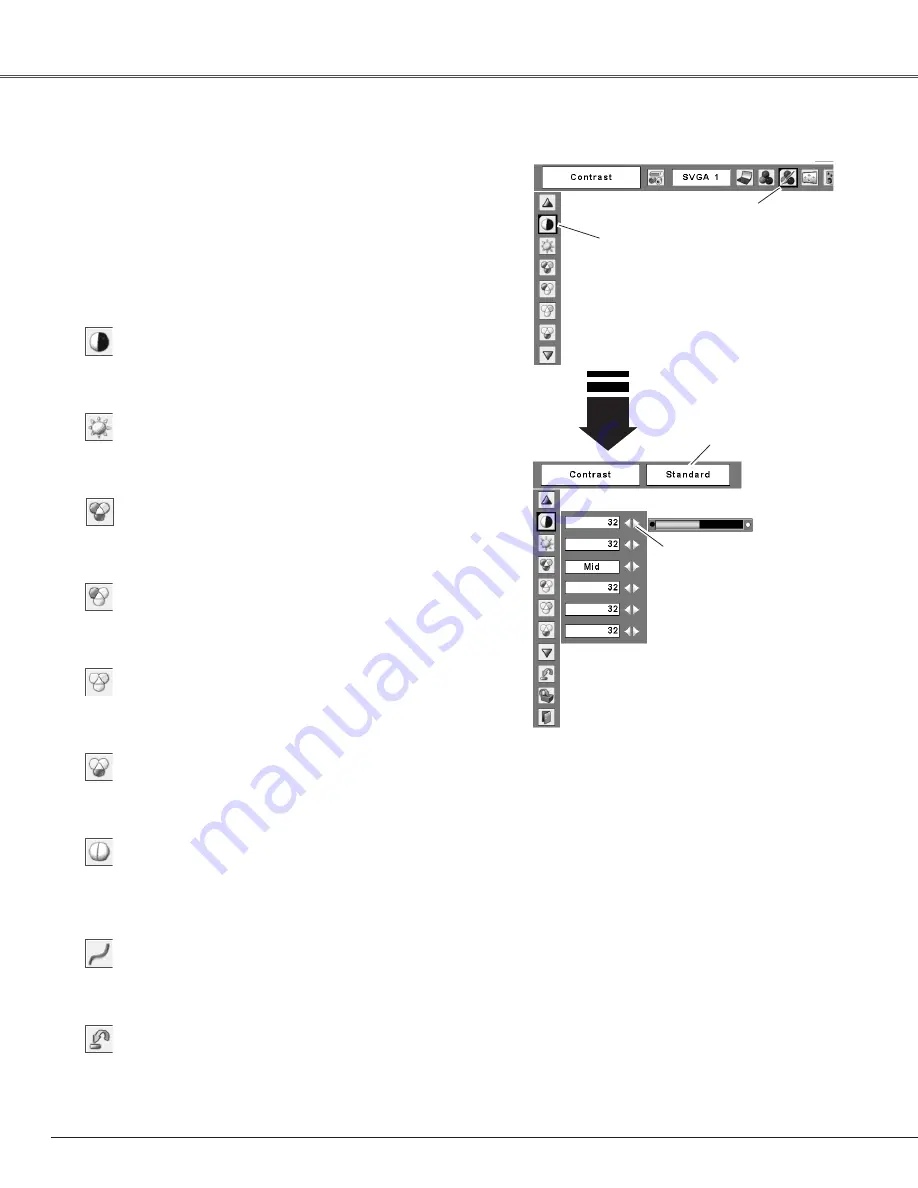
Press the MENU button to display the On-Screen
Menu. Press the Point
7 8
buttons to move the red
frame pointer to the Image Adjust Menu icon.
1
2
Use the Point
ed
buttons to move the red frame
pointer to the desired item and then press the SELECT
button to display the adjustment dialog box. Use the
Point
7 8
buttons to adjust the setting value.
Move the red frame
pointer to the item to be
selected and then press
the SELECT button.
Image Adjust Menu
Image Adjust Menu icon
Selected Image level
Image Adjustment
Computer Input
✔
Note:
After adjusting any of the White balance Red,
Green or Blue, the Color temp will change to
"Adj.".
Reset
Press the Point
7
button to decrease the contrast; press
the Point
8
button to increase the contrast (from 0 to 63).
Press the Point
7
button to decrease the brightness; press
the Point
8
button to increase the brightness (from 0 to 63).
Contrast
Brightness
Press the Point
7
button to lighten red tone; press the
Point
8
button to deepen red tone (from 0 to 63).
White balance (Red)
Press the Point
7
button to lighten green tone; press the
Point
8
button to deepen green tone (from 0 to 63).
White balance (Green)
Press the Point
7
button to lighten blue tone; press the
Point
8
button to deepen blue tone (from 0 to 63).
White balance (Blue)
Use the Point
7 8
buttons to select the desired Color temp.
level (High, Mid, Low, or XLow).
Color temp.
Use the Point
7 8
buttons to adjust the gamma value to
obtain a better balance of contrast (from 0 to 15).
Gamma
Press the Point
7
button to decrease the sharpness of the
image; press the Point
8
button to increase the sharpness
of the image (from 0 to 15).
Sharpness
To reset the adjusted data, select Reset and press the
SELECT button. A confirmation box appears and then select
[Yes]. All adjustments will return to their previous figures.


