29
MODE button
VIDEO MODE
Press the MENU button and the ON-SCREEN MENU will appear.
Press the POINT LEFT/RIGHT buttons to select Video
and
press the SELECT button.
SELECTING VIDEO MODE
DIRECT OPERATION
Select VIDEO mode by pressing the MODE button on the Top
Control or the VIDEO button on the Remote Control Unit.
MENU OPERATION
COMPUTER
VIDEO
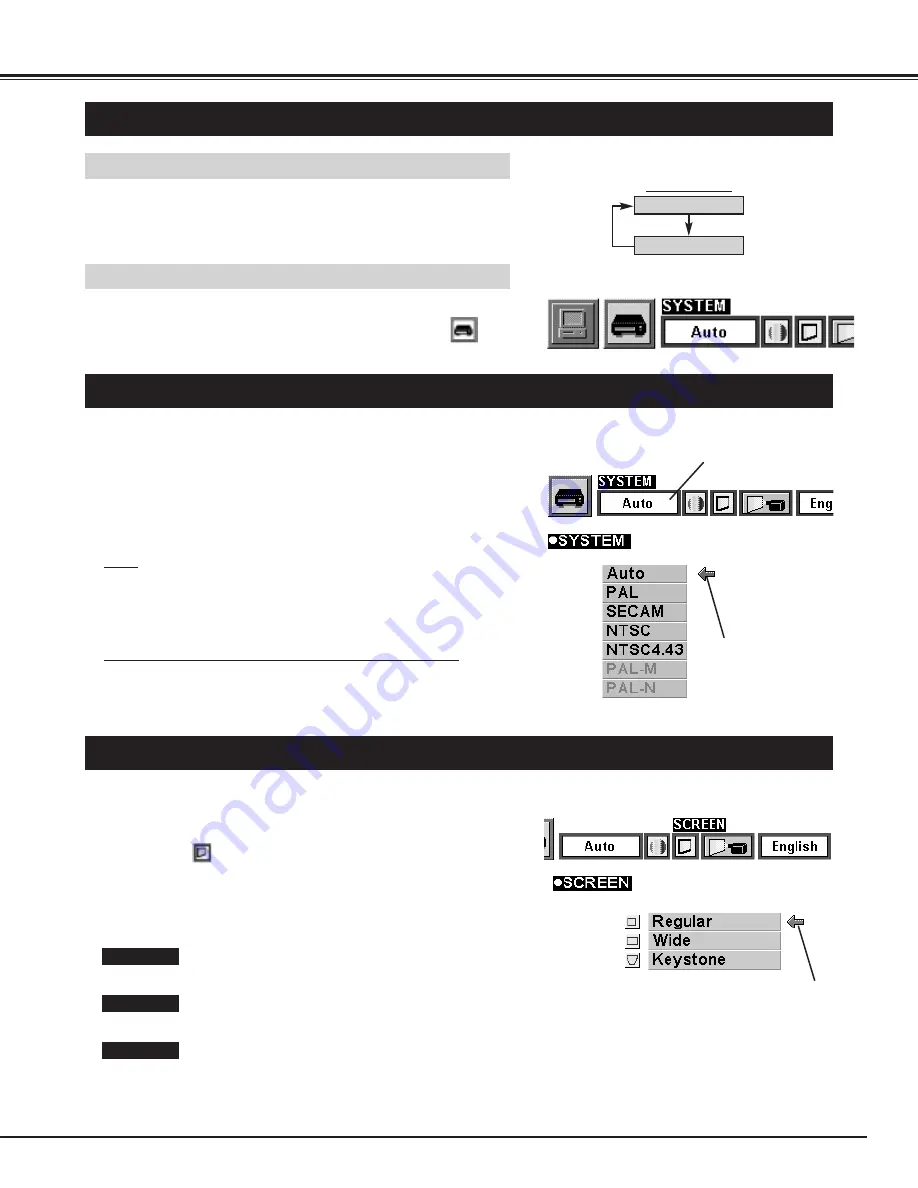
SELECTING COLOUR SYSTEM
Press the MENU button and the ON-SCREEN MENU will
appear. Press the POINT LEFT/RIGHT buttons to select
SYSTEM and press the SELECT button. Another dialog box
VIDEO SYSTEM Menu will appear.
Press the POINT DOWN button and a red-arrow icon will
appear. Move the arrow to "Auto", and then press the SELECT
button.
1
2
The projector automatically detects the incoming Video system, and
adjusts itself to optimize its performance.
When the Video System is PAL-M or PAL-N, select the system
manually.
Auto
If the projector cannot reproduce the proper video image, it is
required to select a specific broadcast signal format among PAL,
SECAM, NTSC, NTSC 4.43, PAL-M, or PAL-N.
PAL / SECAM / NTSC / NTSC4.43 / PAL-M / PAL-N
Move the arrow to
the Mode and press
the SELECT button.
PICTURE SCREEN ADJUSTMENT
This projector has a picture screen resize function, which enables you to display the image in desirable size.
Press the MENU button and the ON-SCREEN MENU will
appear. Press the POINT LEFT/RIGHT buttons to select
SCREEN
and press the SELECT button. Another dialog
box PICTURE SCREEN ADJUSTMENT DISPLAY will appear.
Press the POINT DOWN button and a red-arrow icon will
appear. Move the arrow to the screen size that you want to
set, and then press the SELECT button.
1
2
Normal Video Image size with 4 x 3 aspect ratio.
Resizes the image for wide screen size with 16 x 9 aspect ratio.
Move the pointer to the function that and
press the SELECT button.
Regular
Wide
Keystone
When the image is distorted vertically, select Keystone in the dialog
box. Correct the Keystone distortion by pressing KEYSTONE
▲
/
▼
button or POINT UP/DOWN button(s). Refer to KEYSTONE
ADJUSTMENT on page 20.
This box indicates the
system being selected.


