background image


13


   OPTIONAL COMPONENTS


  Temperature recorder


WARNING


Always disconnect the power supply to the unit prior to attachment of a temperature recorder 

in 

order to prevent electric shock or injury. 


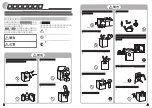
An automatic temperature recorders is available for the freezer as the optional component.    The type of 

the recorder is MTR-G85.    For the attachment, the mounting kit is necessary. 

Following shows the combination of recorder with the mounting kit: 


Temperature recorder 

Mounting kit 

MTR-G85 (circular chart type) 

MPR-S7 (for bottom mounting) 

MDF-S740T (for top mounting) 


In the case of top location 


MTR-G85 

MDF-S740T

Summary of Contents for MDF-U333

Page 1: ...MDF U333 MDF U537 MDF U537D BIOMEDICAL FREEZER INSTRUCTION MANUAL MDF U537 U537D ...

Page 2: ... SANYO Electric Biomedical Co Ltd All rights reserved Printed in Japan CONTENTS PRECAUTIONS FOR SAFE OPERATION P 2 CAUTIONS FOR USAGE P 6 ENVIRONMENTAL CONDITIONS P 7 FREEZER COMPONENTS P 8 INSTALLATION P 11 OPTIONAL COMPONENTS P 13 REMOTE ALARM TERMINAL P 18 TEMPERATURE SETTING P 19 ALARM SAFETY FUNCTIONS P 22 SETTING OF ALARM RESUME TIME P 23 ROUTINE MAINTENANCE P 24 TROUBLESHOOTING P 25 DISPOSA...

Page 3: ...t in a hazard to personnel possibly resulting in serious injury or death CAUTION Failure to observe CAUTION signs could result in injury to personnel and damage to the unit and associated property Symbol shows this symbol means caution this symbol means an action is prohibited this symbol means an instruction must be followed Be sure to keep this manual in a place accessible to users of this unit ...

Page 4: ...wer source A dusty plug or improper insertion may cause a hazard Use a power supply outlet with ground earth to prevent electric shock If the power supply outlet is not grounded it will be necessary to install a ground by qualified engineers Never ground the unit through a gas pipe water main telephone line or lightning rod Such grounding may cause electric shock in the case of an incomplete circu...

Page 5: ... level and sturdy floor for installation This precaution will prevent the unit from tipping Improper installation may result in water spillage or injury from the unit tipping over Connect the unit to a power source as indicated on the rating label attached to the unit Use of any other voltage or frequency other than that on the rating label may cause fire or electric shock When removing the plug f...

Page 6: ...se a breakdown Also do not make a hole in the wall for installation of attachments Hold the handle when closing the door This will reduce the likelihood of a trapped finger Disconnect the power supply plug before moving the unit Take care not to damage the power cord A damaged cord may cause electric shock or fire Be careful not to tip over the unit during movement to prevent damage or injury Disc...

Page 7: ... or rubber parts with volatile solvents such as benzine Wipe up the neutral detergents with a wet cloth when used 5 Frost will accumulate on the inside walls of the freezer during use Then remove the frost with the spatula provided or a similar tool Do not defrost inside walls using a knife or ice pick There are pipelines for cooling behind the walls Be careful not to damage the lines as this coul...

Page 8: ...umidity 80 for temperature up to 31o C decreasing linearly to 50 relative humidity at 40o C 5 Mains supply voltage fluctuations not to exceed 10 of the nominal voltage 6 Other supply voltage fluctuations as stated by the manufacturer 7 Transient overvoltages according to Installation Categories Overvoltage Categories II For mains supply the minimum and normal category is II 8 Pollution degree 2 in...

Page 9: ...8 FREEZER COMPONENTS MDF U537 U537D 1 6 MDF U333 2 11 3 4 12 9 13 1 11 2 3 4 9 13 6 5 7 5 12 7 10 8 8 ...

Page 10: ...hidden by frost defrost the freezer Refer to page 23 for instructions 9 Leveling foot Serves to adjust the height and to settle the frame evenly 10 Space for temperature recorder An automatic temperature recorder optional part can be attached here See page 13 Temperature recorder 11 Storage container Made of styrol resin Be careful not to damage the container by a metal scraper at the time of defr...

Page 11: ... 90 seconds during the temperature setting mode the temperature setting mode is invalid automatically See page 19 for the details 5 Digit shift key Pressing this key in the setting mode causes the changeable digit to shift Key lock is available by pressing this key for more than 5 seconds in the temperature display mode Refer to page 20 for the key lock 6 Numerical value shift key Pressing this ke...

Page 12: ...t refrigeration 4 A location with a sturdy and level floor WARNING Install the unit on a sturdy floor If the floor is not strong enough or the installation site is not adequate this may result in injury from the unit falling or tipping over Select a level and sturdy floor for installation This precaution will prevent the unit from tipping Improper installation may result in water spillage or injur...

Page 13: ...to contact them to the floor Ensure the unit is level 3 Fix the unit Two fixtures are attached to the rear of the frame Fix the frame to the wall with these fixtures and rope or chain 4 Ground earth WARNING Use a power supply outlet with ground earth to prevent electric shock If the power supply outlet is not grounded it is necessary to install a ground by qualified engineers Never ground the unit...

Page 14: ...tomatic temperature recorders is available for the freezer as the optional component The type of the recorder is MTR G85 For the attachment the mounting kit is necessary Following shows the combination of recorder with the mounting kit Temperature recorder Mounting kit MTR G85 circular chart type MPR S7 for bottom mounting MDF S740T for top mounting In the case of top location MTR G85 MDF S740T ...

Page 15: ...corder sensor with the cover provided fix the recorder sensor under the 2nd shelf by using 2 enclosed binders See Fig 2 7 Make a small cut on the rubber caps for capillary to pass 8 Replace the insulation into the access port and cover the port completely with the rubber caps 9 Remove the top cover of the freezer by unscrewing 6 screws Fig 3 10 Join the wire from the freezer and wire from the reco...

Page 16: ...ig 6 5 Remove the wire grille on the back bottom of the freezer See Fig 7 6 Route the capillary tube of the recorder to the back of the freezer through the unit compartment 7 Remove 2 rubber caps outside and inside on the access port on the back of the freezer and also remove the insulation in the port 8 Pass the recorder sensor into the chamber through the access port Fig 8 9 After covering the r...

Page 17: ...fter covering the recorder sensor with the cover provided fix the recorder sensor under the 2nd shelf by using 2 enclosed binders See Fig 11 6 Make a small cut on the rubber caps for capillary to pass 7 Replace the insulation into the access port and cover the port completely with the rubber caps 8 Remove the top cover of the freezer by unscrewing 6 screws Fig 12 9 Join the wire from the freezer a...

Page 18: ...4 Remove the wire grille on the back bottom of the freezer See Fig 16 5 Route the capillary tube of the recorder to the back of the freezer through the unit compartment 6 Remove 2 rubber caps outside and inside on the access port on the back of the freezer and also remove the insulation in the port 7 Pass the recorder sensor into the chamber through the access port Fig 17 8 After covering the reco...

Page 19: ...ote alarm is installed at the back of the unit The alarm is generated from this terminal Contact capacity is DC 30V 2 A Contact output At normal condition Open At abnormal condition Close Note The remote alarm is silenced by pressing the BUZZER key as the remote alarm is operated in conjunction with the buzzer except for the power failure alarm and alarm test ...

Page 20: ...the temperature indicator flashes 4 Set the temperature to 25 with the digit shift key and the numeric value shift key By pressing the key settable digits moves By pressing the key the numerical value of the settable digits increases 5 Press SET key SET When pressed the figure of settable digit increases 6 By pressing the compartment select key select the bottom compartment MDF U537D only TOP BOTT...

Page 21: ...ation after operation 1 The current chamber temperature is displayed 2 Press key for 5 seconds The right digit is flashed 4 Press key and scroll the figure to 1 When pressed the figure of settable digit increases 5 Press SET key SET The key lock is set to ON The current chamber temperature is displayed Note The key lock only works with the chamber temperature setting and the DEF key In the MDF U53...

Page 22: ...erature Table 3 Procedure for setting high temperature alarm Description of operation Key operated Indication after operation 1 The current chamber temperature is displayed 2 Press key for 5 seconds The first digit is flashed 3 Press key and scroll the figure to 1 When pressed the figure of settable digit increases 4 Press SET key SET The right digit is flashed Pressing the key shifts the digit wh...

Page 23: ...ve sensor for compressor is disconnected ALARM lamp is flashed E05 and chamber temp are displayed alternately Thermal sensor abnormality MDF U537 U537D only If the protective sensor for compressor is short circuited ALARM lamp is flashed E06 and chamber temp are displayed alternately Intermittent tone Remote alarm Normal operation If the thermal sensor for lower chamber is disconnected ALARM lamp ...

Page 24: ...st digit is flashed Pressing the key shifts the digit which can be set 3 Set the figure to F25 with the key and key When pressed the figure of settable digit increases 4 Press SET key SET The current reset time is displayed The middle digit is flashed 5 Set the figure to 020 with the key When pressed the figure of settable digit increases 6 Press SET key SET Alarm temperature is memorized and the ...

Page 25: ...shown by 8 in the figure on page 8 is hidden by frost Use the scraper provided for removing the frost if the freezer operation must be continued Pay attention not to impact or damage the inner wall In the case of MDF U537D the top and bottom compartments can be defrosted independently Perform the following procedure after first using the compartment select key to select the compartment to be defro...

Page 26: ... When the unit does not accept changes of set point temperature 1 The key lock is set in ON mode Noise 1 The freezer is not installed on the sturdy floor 2 The freezer is not leveled with the leveling feet 3 There is anything touching the frame 4 The freezer is in the status immediately after start up The unit sometimes causes a noise when the chamber temperature is high due to the large load The ...

Page 27: ...etic type 225 W Hermetic type 350 W Refrigerant R 134a R 407D Temperature controller Electronics controller between 18 and 40o C Temperature display Digital display between 50 and 50o C Temperature sensor Thermistor sensor Temperature alarm Flash of digital indicator and alarm lamp Buzzer Remote alarm Accessories 1 set of key 1 scraper 4 card holders 4 large baskets W446 x D369 x H220 mm 1 small b...

Page 28: ...C to 30o C Rated voltage AC 110 V AC 115 V AC 220 V AC 220 to 240 V Rated frequency 60 Hz 60 Hz 60 Hz 50 Hz Rated power consumption 220 W 230 W 190 W 205 W Noise level 42 dB A background noise 20 dB Maximum pressure 1850 kPa MDF U537D Cooling performance 30o C ambient temperature 35o C no load Temperature control range 20o C to 30o C Rated voltage AC 110 V AC 115 V AC 220 V AC 220 to 240 V Rated f...

Page 29: ... Unit interior No contamination Decontaminated Contaminated Others 3 Instructions for safe repair maintenance of the unit a The unit is safe to work on b There is some danger see below Procedure to be adhered to in order to reduce safety risk indicated in b below Date Signature Address Division Telephone Product name Biomedical Freezer Model MDF U333 U537 U537D Serial number Date of Installation P...

Page 30: ...7FB6P101288007 5 April 2005 Recycled paper SANYO Electric Biomedical Co Ltd 10 15 Hongo 3 Chome Bunkyoku Tokyo 113 8434 Japan Printed in Japan ...

Reviews: