


12
The setting for sound system is only active in TV mode. Usually, the sound system is set to the
position of "B/G". In case of abnormal sound, repeatedly press POINT
◄►
buttons to select "D/K",
"I", "M" or "B/G" until the best sound effect is reached.
This feature is used to remove unwanted channels from the channel scanning memory.
You can skip the unused or undesired channels when you are
selecting a channel using CHANNEL UP/DOWN (
▲▼
) buttons.
This function is only active in TV mode.
To swap the channels between two stored programme positions.
Press MENU button to display the main menu.
1
SOUND SYSTEM
COLOUR SYSTEM
The setting for colour system is only active in TV or AV mode. Usually, the colour system is set to
the position of "AUTO". In case of abnormal colour, repeatedly press POINT
◄►
buttons to select
"AUTO", "PAL", "SECAM", "NTSC" or "NTSC4.43" until the best colour effect is reached.
SKIP
CHANNEL SWAP
Enter into "CHANNEL" menu, press POINT
▲▼
buttons to select CHANNEL SWAP.
2
Press POINT
◄►
buttons or ENTER button to enter into the CHANNEL SWAP menu. Press
POINT
▲▼
buttons to select the CURRENT CHANNEL or TARGET CHANNEL, then press
POINT
◄►
buttons to select the swap channel. And then press POINT
▲▼
buttons to select
SWAPPING item, then press POINT
◄►
buttons or ENTER button to select "OK".
3
■
Press BACK button to return to the previous menu.
■
Press MENU button or wait for 5~60 seconds to exit menu operation.
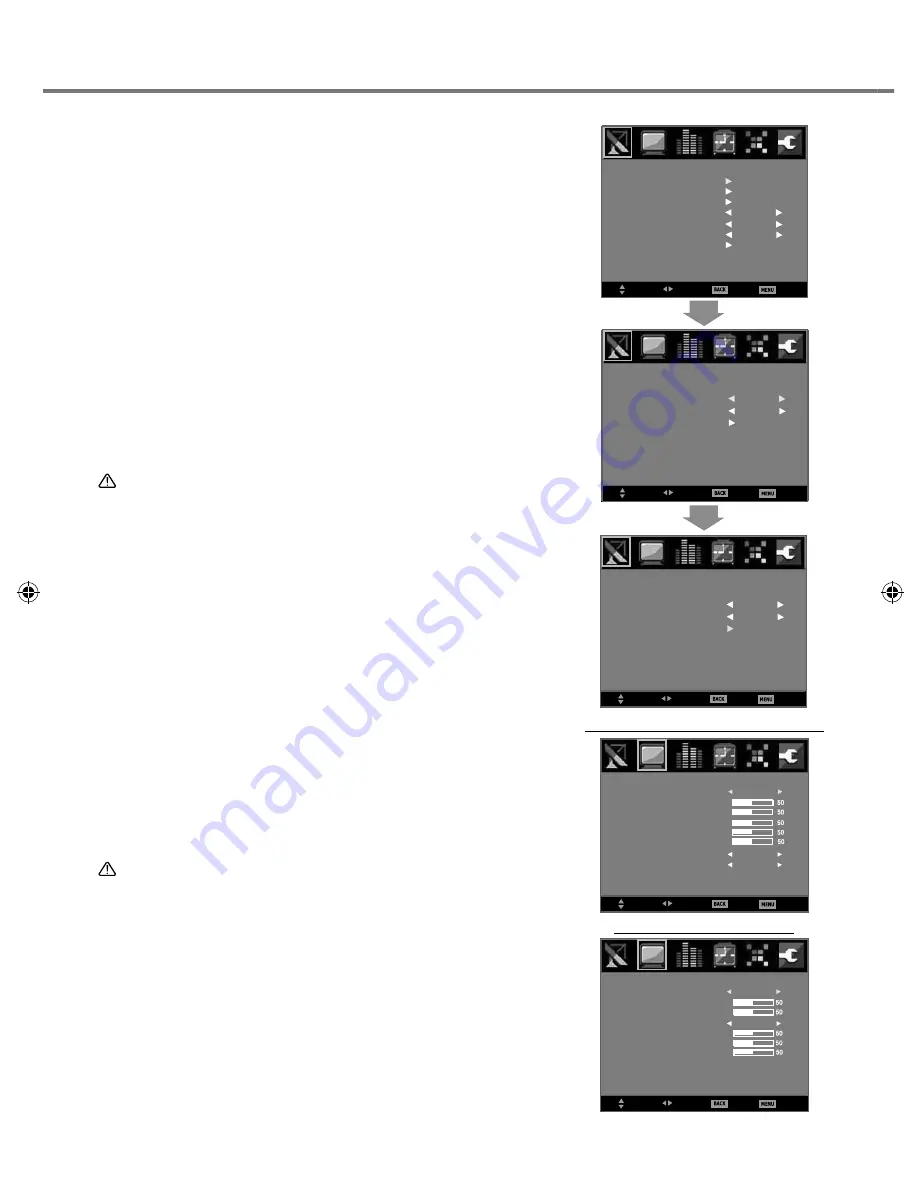
CHANNEL
SEMI-AUTO SEARCH
MANUAL SEARCH
COLOUR SYSTEM
SOUND SYSTEM
SKIP
CHANNEL SWAP
AUTO
B/G
OFF
AUTO SEARCH
SELECT
ADJUST
BACK
EXIT
:
:
:
:
SELECT
ADJUST
BACK
EXIT
:
:
:
:
CHANNEL
CURRENT CHANNEL
TARGET CHANNEL
CHANNEL SWAP
12
16
SWAPPING OK
SELECT
ADJUST
BACK
EXIT
:
:
:
:
CHANNEL
CURRENT CHANNEL
TARGET CHANNEL
SWAPPING
CHANNEL SWAP
12
16
Note:
When enter into CHANNEL SWAP menu again, TARGET CHANNEL will be turn to 0.
1
Note:
●
"TINT" cannot be selected except for NTSC/ NTSC4.43 system.
●
Only COLOUR TONE and GAMMA are available when SPORTS mode is ON.
PICTURE
Press MENU button and the main menu will appear. Press POINT
◄►
buttons to select
"PICTURE", and will display PICTURE menu.
■
Press BACK button to return to the previous menu.
■
Press MENU button or wait for 5~60 seconds to exit menu operation.
PICTURE MODE:
Used for selecting "STANDARD", "VIVID", "SOFT", "PERSONAL" or "DYNAMIC".
CONTRAST:
Used to decrease and increase contrast.
BRIGHTNESS:
Used to adjust darken and brighten image.
COLOUR:
Used for lighten and darken colour. (Only in TV/AV/HDMI mode).
TINT:
Used to obtain proper colour.
SHARPNESS:
Used for soften and sharpen the image. (Only in TV/AV/HDMI mode).
COLOUR TONE:
Used for selecting colour temperature. Select "NORMAL", "WARM" or "COOL".
GAMMA:
This function is used for adjusting the gamma value to obtain a better balance of
contrast. Select "LOW", "MIDDLE", or "HIGH".(Only in TV/AV/HDMI mode).
COLOUR-R:
Used to lighten and deepen red tone. (Only in PC mode).
COLOUR-G:
Used to lighten and deepen green tone. (Only in PC mode).
COLOUR-B:
Used to lighten and deepen blue tone. (Only in PC mode).
PICTURE MENU (TV/AV/HDMI MODE)
PICTURE MENU (PC MODE)
SELECT
ADJUST
BACK
EXIT
:
:
:
:
PICTURE
CONTRAST
COLOUR
SHARPNESS
PICTURE MODE
TINT
COLOUR TONE
GAMMA
BRIGHTNESS
STANDARD
NORMAL
LOW
2
Press POINT
▲▼
buttons or ENTER button to enter into PICTURE menu.
Press POINT
▲▼
buttons to select the item desired.
3
Press POINT
◄►
buttons to adjust the item.
4
SELECT
ADJUST
BACK
EXIT
:
:
:
:
PICTURE
CONTRAST
COLOUR - R
COLOUR - B
PICTURE MODE
COLOUR - G
BRIGHTNESS
COLOUR TONE
STANDARD
NORMAL
MENU OPERATION


