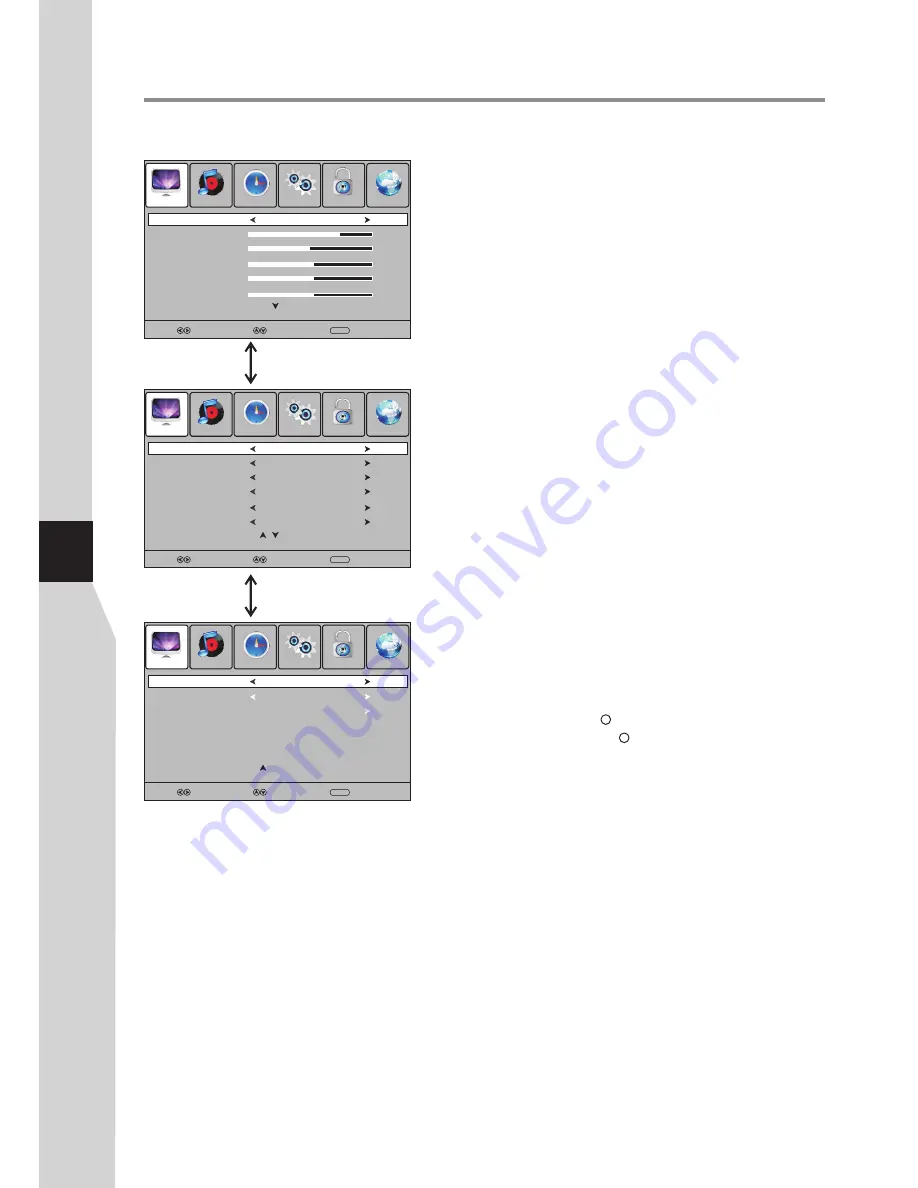
Adjusting the Picture
Adjusting the picture
To adjust the picture:
1
Press
6
5
to highlight an option, press
3
4
to adjust the option;
If a sub-menu exits, press
4
or
OK
to access. You can select:
2
Press
MENU
. The on-screen menu opens with the
PICTURE
menu displayed, then press
6
to access.
!
Picture Mode
— Selects the picture mode. You can select:
. Dynamic
(a bright and vivid picture,
recommended for store use.
When the TV is powered on in this picture mode, a reminder appears)
. Standard
(a standard picture)
. Mild
(a soft picture)
. User
(user customized picture).
Note:
You can also press
P.MODE
to select the picture mode.
!
Contrast
— Adjusts the contrast.
!
Brightness
— Adjusts the brightness.
!
Colour
— Adjusts the colour saturation.
!
Sharpness
— Adjusts the sharpness.
!
Tint
— Adjusts the image tint. (Only for NTSC system)
!
Colour Temperature
— Selects the colour temperature. You
can select
Warm
(to enhance the reds),
Cool
(to enhance the
blues), or
Normal
.
!
Aspect Ratio
— Selects the aspect ratio of the picture. You
can select:
. 16:9
— Shows a full-screen picture in 16:9 mode.
. 4:3
— Shows picture in 4:3 display mode. (Recommended not
let TV remain in this mode for extended period of time as to
protect the screen.)
.
Auto
— Selects the correct aspect ratio automatically.
. Zoom1
— Enlarges the picture vertically. The top and bottom
may be cropped.
.
Zoom2
— Enlarges picture both horizontally and vertically.
The edges may be cropped.
.
1:1 pixel mapping
(D-SUB, HDMI only)
— Displays an input
source without scaling it (This option is available on either of
these two conditions:
native resolution:1920x1080, input
resolution:1920 x 1080p; native resolution:1366x768, input
resolution:1360 x768).
Note:
You can also press
ZOOM
to select the aspect ratio.
!
Noise Reduction
— Selects the noise reduction mode to
reduce picture noise (snow). You can select
Low, Middle,
High,
or
Off
.
!
Light Sensor
— Select
On
to enable the automatic brightness
control. The light sensor measures the room brightness which
allows the TV to automatically adjust the picture brightness,
based on the ambient room light conditions.
Note:
Be sure not to put anything around the light sensor on the
TV front, as its function may be affected.
!
Light Status
— When Light Sensor is turned
On
, the ambient
room light status will appear at this line. You can check the light
status to know whether it is
dark
or
normal
or
bright
.
!
Overscan
(D-SUB,HDMI only) — Turn this
On
to adjust the
picture’s reproduction rate (available when the TV’s aspect
ratio is in 4:3 or16:9 and the input signal is in video format).
!
Adaptive Contrast
— Turn this
On
to optimize the picture
display for a more vivid image.
!
HDMI Black Level
(HDMI only) — Selects the black level on
the screen. Select
Low
for darker screen,
Normal
for brighter
screen. (Available when RGB signal is input through HDMI jack).
!
Screen
(D-SUB only) — Adjusts the computer image.
1
2
Press
the
FREEZE
button
to
freeze
the
image
on
the
screen
(
the
video
sources
still
run
).
Press
again
to
restore
.
SELECT
MOVE
MENU
RETURN
Contrast
75
Brightness
45
Sharpness
50
Colour
50
Tint
50
PICTURE
SOUND
TIME
OPTION
LOCK
CHANNEL
2
SELECT
MOVE
MENU
RETURN
Aspect Ratio
Noise Reduction
Light Status
Light Sensor
Overscan
PICTURE
SOUND
TIME
OPTION
LOCK
CHANNEL
16:9
Middle
Off
Off
On
2
SELECT
MOVE
MENU
RETURN
HDMI Black Level
PICTURE
SOUND
TIME
OPTION
LOCK
CHANNEL
Picture Mode
User
Colour Temperature
Normal
Adaptive Contrast
On
Press
6
or
5
to
scroll the menu
Press
6
or
5
to
scroll the menu
2
Freezing the picture
Note
:
!
long
time
,
that
fixed
image
may
become
imprinted
on
the
screen
and
remain
visible
.
Therefore do not freeze the picture for a long
time.
!
In some mode, the FREEZE function can not
work.
If a fixed image is displayed on the screen for a
22
Screen
Normal
Summary of Contents for LCD-40XR10F
Page 38: ...5944037280 Ver 1 0 ...


