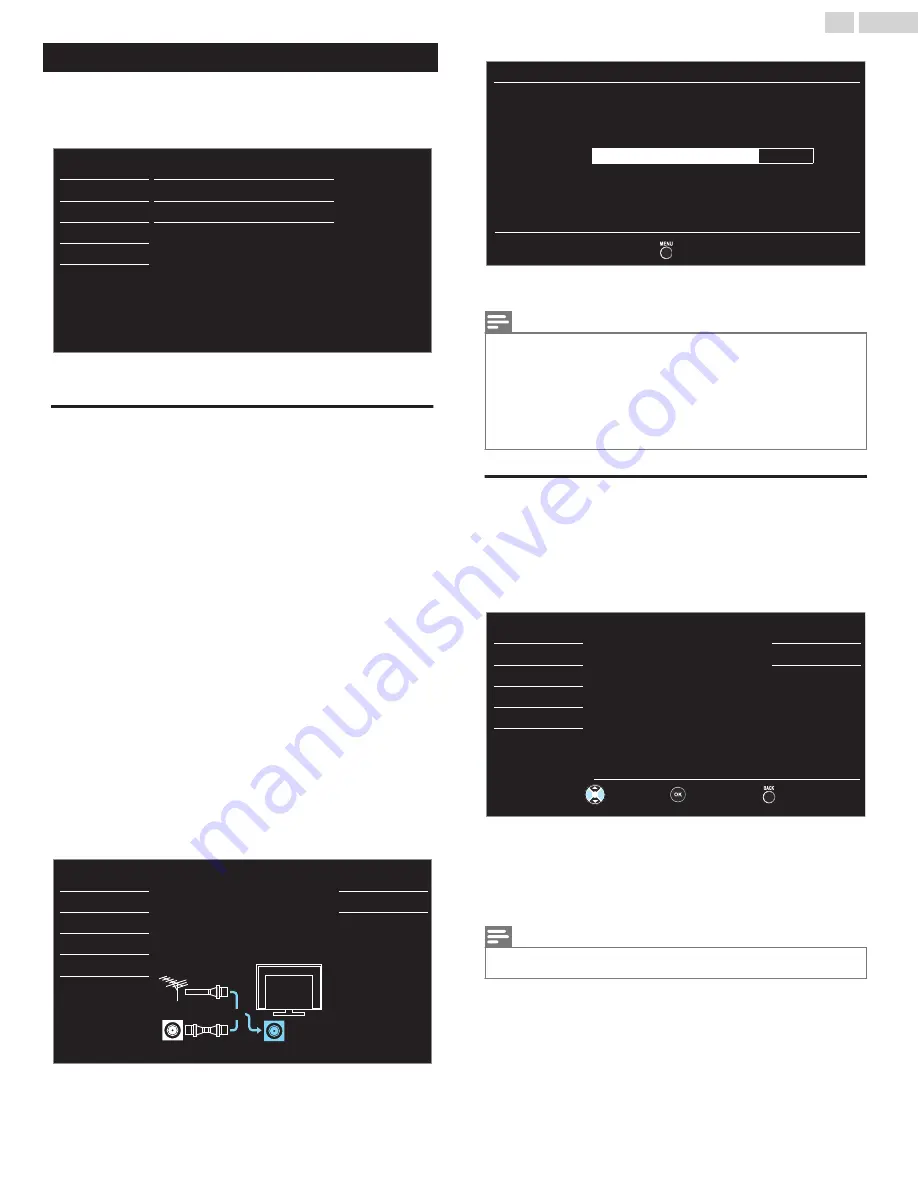
Setup
Before you begin:
Make sure the unit is connected to antenna or cable.
1
Press
MENU
and use
H
I
to select
Setup
, then press
OK
.
Antenna
Add channels
Channel list
Autoprogram
USB
Language
Features
Setup
Sound
Picture
2
Adjust the following items.
Autoprogram
Be sure the RF cable is correctly connected to this unit and you are
registered with your cable TV provider when you install cable channels.
1
Use
H
I
to select
Autoprogram
, then press
OK
.
●
If you run
Autoprogram
when you have locked channels, a
message appears asking to enter your PIN. Enter your child Lock
PIN in order to complete the installation. (Default PIN code is
0, 0,
0, 0
.) You need to reset or set the channel lock again after the
installation.
2
Use
H
I
to select antenna for program local over the air channels
or unencrypted cable channels, then press
OK
.
●
When select
Yes
enter to autoprogram comfirmation selection
frame.
●
When select
No
go to set top box frame.
3
Use
H
I
to select
HDMI
or
RF
on the right side of the screen, then
press
OK
.
●
When select
HDMI
, the TV change source to HDMI 1.
●
When select
RF
, the TV enter to autoprogram comfirmation
selection frame.
4
Use
H
I
to select an appropriate option, then press
OK
.
–
When
Antenna
is selected, the TV detects any Off-the-Air
antenna signals. It searches for ATSC (Digital) and NTSC
(Analog) channels available in your area.
–
When
Cable
is selected, the TV detects signals supplied by
cable. It searches for ATSC (Digital), NTSC (Analog) and Cable
channels available in your area.
Cable
Antenna
Back
ANTENNA IN
Or
Cable
Antenna
Select your signal source.
Language
Features
USB
Setup
Sound
Picture
####
than 20 minutes to complete.
Auto programming may take more
Auto program will rescan all channels.
Exit
6 ch
Analog channels
10 ch
Digital channels
75%
to complete.
Auto programming may take more than 20 minutes
channels.
Please wait while the system is scanning for
Autoprogram
●
When the scanning and memorizing of available channels is
completed, the lowest memorized channel will be displayed.
Note(s)
●
After setting
Autoprogram
, using
CH + / –
skips unavailable channels automatically.
●
If you are not receiving a signal from your cable service, contact the cable provider.
●
If you press
B
or
MENU
during Autoprogram, the setup of TV channels will be cancelled.
●
Even if
Autoprogram
is completed, the channel setting will be lost if the AC power cord is
unplugged before the unit goes into standby mode by pressing
B
.
●
The PIN code will be required once you set a PIN code in the
Child and ratings lock
●
If you want to change your PIN code, follow the instruction for
Change PIN
.
Channel list
The channels selected in the
Channel list
can be skipped when selecting
the channels using
CH + / –
.
These channels can still be selected with
the NUMBER keys
.
1
Use
H
I
to select
Channel list
, then press
OK
.
2
Use
H
I
to select the channel you want to remove, then press
OK
.
DTV
DTV
DTV
11.1
11.2
11.3
Back
Watch / Skip
Ch Select
key selection.
Highlight channels for Ch Up/Down
USB
Language
Features
Setup
Sound
Picture
●
The channel display for the removed channel darkens. You will not
be able to select the channel again using
CH + / –
.
●
To reactivate a removed channel, use
H
I
and press
OK
. The
registered channels are highlighted.
●
When you remove a main channel, its subchannels are removed
as well.
Note(s)
●
The channel with
DTV
indicated on the display is digital TV (ATSC). Otherwise the channel
is analog TV (NTSC).
23
.
English
Continued on next page.
Summary of Contents for FW43D47F
Page 39: ...AAAV3UT 43FL ...


