background image

-3-

3. Insert the plug into the socket. The power supply is 220~240V/50Hz

2. With a little force to ensure the door is properly closed.

Note:

 A click  could be heard when the door is closed perfectly.

2. Press  the programme button to select the desired programme.
3. Press the 

 button to start washing.

Start/Pause

The maximum number of  place settings to be washed is 12.

Upper Basket
Spray Arms
Lower Basket

Detergent Dispenser

Main Filter

5
6

Silverware Basket

Cup Shelf

7
8

Rinse Aid Dispenser

Coarse Filter

Drain pipe connector
Inlet pipe connector

9

10

12

11

3

2

1

Water Softener(Option)

4

11

12

1

2

3

4

5

6

7

8

9

10

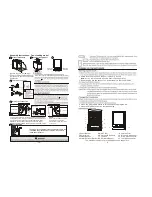
Assembly instructions - Free-standing model 

Turn

2

3

4

Once the appliance is positioned, adjust the feet (screwing 
 

more than 2 .

Drain pipe 
connector  

Inlet pipe 
connector

 BACK VIEW
  

  Product dimensions
  

1

     (All sizes are given in millimetres)  

 We reserve the right to make technical 
 modifications.  

600

580

850

113

5

POWER OUTLET   

The plug must be plugged into an appropriate  outlet  that
 is  installed  and  grounded  in  accordance with  all  local 
codes and ordinances.


Inlet pipe connection

6

Insert the plug

 Ma

x


10

0

0

mm

Mi

n


4

00m

m


Inlet pipe 

connector

Drain pipe connector  

PO W ER 
O U TL ET   

SINK  

DISHWASHER  

Min 100mm

Insert the drain hose into the drain pipe and fix properly with 
a clamp. Make sure there is no bending on the drain pipe (You 
may use the special plastic support that attached with the 
appliance). The free end of the hose must be at a height 
between 400 and 1000mm and must not be immersed in water.

Drain pipe connection

5

 FRONT  VIEW
  

Min 100mm

 FRONT  VIEW
  

Please refer to above picture, 
if you want to install the 
dishwasher at the right side 
of the sink.

NOTE :  
  

-14-


Summary of Contents for DW-M600F

Page 1: ...INSTRUCTION MANUAL DISHWASHER DW M600F DW MS600F ...

Page 2: ...Instructions Installation Instructions and Troubleshooting Tips etc Carefully reading it before using the dishwasher will help you to use and maintain the dishwasher properly About Electricity connection 11 Before calling for service 12 13 Assembly instructions 14 ...

Page 3: ......

Page 4: ...her only for its intended function 1 Power Switch Turns the power supply on or off 2 Half load washing light To come on when select the Half load wash option Do not open the door when washing You maybe burnt by hot water ...

Page 5: ...n 2 Drain pipe connector Inlet pipe connector BACK VIEW Product dimensions 1 All sizes are given in millimetres We reserve the right to make technical modifications 600 580 850 1135 POW ER OUTLET The plug must be plugged into an appropriate outlet that is installed and grounded in accordance with all local codes and ordinances Inlet pipe connection 6 Insert the plug Max 1000mm Min 400mm Inlet pipe...

Page 6: ... not opened Malfunction of temperature sensor or of heating element Too much inlet water Open circuit or break of temperature sensor Short circuit or break of temperature sensor For normal soiled loads such as plates glasses and lightly soiled pans standard daily cycle pots 5 25 g 4 Combination of soft water and too much detergent a shortest cycle to wash the glassware and to get them clean Tea or...

Page 7: ...opped into the basket Motor hums Improper detergent Spilled rinse agent Always wipe up rinse agent spills immediately Detergent with colorant was used Rinse agent dispenser is empty Make sure that the rinse agent dispenser is filled Some audible sounds are normal Power supply is not turned on Overflow 12 Improper program Improper rack loading Select stronger program ...

Page 8: ... overfill Replace the cap by inserting it aligned with open arrow and turning it to the closed right arrow There are two ways to reduce the hardness one way is using water softener the other is using detergent water If the sink is 1000 higher from the floor the excess water in hoses cannot be drained directly into the sink It will be necessary to drain excess water from hoses into a bowl or suitab...

Page 9: ...t performance and results the filter assembly must be cleaned The filter efficiently removes food particles from the wash water allowing it to be recirculated during the cycle For this reason it is a good idea to remove the larger food particles trapped in the filter after each wash cycle by rinsing the semicircular filter and cup under running water To remove the filter assembly pull on the cup h...

Page 10: ...the water inlet pipe from the water valve 3 Drain water from the inlet and water valve pipe Use a pan to catch the water 4 Reconnect the water inlet to the water valve pipe 5 Remove the filter in the tub the bottom and use a sponge to soak up water in sump ATTENTION Do not put the fine filter upside down 4 4 3 2 6 4 4 4 5 4 4 4 4 1 1 1 1 1 1 1 1 1 4 4 4 1 1 1 5 5 5 5 5 5 5 5 5 5 5 2 2 2 2 2 2 2 2 ...

Reviews: