POWER
VOL
CH
POWER
VOL
CH
1
4
5
6
7
8
0
9
2
3
POWER
INPUT
INFO
RECALL
MENU
CAPTION EXIT
VOL
RESET
AUDIO
PIX SHAPE
CH
ENTER
TUNER MUTE
SLEEP
GENERAL
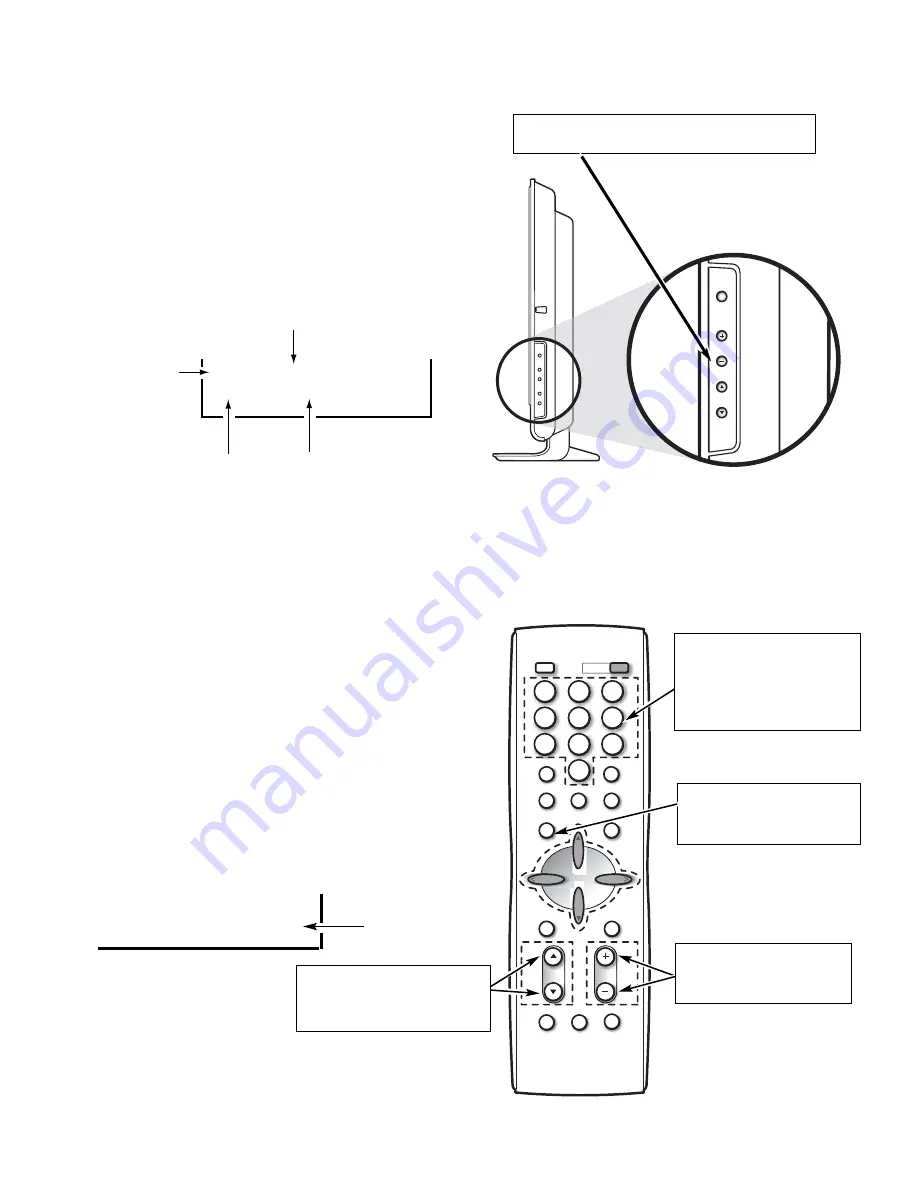
This set has an On-screen Service Menu system included in
the CPU that allows remote operation for most of the ser-
vice adjustments.
ON-SCREEN SERVICE MENU SYSTEM
1. Enter the Service Menu:
•
Turn off the receiver and disconnect the AC power
supply.
•
While pressing the Volume (–) button on the televi-
sion, reconnect the AC power supply. The Service
Menu will now appear. The remote can now be used
to make adjustments. See Figure 1 below.
2. Service Adjustments:
•
Press the
Channel
or
key to select the desired
service menu item you want to adjust. See page 4
for the On-screen Service Menu.
•
Use the
Volume
+ or – key or number keys to adjust
the data.
The + or – keys will increase or decrease the data
sequentially. The number keys (0 ~ 7) toggle only
their respective bits between 1 and 0 and are used to
change the Sub-Address. For example to change bit
5 press the number 5 key. See below.
Note:
Using the + or – is not recommended due to possi-
ble rapid changes.
3. Exit from the Service Menu:
•
Press the
MENU
key to turn off the Service Menu
display.
— 3 —
SERVICE ADJUSTMENTS
(b7) (b6) (b5) (b4) (b3) (b2) (b1) (b0)
0 1 0 1 0 1 1 0
BINARY DATA
(8 bit)
Menu:
Exit Service Menu
Volume + / –:
Adjust Service Menu
Numeric:
0, 1, 2, 3, 4, 5, 6, 7:
Change Binary Data
Volume –
:
Enter Service Menu
080
ATT
07
00000111
Figure 1. Service Menu Display
ITEM NO.
TITLE
BINARY DATA
(8 bit)
HEX DATA
Channel
:
Select Item


