background image

29

ENGLISH

Program playback

1

Press 

PLAY MODE

 during playback or stop mode.

Play Mode screen will appear.

2

Press 

/

 to select “Program”, then press   or 

ENTER

.

3

Press 

/

 to select 

“Create/Edit”, then 

press 

ENTER

“Create/Edit” display 

differs, depending on 

discs or files.

Program Step

01. 01
02.
03.
04.
05.
06.
07.
08.

Title 1-38

Title 01
Title 02
Title 03
Title 04
Title 05
Title 06
Title 07
Title 08

 Chapter 1-004 

  Chapter 001
  Chapter 002
  Chapter 003
  Chapter 004

Program

Current

Title:02

Chapter:001

4

Press 

/

/

/

 to select Title, Chapter, Track or 

File, then press 

ENTER

.

When you add a program, find where you 

want to add it (Program Step) and select Title, 

Chapter or Track then press 

ENTER

. (It will be 

added to the left if File is added.) 

To go to previous step, press 

RETURN

.

If 

RETURN

 is pressed while programming, the 

content will be deleted.

To delete a program, select Program Step that 

you want to delete and press 

CANCEL

.

5

Press 

PLAY ( )

.

To play existing programmed contents, select 

“Playback Start” from Play Mode screen and 

press 

ENTER

.

To resume normal playback, select “Playback 

Stop” in Play Mode screen and press 

ENTER

Your programmed contents are saved.

To delete all programmed contents, select 

“Program Delete” in Play Mode screen and 

press 

ENTER

.

NOTE:

You can repeat the programmed contents. Select 

“Program Repeat” from “Repeat” in the Play Mode 

screen during Program playback. 

You cannot play Random for programmed 

contents (Random play is not permitted during 

Program playback).

In stop mode, you can also enter Play Mode 

screen by selecting “Play Mode” in HOME MENU.

Locating desired scene

1

Press 

PLAY MODE

 during playback or stop mode.

Play Mode screen will appear.

2

Press 

/

 to select “Search Mode”, then press 


or 

ENTER

.

3

Press 

/

 to select desired search mode option, 

then press 

 or 

ENTER

.

Search Mode options differs, depending on 

discs or files.

4

Input Title, Chapter, 

Track or Folder number 

or Time by using 

Number buttons 

(0–9)

 and press 

ENTER

.

0   0   1

Title Search

Chapter Search

Time Search

Input Chapter

A-B Repeat

Repeat

Random

Program

Search Mode

Play Mode

For instance, if you want to enter 1hr 4min 

(64:00), input 6, 4, 0, 0.

NOTE:

You can locate desired scene in menu screen 

for some DVD video.

In stop mode, you can also enter Play Mode 

screen by selecting “Play Mode” in HOME 

MENU.

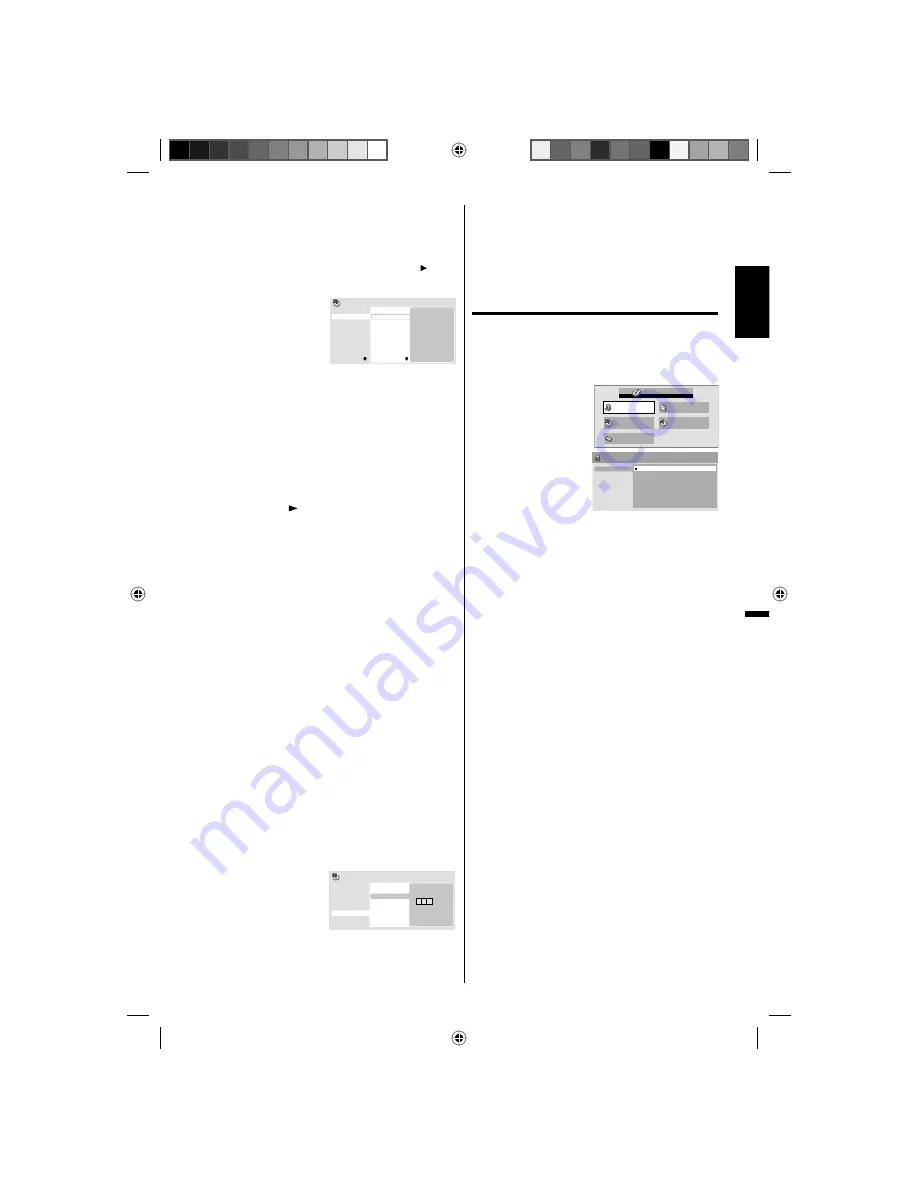
Audio Settings menu

The Audio Settings menu offers features for adjusting 

the way discs sound.

1

Press 

SETUP

 during stop mode.

HOME MENU will appear.

2

Press 

/

/

/


to select “Audio 

Settings”, then press 

ENTER

.

Audio Settings

Video Adjust

Disc Navigator

Play Mode

Initial Settings

HOME MENU

DVD

3

Press 

/

/

/

 to 

setting the option, 

then press 

ENTER

.

Audio Settings

Equalizer

Audio DRC

Dialog

Off
Rock
Pop
Live
Dance
Techno
Classic
Soft

4

Press 

SETUP

 to save the setting.

Equalizer

Select the most suitable setting to match a 

category of music that you are listening to.

Audio DRC

Adjusts loud sound levels down and quiet 

sound levels up while playing. This is useful, 

for instance, when you watch a film in the late 

night.

Audio DRC only works with Dolby Digital 

Sound.

The effect depends on your AV amplifier and 

speaker volume. Adjust the sound as you wish 

and find the most effective setting.

Dialog

Adjust setting when you cannot hear dialogs very 

well.

NOTE:

It may not be very effective for some discs or 

files.

56Q0221A_eng.indd   29

56Q0221A_eng.indd   29

1/11/11   4:20:26 PM

1/11/11   4:20:26 PM

Summary of Contents for DP26671

Page 1: ...ENGLISH J56Q0221A ESPAÑOL 56Q0221A_eng indd 1 56Q0221A_eng indd 1 1 8 11 5 31 34 PM 1 8 11 5 31 34 PM ...

Page 2: ...riginal dated sales receipt for evidence of purchase Return the defective TV to the retailer along with the receipt and the included accessories such as the remote control The defective TV will be exchanged for the same model or a replacement model of equal value if nec essary Replacement model will be contingent on availability and at the sole discretion of Sanyo Manufacturing Corporation THE FOR...

Page 3: ...nderwriter s Laboratories Inc It is designed and manufactured to meet rigid U L safety standards against risk of fire casualty and electrical hazards Manufactured under license from Dolby Laboratories Dolby and the double D symbol are trademarks of Dolby Laboratories This item incorporates copy protection technology that is protected by U S patents and other intellectual property rights of Rovi Co...

Page 4: ...T TIMES CAUTION TO PREVENT ELECTRIC SHOCK DO NOT USE THIS POLARIZED PLUG WITH AN EXTENSION CORD RECEPTACLE OR OTHER OUTLET UNLESS THE BLADES CAN BE FULLY INSERTED TO PREVENT BLADE EXPOSURE The lamp s within this product contain mercury Disposal should be in compliance with local state or federal laws WARNING This equipment has been tested and found to comply with the limits for a Class B digital d...

Page 5: ...ional Electrical Code ANSI NFPA 70 provides information with respect to proper grounding of the mast and supporting structure grounding of the lead in wire to an antenna discharge unit size of grounding conductors location of antenna discharge unit connection to grounding electrodes and requirements for the grounding electrode 20 When replacement parts are required be sure the service technician u...

Page 6: ... liquid gets in your mouth immediately gargle and consult with your doctor Also if the liquid gets in your eyes or touches your skin consult with your doctor after rinsing for at least 15 minutes or longer in clean water CHILD SAFETY It Makes A Difference How and Where You Use Your Flat Panel Display Congratulations on your purchase As you enjoy your new product please keep these safety tips in mi...

Page 7: ...of time while it is displaying the following formats or images Fixed Images such as stock tickers video game patterns TV station logos and websites Special Formats that do not use the entire screen For example viewing letterbox style 16 9 media on a normal 4 3 display black bars at top and bottom of screen or viewing normal style 4 3 media on a widescreen 16 9 display black bars on left and right ...

Page 8: ...own in Figure 1 Finally secure the bottom plate b with 3 silver screws supplied M4x16mm as indicated by the arrows in Figure 2 Be sure to follow the instructions Insufficient tightening or incorrect installation of the stand will not support your unit correctly and could result in damage or injury from tip over How to remove the stand When you transport this product remove the stand and pack flat ...

Page 9: ...time Slow Motion The SLOW moves you back and forth through the program by 4 steps of 1 16 1 2 times Repeat Playback You can repeat chapter track title sides or material between two selected points Program Playback Audio CD MP3 WMA CD You can playback tracks in programmed sequences Zoom You can zoom in the selected subject on the screen during playback Note Make sure that discs are suitable for the...

Page 10: ...tting the picture size 24 DVD operation Preparation 25 Status display of disc 25 Playback procedure 25 Special playback 26 Zooming 26 Locating desired scene 26 A B Repeat playback 26 Marking desired scenes 27 Changing angles 27 Changing soundtrack language 27 Subtitles 27 Using HOME MENU 28 Play mode 28 Audio Settings menu 29 Video Adjust menu 30 Quick guide for DVD menu operation 30 Function Setu...

Page 11: ...e used on this unit Title When two or more movies are recorded on a disc the disc is divided into two or more sections Each section is called a TITLE Chapter The titles can be subdivided into many sections Each section is called a CHAPTER Track An Audio CD can contain several items These are assigned to the tracks Removing Disc from Case Be sure to hold the edge of disc Do not touch the surface of...

Page 12: ...e played Progressive JPEG formatted files do not work It may take some more time to start to play larger files than usual JPEG files with different aspect ratio may be displayed with black bands either vertical or horizontal Playing Audio files WMA and MP3 files recoded in DVD R RW CD R RW can be played Windows Media Audio WMA compatibility WMA is an acronym for Windows Media Audio and refers to a...

Page 13: ...HANNEL 3 STOP button DISC slot Remote sensor POWER button FOR SERVICE PERSONNEL USE ONLY Do NOT insert ANY USB device into this port Use of this port by other than Service Personnel may void this products warranty HDMI 2 IN jack HDMI 1 DVI IN jack PC DVI AUDIO IN jack AUDIO L MONO R jacks for COMPONENT IN and VIDEO2 IN COMPONENT IN jacks RF ANT IN jack DIGITAL AUDIO COAXIAL OUT jack VAR VARIABLE A...

Page 14: ...menu VOL Adjust volume of TV INPUT SELECT Display source selection menu RECALL ZOOM Switch between present last channel Zoom CH Select channel of TV DVD MENU Display DVD menu TOP MENU Select title CCD JUMP Closed Caption Locating desired scene RETURN Remove DVD setup menu AUDIO Change sound track language SUBTITLE Set subtitle ANGLE Change playback angle PLAY MODE Select playback mode SLOW Forward...

Page 15: ...tteries if the remote control will not be operated for an extended period of time Power source TO USE AC POWER Connect the AC cord plug into this unit s AC INPUT jack Connect the AC cord into an AC outlet 1 2 NOTE Please make sure to insert the cord securely at both the LCD TV DVD and the wall outlet The AC Cord has a polarized type AC line plug If the supplied AC cord does not match your AC outle...

Page 16: ...ervice with scrambled premium channels If you subscribe to a Cable TV service in which basic channels are unscrambled and premium channels require the use of a Converter Descrambler box you may wish to use a signal Splitter and an A B Switch box available from the Cable TV company or an electronics supply store Follow the connections shown below With the switch in the B position you can directly t...

Page 17: ... number of bars If the volume decreases the number of green bars also decreases 3 Set the Signal Type option to the appropriate position see Air Cable selection on page 20 4 Press the Direct Channel Selection 0 9 buttons to select the channel If you press only channel number channel selection will be delayed for a few seconds TO SELECT ANALOG CHANNELS 1 9 Press 1 9 as needed Example to select chan...

Page 18: ...l appear on the screen The sound can be switched back on by pressing this button again or the VOL or SLEEP To set the TV to turn off after a preset amount of time press SLEEP on the remote control The clock will count up 10 minutes for each press of the SLEEP but ton Off 0h 10m 0h 20m 2h 0m After the sleep time is programmed the display will appear briefly every ten minutes to remind you that the ...

Page 19: ...on When the TV receives a stereo or SAP broadcast the word Stereo or SAP displays on screen every time you press DISPLAY Surround On Off The dynamic presence and sound created offers a thoroughly enjoyable listening experience Auto Volume On Off Volume level will be adjusted automatically between signals Audio Language When two or more audio languages are included in a digital signal you can selec...

Page 20: ...tient NOTE Memorizing channels is best accomplished during evening PRIMETIME hours as more stations are broadcasting digital signals Memorizing channels can only be accomplished while a station is broadcasting a digital signal to set that channel into memory If you are unsure of the digital channels available in your area you may visit www antennaweb org to receive a list based on your address or ...

Page 21: ...r to select a channel you want to label then press Ch Label Label Clear Ch Label Channel Number 15 1 CH 1 Adjust Select CH 4 Press or repeatedly until the character you want appears in the first space Label Clear Ch Label Channel Number 15 1 Ch Label CH 1 Adjust Select ENTER Set CH The characters rotation as follows SPACE If the character which you desire appears press ENTER Repeat this step to en...

Page 22: ...ress DISPLAY to explain the rating Genre D Dialogue L Language S Sex V Violence FV Fantasy Violence Movie Rating G PG PG 13 R NC 17 X Movie Rating ENTER Set Select G All ages PG Parental guidance PG 13 Parental guidance less than 13 years old R Under 17 years old parental guidance suggested NC 17 17 years old and above X Adult only 6 Press to select the desired rating then press ENTER 7 Press EXIT...

Page 23: ...pear 3 Press or to set CC Setting to On On Captions will be displayed on the screen Off Captions will not be displayed on the screen 4 Press or to select Analog Caption or Digital Caption When you select Analog Caption you can choose from C1 C2 C3 C4 T1 T2 T3 and T4 When you select Digital Caption you can choose from CS1 CS2 CS3 CS4 CS5 and CS6 5 Press or to select the desired Closed Caption mode ...

Page 24: ...e sizes may vary depending on the input source or broadcast signal Picture Size menu also can be displayed by pressing PICTURE SIZE on the remote control Natural In some cases this image will display the size of standard 4 3 with a black side bar Cinema Wide1 for 4 3 format programs To fill the screen the right and left edges are extended however the center of the picture remains near its former r...

Page 25: ... display and then Can t play disc will be displayed Some playback operations of DVDs may be intentionally fixed by software producers Since this unit plays DVDs according to the disc content recorded some playback features may not be available Also refer to the instructions supplied with the DVDs Preparation The following pages describe the setup operation in DVD mode Preparation Before DVD CD ope...

Page 26: ...of the image will be zoomed in Each press of ZOOM will change the ZOOM magnification Zoom 2 and Zoom 4 2 Press to view a different part of the frame You may move the frame from the center position UP DOWN LEFT or RIGHT 3 In the zoom mode press ZOOM repeatedly to return to a 1 1 view NOTE You can select the Still Playback or Fast Forward Review Playback in the zoom mode Some discs may not respond t...

Page 27: ...an select the language when you play a multilingual disc 1 Press AUDIO during playback The current soundtrack language will appear Current Total Audio 1 2 English Dolby Digital 2 0CH 2 Press AUDIO repeatedly until the desired language is selected The on screen display will disappear after a few seconds Current Total Audio 2 2 French Dolby Digital 2 0CH NOTE If the desired language is not heard aft...

Page 28: ... Point Off A B Repeat Repeat Random Program Search Mode Play Mode 2 Press to select A B Repeat then press or ENTER 3 Press to select A Start Point then press ENTER The start point is selected 4 Press to select B End Point then press ENTER The end point is selected Playback starts at the point that you selected Playback stops at the end point and returns to Point A automatically then starts again T...

Page 29: ... 1 Press PLAY MODE during playback or stop mode Play Mode screen will appear 2 Press to select Search Mode then press or ENTER 3 Press to select desired search mode option then press or ENTER Search Mode options differs depending on discs or files 4 Input Title Chapter Track or Folder number or Time by using Number buttons 0 9 and press ENTER 0 0 1 Title Search Chapter Search Time Search Input Cha...

Page 30: ...phasize dark part of images Hue Adjust a balance between green and red Chroma Level Adjust color density It is effective with animation or something with high color density NOTE It may not be very effective for some discs or files Quick guide for DVD menu operation You can change the default settings to customize performance to your preference Setting procedure 1 Press SETUP in stop mode HOME MENU...

Page 31: ... if you have a widescreen TV Language settings Audio Language English French Spanish If there is an English French or Spanish soundtrack on the disc then it will be played Other Language Select to choose a language other than the ones displayed See Language Code List on page 33 Subtitle Language English French Spanish If there is an English French or Spanish subtitle on the disc then it will be di...

Page 32: ...Code 2 Press Number buttons 0 9 to input the current password then press ENTER Digital Audio Out Video Output Language Display Options 1 2 3 4 5 6 7 8 Off Initial Settings Parental Lock Level Change Password 3 Press or to select from the level 1 to level 8 The limitation will be more severe as the level number is lower Then press ENTER Digital Audio Out Video Output Language Display Options 1 2 3 ...

Page 33: ...1319 Maltese mt 1320 Burmese my 1325 Nauru na 1401 Nepali ne 1405 Norwegian no 1415 Occitan oc 1503 Oromo om 1513 Oriya or 1518 Panjabi pa 1601 Polish pl 1612 Pashto Pushto ps 1619 Quechua qu 1721 Rhaeto Romance rm 1813 Kirundi rn 1814 Romanian ro 1815 Kinyarwanda rw 1823 Sanskrit sa 1901 Sindhi sd 1904 Sangho sg 1907 Serbo Croatian sh 1908 Sinhalese si 1909 Slovak sk 1911 Slovenian sl 1912 Samoan...

Page 34: ...lied Component video cord not supplied To AUDIO IN Rear of the unit To COMPONENT IN To Audio OUT NOTE Component Video input of the unit are for use with a device which output 480i 1080i interlaced signals and 480p 720p progressive signals VCR DVD or To connect the TV DVD to a camcorder or a TV Game To playback from a camcorder connect the camcorder to the unit as shown This unit can also be used a...

Page 35: ... etc to this LCD TV using an HDMI cable or a DVI to HDMI cable the image will not display if the output resolution of the component is set to 480i To receive the picture you must change the output resolution on the external component Should you require further instruction please contact the manufacturer of the external component or To Audio L Input To Audio R Input Audio cord not supplied Amplifie...

Page 36: ...isted above Center Speaker Coaxial Digital Audio Output To Coaxial Digital Audio Input Rear of the unit Front Speaker Left Front Speaker Right Subwoofer Surround Speaker Left Surround Speaker Right TV DVD NOTE When you are viewing digital broadcast this unit will not work in conjunction with DTS audio or MPEG audio There will be no sound output if connected to an AV amplifier with a built in DTS d...

Page 37: ...lay the TV s PC Setting Menu Select Auto Adjust NOTE Power on the TV and any other peripheral equipment before powering on the computer NOTE Save and close all documents in case computer might need to be restarted Before connecting your computer to your TV please refer to the following chart to set to a compatible resolution A Refresh Rate value of 60 Hz on your computer is recommended for your TV...

Page 38: ...s normal when you adjust the CONTRAST or BRIGHTNESS settings Most types of television interference can be remedied by adjusting the height and position of the VHF UHF antenna Outdoor antennas are recommended for best results The most common types of television interference are shown below If one of these symptoms appear when the TV is connected to a Cable TV system the disturbance may be caused by...

Page 39: ...r Cable TV experiencing problems tune to another station Make sure channels are set into memory Cable TV company is scrambling signal Check antenna orientation 17 20 16 No Cable TV reception Check all Cable TV connections Set Signal Type option to the Cable mode Station or Cable TV system problems try another station 16 20 17 Horizontal or diagonal bars on screen Check antenna connections reorient...

Page 40: ...ns No surround sound The setup does not match your stereo system 35 The unit or remote operation key is not functioning Turn off the unit and unplug the AC power cord for several minutes then replug it 15 Playback does not start when the title is selected Check the Parental setup 32 Audio soundtrack and or subtitle language is not changed when you play back a DVD Multilingual language is not recor...

Page 41: ...1 100 135 100 135 01 4A Inputs Video RCA 1 V p p 75 ohms Audio RCA 8 dBm 50k ohms Component video Y 1 V p p 75 ohms Pb Pr 0 7 V p p 75 ohms HDMI HDMI compliant type A connector HDCP compliant E EDID compliant Suggested scan rates 480p 480i 720p 1080i 1080p HDMI Audio 2 channel PCM 32 44 1 48 kHz sampling frequency 16 20 24 bits per sample PC Monitor Mini Dsub 15pin x 1 Antenna VHF UHF In 75 ohms c...

Reviews: