background image

- 4 -

Preparation For Use

•  Never throw batteries into a fire. Do not expose batteries to fire or 

   other heat sources.

UNPACKING AND SET UP

•  Carefully remove all the accessories from the display carton. 

V

erify 

   that you have all the necessary accessories before you dispose of 

   the display carton.

•  

R

emove all packing materials from the individual components. 


R

emove any descriptive labels that may be attached to the front 

   panel of the main unit. Do not remove any labels or stic

k

ers on the 

   back panels of the main unit or the spea

k

ers.

•  Unwind the 

A

C power cord on the back of the unit and extend the 

   cord to its full length.

POWER SOURCE 


•  This system is designed to operate 

   on 240V 

A

C 50Hz.                         

•  Connecting this system to a power 

   supply that is not 240 V ~ 50 Hz 

   could result in damage to the unit.

•  The main plug is used as the 

   disconnect device.  The disconnect 

   device shall remain readily operable.

NOTE:  

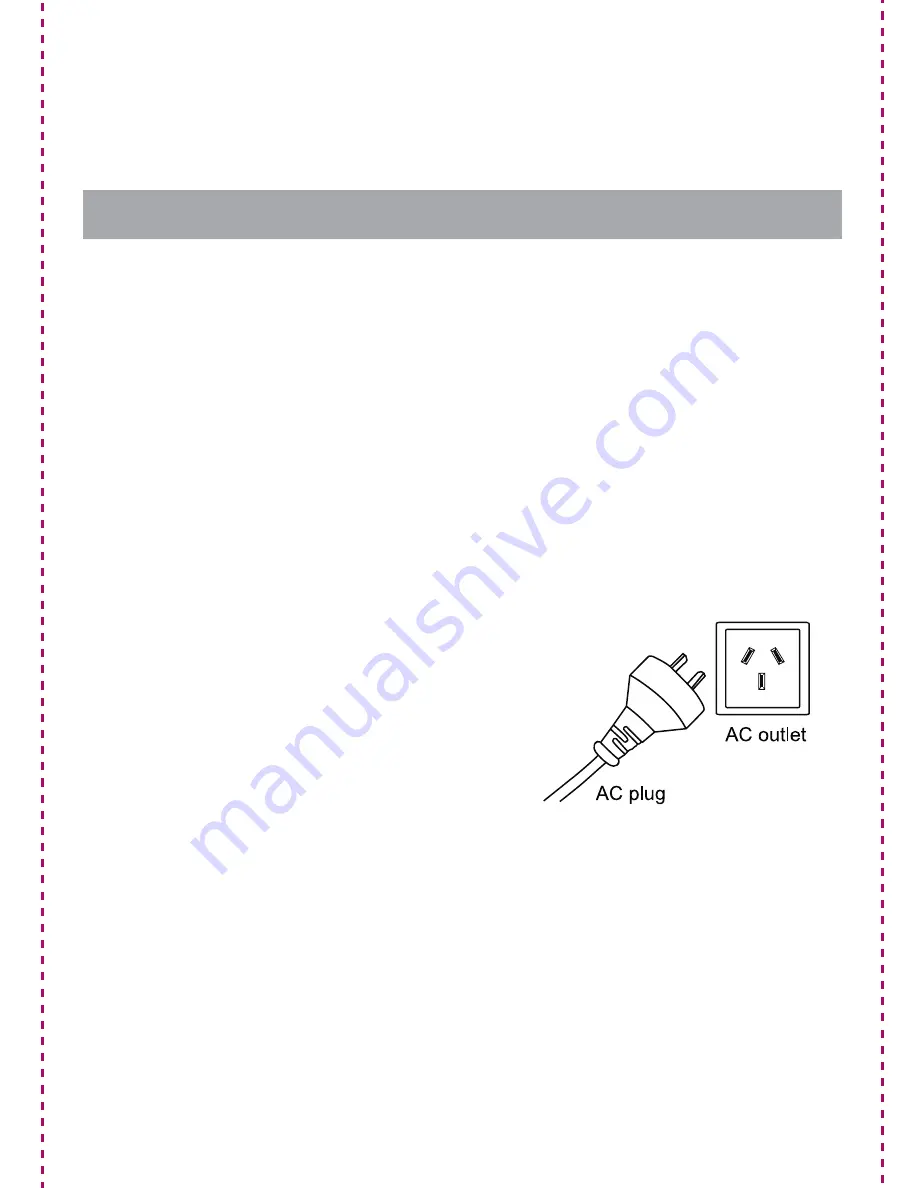
The system has an 

A

C plug and will only fit into matching 

A

outlets. This is a safety feature to reduce the possibility of electric 

shock. If the plug will not fit in your 

A

C outlets, you should have the 

outlet changed by a qualified, licensed electrician. Do not use an 

adapter to ma

k

e the plug fit into your outlet. This defeats the safety 

feature and could expose you to electric shock.

Summary of Contents for DMP-P8

Page 1: ......
Page 2: ...tents IMPORTANT SAFEGUARDS 2 3 PREPARATION FOR USE 4 LOCATION OF CONTROLS AND INDICATORS 5 7 REMOTE CONTROL BATTERY 8 OPERATION INSTRUCTIONS 9 15 CARE AND MAINTENANCE 16 TROUBLESHOOTING 16 17 TECHNICAL INFORMATION 18 ...

Page 3: ...the product CAUTION TO REDUCE THE RISK OF ELECTRIC SHOCK DO NOT REMOVE COVER OR BACK NO USER SERVICEABLE PARTS INSIDE REFER SERVICINGTO QUALIFIED SERVICE PERSONNEL The Lightning Flash And Arrow Head Within The triangle is a warning sign alerting you of DANGEROUS VOLTAGE INSIDE THE PRODUCT Always follow basic safety precautions when using electrical products especially when children are present WAR...

Page 4: ...s from the unit Keep the power cord and product away from heated surfaces The apparatus shall not be exposed to dripping or splashing and no objects filled with liquids such as vases shall be placed on the product Do not place or drop the product into water or other liquids If the product falls into water immediately unplug it from the electrical outlet do not pull on the power cord Do not put any...

Page 5: ...he AC power cord on the back of the unit and extend the cord to its full length POWER SOURCE This system is designed to operate on 240V AC 50Hz Connecting this system to a power supply that is not 240 V 50 Hz could result in damage to the unit The main plug is used as the disconnect device The disconnect device shall remain readily operable NOTE The system has an AC plug and will only fit into mat...

Page 6: ... 5 Location Of Controls And Indicators TOP PANEL FRONT PANEL 1 2 3 8 10 12 13 9 11 4 5 6 7 ...

Page 7: ... 6 14 15 16 17 18 19 20 21 22 23 BACK PANEL DISPLAY ...

Page 8: ... 7 Location Of Controls And Indicators Remote Control 1 4 7 8 11 13 16 3 2 5 6 9 12 10 14 17 15 18 ...

Page 9: ...riginal battery with a new 3 volt lithium battery 1 Slide out the battery holder from the remote control case Push tab A towards the middle first see diagram 2 Place one 3V CR2025 battery into the battery holder observing the positive direction If the battery is placed incorrectly the remote control will not work CAUTION Danger of explosion if the battery is replaced incorrectly Replace only with ...

Page 10: ...ck set mode 12H will show and flash on the display indicating that the clock is set to 12 hour format 2 PressTUNE SKIP button on the top panel or remote control once to change the clock format to 24 hour time The display will change from 12H to 24H 3 Press the MODE button to confirm The hour digit will begin flashing PressTUNE SKIP button on the top panel or remote control to set the hour Press MO...

Page 11: ...he below a Wake up to Radio FM Broadcasting You have to pre tune your desired radio channel in FM radio mode before setting the wake up function b Wake up to Radio AM BroadcastingYou have to pre tune your desired radio channel in AM radio mode before setting the wake up function c Wake up to iPod playback d Wake up to Buzzer For Radio Broadcasting and IPOD playback the default volume is 10 and wil...

Page 12: ...on is activated press SLEEP button once and the remained sleep time will be shown Press SLEEP button again to select another sleep times ІІІ Listening toYour iPod And Radio iPod Charging IMPORTANT In order to prevent unwanted distortion during iPod playback it is recommended that you set the EQ in your iPod to the Off position Go to the Main Menu in your iPod and then select the Settings Menu sele...

Page 13: ... on top panel or remote control to control play and pause function 4 PressTUNE SKIP button on top panel or remote control to select previous or next song 5 Press the VOLUME VOLUME button on top panel or remote control to adjust the VOLUME level of this unit as desired Control iPod menu by REMOTE CONTROL only Press MODE button on the remote control the iPod will go to the previous menu Press IPOD U...

Page 14: ...heTUNE SKIP buttons on the top panel or remote control until the frequency of the desired station appears on the display After entering the radio mode for about 6 sec the display will show the time mode again Press MODE button again to show the radio frequency 4 Preset FM AM stations in the tuner memory This unit includes a 20 station preset memory You can store up to 10FM stations and 10 AM stati...

Page 15: ...ge during AM Radio Mode IV AUXILIARY IN Connect the Audio Output jacks of your auxiliary sound source TV VCR DVD Player Cassette Deck Mini Disc player etc etc to the AUX IN jack on the back panel of the unit The auxiliary function will only activate when the aux in jack is fitted with connection cable Note The connection cables are not included 1 Press STANDBY SOURCE button on the top panel or rem...

Page 16: ...wer again after one minute Note Although disconnect the power will unlock the internal computer after a power surge it will also erase all of the settings After turning On the unit you will need to reset the settings again Back Up Function If the AC supply is interrupted the clock display and Radio preset stations will go off and all settings will be cancelled To back up the clock and preset stati...

Page 17: ...onsult your dealer or service center if the problem cannot be solved by the following information NOTE Warrantee will be void if you try to repair the unit yourself Problem Remedy Power System does not turn on or does not respond to the remote control Strange noises unit does not work properly Make sure AC mains is connected to the wall outlet properly and it has power Remove batteries disconnect ...

Page 18: ...Pod to come loose from the docking station Radio Poor FM reception Poor AM MW reception Make sure the FM antenna is extended Switch to FM mono mode if signal is weak and this feature is provided try rotating the unit Move the unit away from other operating electrical equipment such as motorized appliances transformers televisions and microwave ovens Please be aware that the structure of some build...

Page 19: ... 18 Technical Information AC Power AC 240 50Hz AM 522 1620kHz FM 87 5 108 MHz DC Backup 3 V 2 AA size batteries Output Power 2 x 3 5 W Power Consumption 13 W ...

Page 20: ......

Reviews: