background image

13

3.

Press the OPEN/CLOSE button again.
-

The disc tray closes and “READING” appears on the display.

Note:
Some discs may start play automatically.

Starting play

Press the 

a

 button. The DVD/CD function is selected and play starts

automatically.

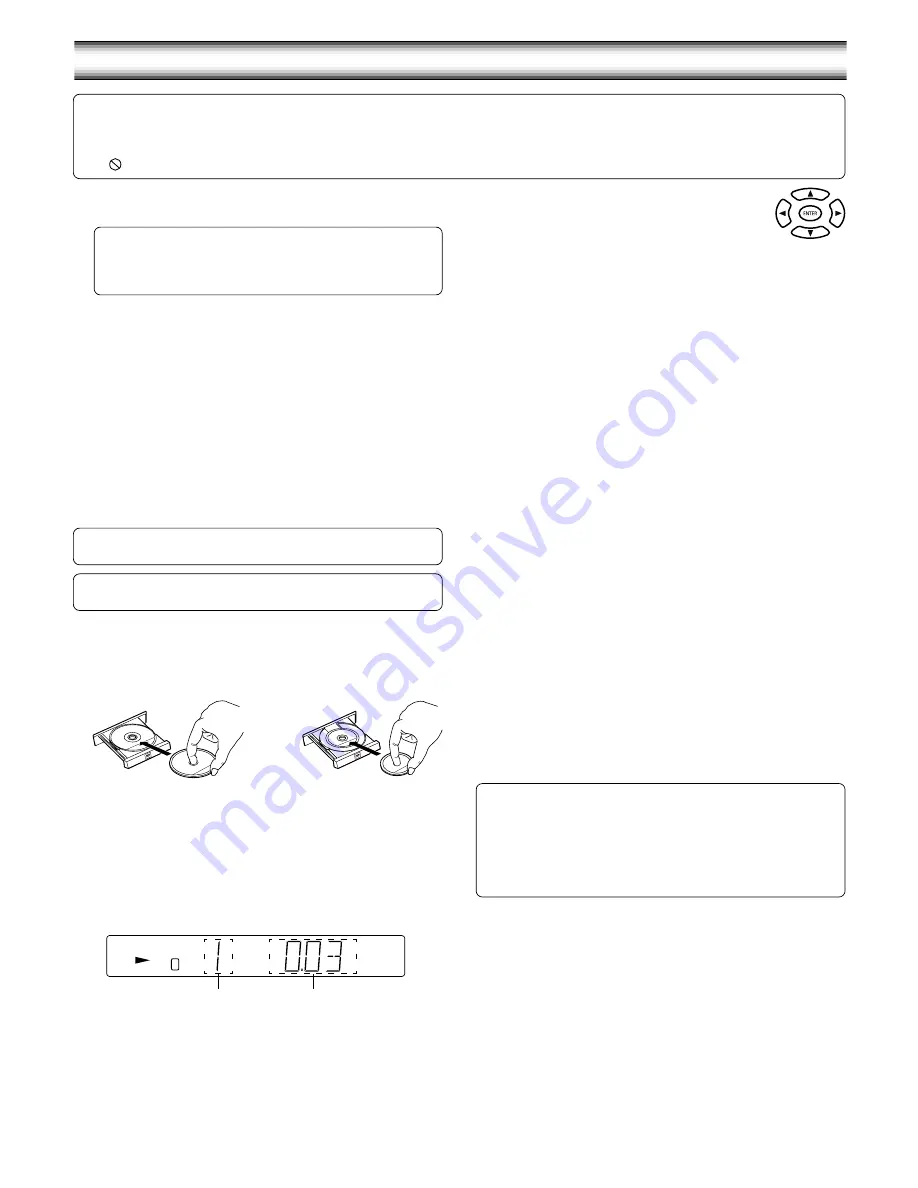
Example:

Note:
If “NO DISC” appears on the display, load the disc.
-

If the disc is loaded with the label side downward (and it is a single
sided disc), or if a badly scratched disc is loaded, “NO DISC” (or “NO
PLAY”) appears. If this occurs, load the disc correctly or replace the
disc.

DISC PLAY

Important note:
-

This “DISC PLAY” explains the basic instruction of the DVD player section.

-

Some DVD discs have different functions that may not be explained in this instruction manual. You may need extra instructions. In this case, please
follow the instructions displayed on the TV screen or jacket or case of the disc.

-

“ 

 ” may appear on the TV screen during operation. This icon means that the function is not available on the disc now.

If a menu appears on the TV screen...
Press the 

4

a

5

 or 

b

 button (or the number buttons),

then press the ENTER button to select the desired menu.
Playback of the selected menu starts.
Note:
For more details, please refer to the jacket or case of the disc.

Stopping play

[DVD]
-

Press the 

n

 button once.

When you press the 

a

 button, play starts automatically from the point

where you stopped.
Note:
Some discs may not resume play.

-

Press the 

n

 button twice. The unit stops completely and “STOP”

appears on the display.
When you press the 

a

 button, play starts from the beginning of the

disc.

[CD]
-

Press the 

n

 button. The unit stops completely.

Continuing play from where you stopped watching (LAST MEMORY
PLAY) [DVD]
1. During play, press the L.MEMO button at the point from which you

want to resume play later. “LM-STOP” appears on the display. Play
stops automatically.

2. Remove the disc or turn off the power.
3. Load the disc (and press the 

a

 button), or turn on the power. “Last

Memory Play?” screen appears.

Last Memory Play?

 Yes
  No
Clear

(The memory is released.)

4. Press the 

4

 button to select “Yes”.

5. Press the ENTER button. Play resumes from the point where you

stopped. (If desired, press the L.MEMO button again.)

Note:
-

Points on up to 3 discs can be memorized.

-

The Last Memory Play mode may not work correctly with some discs.

To lock the disc tray
You can lock the disc tray to prevent misuse by young children.
While the disc tray is opened, press the OPEN/CLOSE button until
“LOCKED” appears on the display. (The disc tray closes.)
-

The OPEN/CLOSE button will not function.

To release this mode, press the OPEN/CLOSE button until
“UNLOCKED” appears on the display.

8 cm disc

12 cm disc

Preparations

-

Turn on the TV and select the video input for this unit.

To use the remote control for TV
The remote control must be pointed toward your TV.
1.

Press the TV POWER button to turn on the power.

2.

Press the TV/VIDEO button to select the video input source.

Select the playback picture size according to the aspect ratio of the
TV. (See “Setting display” under “INITIAL SETTINGS” on Page 18.)

-

Select the desired language for the on-screen menus if required. The
following languages can be selected.

English, Spanish, French, German, Portuguese

(See “Setting language” under “INITIAL SETTINGS” on Page 18.)

Note:
-

Do not touch the disc tray while it is moving.

-

Never place anything except a disc on the disc tray. Foreign objects
can damage the unit.

-

Do not apply excessive force to the disc tray.

-

Only one disc must be placed on the disc tray at a time.

-

To open or close the disc tray, be sure to use the OPEN/CLOSE (or

q

 on the main unit) button. Do not press the disc tray with your hand.

When operation buttons are pressed, that operation is displayed
on the TV screen for several seconds.

If a disc is loaded, you can turn the unit on and begin play immediately
by pressing the 

a

 button.

1.

Press the OPEN/CLOSE button. “OPEN” appears on the display and
the disc tray opens. “SANYO” logo appears on the TV screen.
-

When using the main unit, use the 

q

 button.

2.

Place the disc with the label facing up on the disc tray.

C

Chapter number

Elapsed playing time

Summary of Contents for DC-TS750

Page 1: ...INSTRUCTION MANUAL DVD Home Theatre System DC TS750 REMOTE CONTROLLER RB TS750ST ...

Page 2: ...ion to form on the optical lens inside the unit If this happens take out the disc leave the unit for about 1 hour and then proceed to operate When carrying the unit be sure to remove any disc which may be inside and turn the power off Wait at least 10 seconds then unplug the mains lead from the AC outlet Carrying the unit with a disc inside may damage the disc and or the unit Do not install this e...

Page 3: ...n 5 Programme indicator PROG 6 Repeat mode indicators ALL 1 A B REP 7 Timer indicator 0 8 Timer off indicator OFF 9 Timer on indicator ON 10 Sleep indicator SLEEP 11 Kilohertz indicator kHz Megahertz indicator MHz 12 RDS indicator RDS 13 Chapter indicator C 14 Pause indicator k 15 FM mono indicator MONO 16 FM stereo indicator ST 17 Play indicator a 18 Dolby Digital indicator DOLBY DIGITAL Front pa...

Page 4: ...tton MUTE Bass button BASS Sound preset button SOUND Function button FUNCTION Volume buttons VOLUME Remote sensor Inserting batteries Install two R6 HP 7 batteries Remote control range Note Remove the batteries if the remote control is not to be used for a month or more Batteries left in the unit may leak and cause damage Within approx 6 meters 6 Shift button SHIFT 7 Open Close button OPEN CLOSE 8...

Page 5: ... speaker Black and Brown Subwoofer VIDEO AUDIO IN EXT ANT FM75Ω AM LOOP ANT R L VIDEO S VIDEO MONITOR OUT FRONT CENTER SURROUND 8Ω SUBWOOFER 4Ω SPEAKERS R R L L CENTER SUB WOOFER FRONT SURROUND AV EURO TV AUDIO IN RGB OUT VIDEO OUT SELECT RGB S VIDEO INPUT Front right speaker Front left speaker Centre speaker Surround right speaker Surround left speaker Subwoofer Blue Green Orange Gray Brown JCX T...

Page 6: ...eakers Note Take care when installing the speakers They may cause damage or serious injury should they fall from their mountings Front left speaker Front right speaker Centre speaker Surround left speaker Surround right speaker Subwoofer 120 30 30 The front centre and surround speakers should be placed at approximately the same distance from the listening position Place the front left and right sp...

Page 7: ...eo dealer for more details Aerial connections VIDEO AUDIO IN EXT ANT FM75Ω AM LOOP ANT R L VIDEO S VIDEO MONITOR OUT AV EURO TV AUDIO IN RGB OUT EXT ANT FM75Ω AM LOOP ANT AM loop aerial In areas close to a transmitter the simple indoor aerial is sufficient to receive broadcasts Extend the aerial wire as straight as possible and while listening to the sound from the system secure it in a position w...

Page 8: ...dphones Connect stereo headphones not supplied to the PHONES socket for monitoring or for private listening The speakers are automatically disconnected when headphones are connected Manufactured under license from Dolby Laboratories Dolby Pro Logic and the double D symbol are trademarks of Dolby Laboratories DVD disc with DTS may not work correctly You can see the picture on the TV screen but ther...

Page 9: ...4Ω SPEAKERS R R L L CENTER SUB WOOFER FRONT SURROUND AV EURO TV AUDIO IN RGB OUT VIDEO OUT SELECT RGB S VIDEO AUDIO OUT R L AERIAL IN JCX TS750 TV and Audio equipment JCX TS750 TV and VCR TV EURO AV SCART lead not supplied Audio lead not supplied Aerial Aerial lead not supplied JCX TS750 TV Aerial Aerial lead not supplied EURO AV SCART lead not supplied EURO AV SCART lead not supplied Aerial lead ...

Page 10: ...O TV AUDIO IN RGB OUT VIDEO OUT SELECT RGB S VIDEO AUDIO OUT R L AUDIO OUT R L IN OUT AV AERIAL AERIAL IN JCX TS750 TV VCR and Audio equipment JCX TS750 TV VCR STB and Audio equipment TV EURO AV SCART leads not supplied Audio lead not supplied Aerial Aerial lead not supplied JCX TS750 TV Aerial EURO AV SCART leads not supplied EURO AV SCART lead not supplied Aerial lead not supplied JCX TS750 VCR ...

Page 11: ...L Selecting the sound mode 1 Press the SOUND button to select the desired sound mode BASS or TREBLE 2 Press the 4 or 5 button to adjust the sound level 5 5 3 Press the SOUND button repeatedly to close the display To reset BASS and TREBLE to 0 press the SOUND button to select FLAT Then press the ENTER button FLAT briefly appears Adjusting the display brightness While pressing the n button on the ma...

Page 12: ...en headphones are connected while any of the surround modes are selected the surround mode is switched off automatically The SURROUND button does not function while headphones are connected VARIOUS ADJUSTING Adjusting the speaker volume balance This unit is set to the standard level before shipping from the factory You may not need adjustment But depending on the size of the room and the placement...

Page 13: ...The DVD R that has no movie data can not be played back This unit is to be used exclusively with the PAL or NTSC colour system discs SECAM system discs cannot be used with this unit The video output signal format can be selected PAL60 or NTSC when playing back the NTSC discs Notes on handling discs Do not expose the disc to direct sunlight high humidity or high temperatures for extended periods of...

Page 14: ...reen appears Last Memory Play Yes No Clear The memory is released 4 Press the 4 button to select Yes 5 Press the ENTER button Play resumes from the point where you stopped If desired press the L MEMO button again Note Points on up to 3 discs can be memorized The Last Memory Play mode may not work correctly with some discs To lock the disc tray You can lock the disc tray to prevent misuse by young ...

Page 15: ...le Chapter search DVD 1 Press the SHIFT SEARCH MODE buttons twice during play The chapter search screen appears Example Title 01 Chapter Search 35 2 Press the number button s to enter the chapter number 3 Press the a button Play starts from the selected chapter Track search CD Press the number button s during play or in the stop mode then press the a button Play starts from the selected track Time...

Page 16: ...the display 2 Press the A B REP button again at the end of the section Point B A B REP remains lit on the display The section between points A and B is played repeatedly 3 To return to normal play press the A B REP button again Note Repeat play or A B repeat play mode may not work correctly with some discs Programmed play CD Up to 20 selections can be programmed Programming procedure 1 Press the P...

Page 17: ...S DTS appears You can see the picture on the TV screen but there is no sound Note When the desired language is not selected even if the button is pressed the language is not available on the disc When the power is turned on or the disc is replaced select the language again Ifthelanguageisnot recordedonthedisc onlytheavailable language on the disc will be heard Selecting on screen information Press...

Page 18: ...lay 1 Load the MP3 CD A table of contents in the root directory appears on the screen Example the root directory 2 Select the desired file by pressing the 4 a 5 or b button The selected file number is highlighted To go on to the next directory press the 4 button to move the highlighted box to the folder Example HYPE AX then press the ENTER button A table of contents in the selected directory appea...

Page 19: ...ess the SETUP button in the stop mode The setup screen appears 2 Press the a button to select Display then press the ENTER button Display screen appears 3 Press the 5 or 4 button to select the item highlighted then press the ENTER button The submenu appears Example TV Type 4 3 LB 4 3 LB NTSC Disc PAL60 4 3 PS 16 9 4 Press the 5 or 4 button to select the submenu highlighted Example To select TV Typ...

Page 20: ...elected delay time remain 12 Press the 4 button to skip back to the setup screen or press the SETUP button Setting parental 1 Press the SETUP button in the stop mode The setup screen appears 2 Press the a button to select Parental then press the ENTER button Parental screen appears 3 Press the 5 button to skip Password and select Level Password Level Off 4 Press the ENTER button repeatedly to sele...

Page 21: ...t Lithuanian 7686 lv Latvian Lettish 7771 mg Malagasy 7773 mi Maori 7775 mk Macedonian 7776 ml Malayalam 7778 mn Mongolian 7779 mo Moldavian 7782 mr Marathi 7783 ms Malay 7784 mt Maltese 7789 my Burmese 7865 na Nauru 7869 ne Nepali 7876 nl Dutch 7879 no Norwegian 7967 oc Occitan 7977 om Afan Oromo 7982 or Oriya 8065 pa Punjabi 8076 pl Polish 8083 ps Pashto Pushto 8084 pt Portuguese 8185 qu Quechua...

Page 22: ...ress the PRESET e button again to keep the reception locked at that station When beat interference is heard A high pitched noise called beat is sometimes heard during reception of radio broadcasts If this occurs While pressing the n button on the main unit press the TEST button on the remote control to select bc A or bc B Select the setting that gives the best results Changing the AM reception fre...

Page 23: ...utton and the timer will be set in the standby mode To check the timer settings Press the SHIFT 7 TIMER buttons repeatedly The timer settings are displayed in the following order On time v Off time v Function v Original display returns To change the settings press the SHIFT 7 TIMER buttons to select the setting to be changed then press the SHIFT 8 ADJUST buttons so that the display blinks Change t...

Page 24: ... loaded The disc is loaded with the label side down The disc is dirty Parental is set The memory must be reset The batteries in the remote control are weak or installed incorrectly The remote control is not aimed at the remote sensor window CORRECTIVE ACTION Select the correct function Load a disc or load a playable disc Check the disc logo type colour system and regional code Select the correct i...

Page 25: ...aser wavelength 650 790 nm Laser output Continuous wave max 1 mW DVD 0 5 mW CD Signal to noise ratio More than 105 dB Harmonic distortion 0 003 Wow and flutter Below measurable level Tuner Reception frequency FM 87 5 108 MHz AM 522 1611 kHz General Power requirements AC 230 V 50 Hz Power consumption 120 W 1 5 W standby mode Dimensions 435 W x 75 H x 375 D mm Weight 6 4 kg Speaker system Front left...

Page 26: ...25 ...

Page 27: ...26 ...

Page 28: ... the statutory rights available to the purchaser of this equipment Note This guarantee supersedes any other form of guarantee that may inadvertently have been enclosed with or attached to the product August 1978 Thank you for buying Sanyo This equipment should give you many years of pleasure and faithful service but in the event that a fault occurs the following notes for your guidance may be help...

Reviews: