Getting started DAB mode
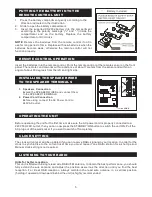
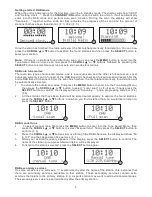
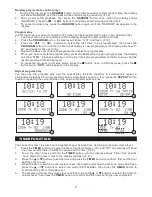
When the unit is powered up for the first time, it will be in standby mode. The display will show “00:00”
and “Setting clock …”. Press the
STANDBY/ON
button once to switch the unit on, it will automatically
enter into the DAB mode and perform auto scan function. During the scan the display will show
“Scanning …” together with a slide bar that indicates the progress of the scan and the amount of
stations that have been found so far. (F. 1) (F. 2) (F. 3)
Once the scan has finished, the radio will select the first alphanumerically found station. You can now
press the
SCROLL
▲
or
▼
button to explore the found stations and then press the
SELECT
button to
select your station.
Note:
If there is no stations found after auto scan, you can press the
MENU
button to enter into the
Tune Select Menu and you can now press the
SCROLL
▲
or
▼
buttons followed by pressing the
SELECT
button to select manual tune or auto scan modes for stations.
DAB auto tune modes
There are two types of auto scan modes, one is local auto scan and the other is full auto scan. Local
auto scan will only search for part of the DAB Band III channels and full auto scan will search for the
entire DAB Band III channels. After the scan has finished, the first alphanumerically found station will
be automatically selected.
1. To activate the auto scan modes, first press the
MENU
button to enter into the Tune Select Menu,
then press the
SCROLL
▲
or
▼
button to select “Local scan” or “Full scan”, finally press the
SELECT
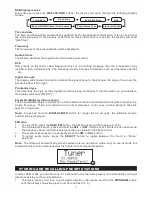
button to confirm, the display will show “Scanning …” and a progressing slide bar. (F.4)
(F.5)
2. All the stations that have been found will be stored automatically, to explore the found stations,
press the
SCROLL
▲
or
▼
buttons; and when you find a station that you would like to listen to,
press the
SELECT
button
DAB manual tune
1. To select manual tune, first press the
MENU
button to enter into the Tune Select Menu, then
press the
SCROLL
▲
or
▼
buttons to select “Manual tune”, finally press the
SELECT
button to
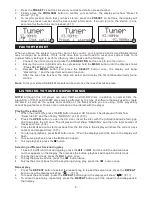
confirm. (F. 6)
2.
Press the
SCROLL
▲
or
▼
buttons to move through the DAB channels, the display will show “5A
to 13F” and their associated frequencies. (F. 7)
3.
When your desired frequency appears in the display, press the
SELECT
button to confirm. The
name of the station group (ensemble/multiplex) will be displayed.
4.
To listen to the station selected, press the
SELECT
button again.
DAB secondary services
On some occasions you will see a “>” symbol directly after the name of the station, this indicates that
there are secondary services available to that station. These secondary services contain extra
services that relate to the primary station. E.g. a sports station may want to add extra commentaries.
The secondary services are inserted directly after the primary station.
6
F2
F1
F3
F4
F5
F6
F7


