


9
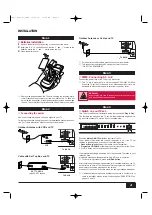
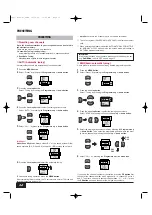
You can connect a VCR, S-VHS VCR, Satellite Tuner, PAY TV Decoder,
DVD or Camcoder to this TV via the SCART terminals and the AV termi-
nals.
■
Use of rear AV2 input terminal
If you want to use a VCR which is equipped with the S-VHS capability to
obtain the best performance, you should connect the S-Terminal of AV2
and select the S-Video mode in the “AV2 mode” using the following proce-
dures.
SOUND OPTIONS/USE OF AV EQUIPMENT
2 ~ 4
meters
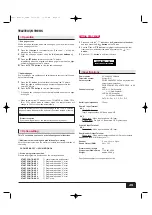
■
Guidance for the best enjoyment of active 3D
surround
Optimum positioning
• Sit at a distance of approximately 2 to 4 meters from the TV set.
• Listen facing the centre of the TV set.
• Remove any obstructions between you and the TV set.
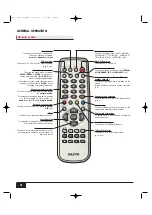
SOUND OPTIONS
■
Selection of surround mode
This TV provides an active 3D surround
processor which can realises a 3 dimension-
al sound effect when receiving a standard
stereo signal or monaural signal.
You can choose following 3D surround
modes by pressing the SURROUND button
repeatedly.
ACTIVE
: Normal 3D surround mode, you will feel optimum 3D sur-
round effect.
MONO
: This mode is especially prepared for Nicam-mono broad-
casting. Select this mode, when you can not get the 3D
surround effects even if the status is Nicam stereo. You
may feel 3D surround effect.
OFF
: To switch off 3D surround effect.
USE OF AV EQUIPMENT
3D Surround : OFF
3D Surround : ACTIVE
3D Surround : MONO
Picture
Sound
Timer
Setting
Preset
AV2
VIDEO
Child lock
Text Language
OSD Language
S-VIDEO
■
Selection of sound track from the equipment
By pressing the Nicam/Bilingual selector repeatedly, you can select the
sound track L(Left), R(Right) or L/R from the equipment connected to the
scart terminals or the AV terminal.
■
Selection of colour system in the AV mode
By pressing the
button repeatedly in the AV mode, the colour
system mode will be changed as follows;
AUTO -> PAL -> SECAM -> NTSC4.43 -> NTSC3.58
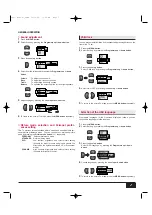
Hello !
Hello !
Bonjour!
Bonjour!
L
R
Bonjour!
L/R
Hello !
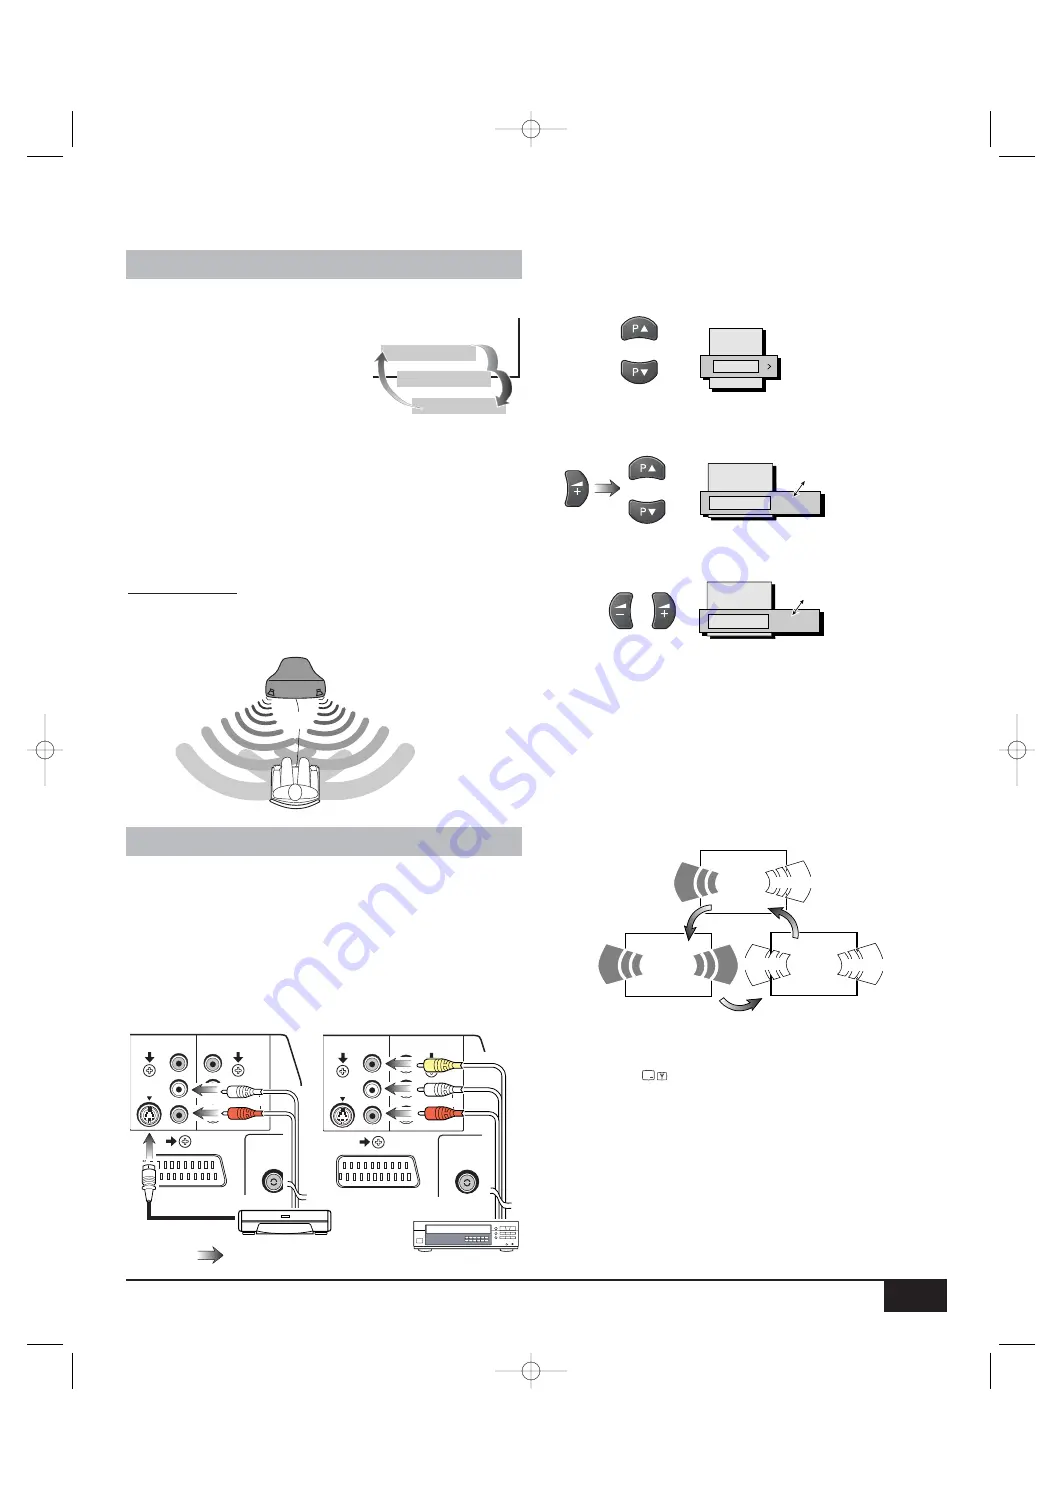
3
Press the Level up button.
Select “AV2” by pressing the Programme up or down button.
5
To return to the normal TV mode, press the MENU button repeatedly.
4
Select “ S-VIDEO” or “VIDEO” by pressing the Level up or down
button.
AV2
VIDEO
Child lock
Text Language
OSD Language
S-VIDEO
Note: While a S-VIDEO terminal is connected, normal Video input of the
AV2 terminal can not be used. To use normal Video input of the AV2 ter-
minal, disconnect the S-VIDEO terminal.
●
Setting of AV2 input mode
1
Press the MENU button.
2
Select “Setting” by pressing the Programme up or down button.
S-VHS VCR
L
R
AUDIO
VIDEO
(MONO)
S-VIDEO
MONITOR
OUT
AV2 IN
To S-Video out
L
R
AUDIO
VIDEO
(MONO)
S-VIDEO
MONITOR
OUT
AV2 IN
Normal VCR
Inst. manual_F8WA 12/30/03 11:26 AM Page 9


