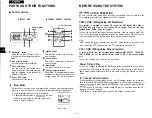

REMOTE CONTROL
INSTALLATION
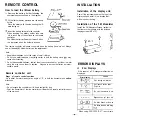
How to load the lithium battery
Remove the battery holder following the
numerical sequence shown in the diagram.
Fit the lithium battery provided into the battery
holder.
Place the battery with the side bearing the
mark facing up.
Inset-t the battery holder into the controller.
When inserting the battery holder, take care
not to touch any of the buttons on the remote
controller.
The lithium battery will wear out faster if a but-
ton is pressed when the holder is inserted.
Remote controller
( R e v e r s e s i d e )
The remote controller will cease to operate when the battery has worn out. Always
use a
lithium battery as the replacement.
Note:
l
Keep lithium batteries out of the reach of small children.
l
Do not use metal tweezers or anything similar to hold the battery since
may
cause short-circuiting.
Do not disassemble batteries, subject them to excessive heat or put them in water
since this may cause them to explode.
Dispose of worn-out batteries as incom-
bustible waste.
Remote controller unit
Range of remote control operation
Up to about 4 meters linearly at an angle of
in both the horizontal and
directions
Note:
l
Do not expose the controller unit fo direct sunlight for long.
l
Point the fransmitter of remote controller unit towards the remote controller sensor
of the main unit.
Installation of the display unit:
Peel off the removable seal on the top of the
display unit and install it in a location that
will not obstruct driving.
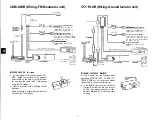
Installation of the FM Modulator/Ground Isolator:
Install the FM Modulator/Ground Isolator to
the floor or other surface with the included
tapping screws (M3 x 12).
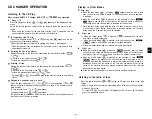
ERROR DISPLAYS
q
Error Displays
If the event of a CD changer malfunction, one of the errors described below will be
displayed.
Error display
Cause
I
I.... : :
I....
I
Disc change malfunction.
I....
. . .
I....
Disc loaded upside down.
Dirty disc.
........... :
........
Too high temperature to play.
Magazine has not been installed.
No discs loaded inside magazine.
. . . . .
. .
. . .
No discs loaded into magazine
When using FXD-C200, “E-07” is not displayed.
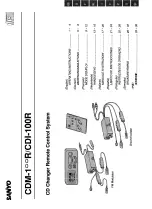
Summary of Contents for CDM-100R
Page 1: ...n c u 0 0 ...


