

15
■
■
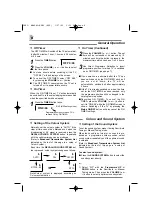
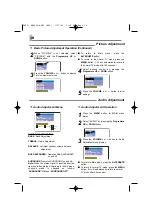
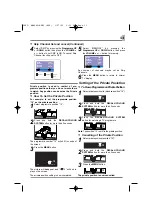
When watching a video program input from the AV1 terminal, press the TV/AV button to select AV1.
Whenever the TV/AV button is pressed, the mode will change as follows:
■
■
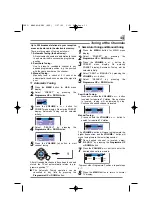
You can select a TV programme while watching a playback from a VCR
For example:
●
To select programme position “9” while watching a playback from external VCR, press “
9
” button of the
remote control. The TV set returns to the TV mode and programme “9” will be selected.
●
To select the programme position “26”, press
Digit
(--/-) button, “
2
” then “
6
” button. Then TV set returns
to the TV mode and programme position “26” will be selected.
Note:
Pressing either of the
PROGRAMME UP
or
DOWN
buttons of the remote control or the TV will
return the TV to the TV mode.
TV mode
AV1
AV1(DVD)
28
AV2
❒
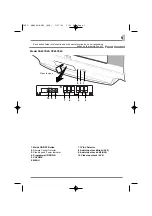
Connecting
To
the
Rear
AV1
Input
Jacks
(Continued)
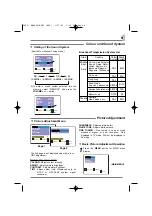
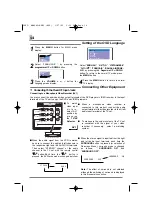
Each time the
RECALL/COLOUR SYSTEM
button is pressed, colour system is changed as follow;
Depending on the type of video tape or connected AV equipment being used, it may be necessary to
select colour system. In this case, press the
RECALL/COLOUR SYSTEM
button and select a suitable
colour system.
AV1
AUTO
AV1
PAL
AV1
SECAM
AV1
NTSC
AV1
NTSC 4.43
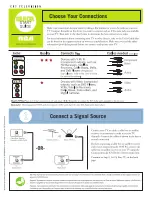
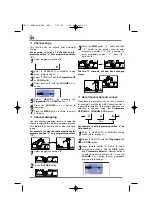
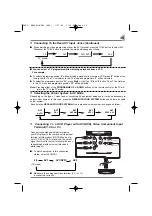
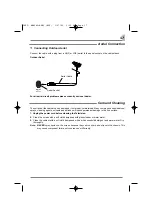
Connect the component output terminal on
your DVD player to the component video input
terminal of this product. (NOTE: When a sig-
nal of Y,Cb,Cr/Y,Pb,Pr is received, the output
signal from monitor output terminal will be cor-
responding but without colour (black and
white image).)
■
■
To watch a program in this connection
status, select AV1(DVD).
Y
MONITOR OUT
AV1/DVD
C
R
C
B
R
L
(MONO)
VIDEO
R
L
INPUT
V
D
E
O
I
Video/DVD Player
To Audio Input-R (AV1)
To Audio Input-L (AV1)
To Input Terminal C
R
To Input Terminal C
B
To Input Terminal Y
28
AV1
AV1(DVD)
(TV mode)
AV2
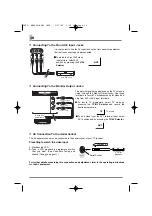
■
■
Make sure the component video terminal (Y, C
b
or C
r
)
is connected correctly.
❒
Selecting
the
Colour
System
in
AV
Mode
❒
Connecting
To
a
DVD
Player
with
AV1(DVD)
Video
Component
Input
Terminal
(Y,
Cb
or
Cr)
INST. MANUAL-BE8Y (AUS) 1/27/09 3:23 PM Page 15