– 4 –
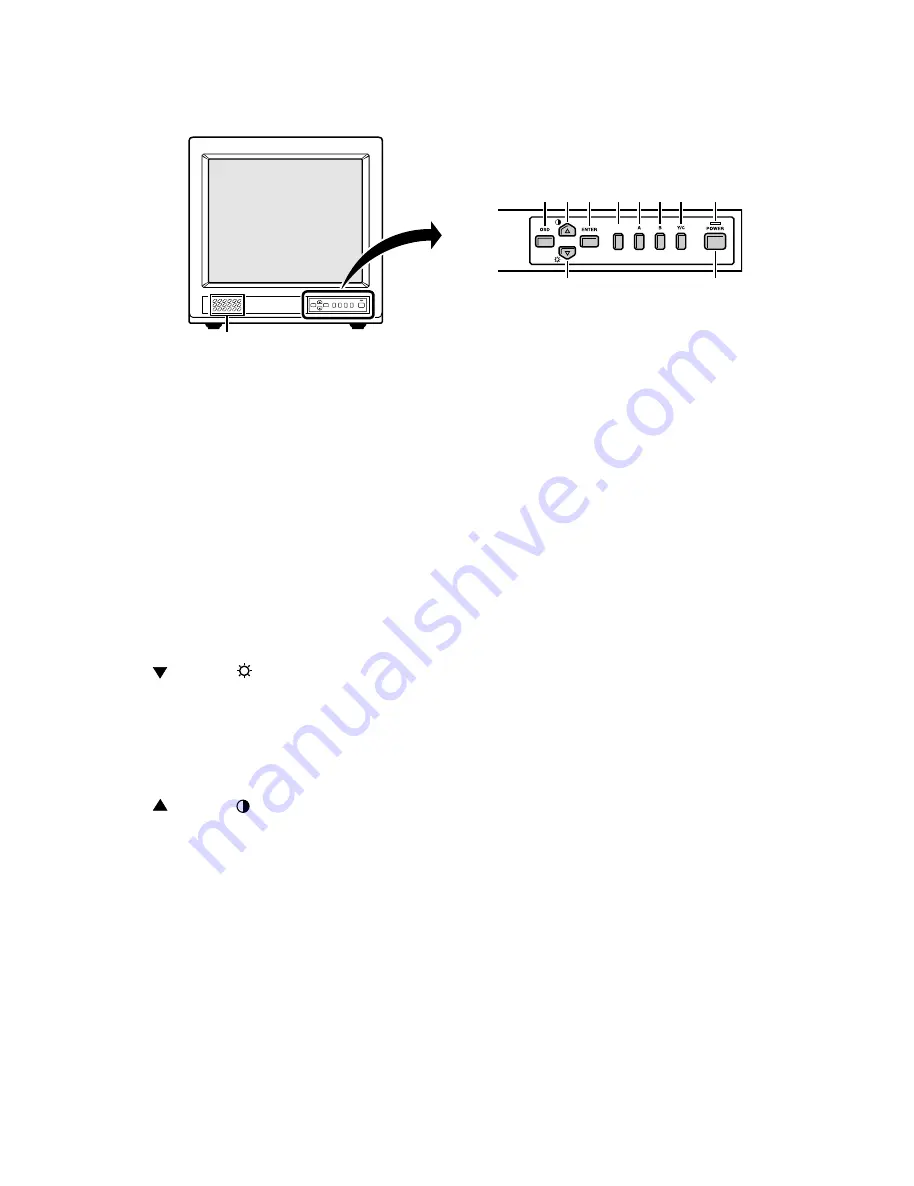
Fig. 2
1. Speaker
When the monitor selector button (A, B or Y/C) is
pressed, the speaker lets you hear the sound from
the components which are connected to the termi-
nals at the rear of the monitor. (Use components
which produce audio output.)
2. On-screen display button (OSD)
When this button is pressed, the menu screen
appears on the monitor screen.
3. Cursor (
) button (
)
When this button is pressed, the cursor moves
down. When it reaches the bottom, it reappears at
the top. In addition, this button is used to make
adjustment values smaller.
4. Cursor (
) button ( )
When this button is pressed, the cursor moves up.
When it reaches the top, it reappears at the bottom.
In addition, this button is used to make adjustment
values larger.
5. Display selector button (ENTER)
If this button is pressed while a picture is on the
monitor screen, the screen changes to the adjust-
ment screen. If the button is pressed once more, the
picture returns to the previous screen.
6. Underscan/overscan select button (SCAN)
The initial setting is for the normal screen (overscan).
1. OPERATING INSTRUCTIONS
1-1. FRONT PANEL CONTROLS
If the SCAN button is pressed, the screen will be-
come smaller (underscan) than the normal screen.
Change this setting in cases such as when screen
display characters are missihg. If the SCAN button is
pressed once more, the normal screen is displayed
again.
7. Monitor A selector button (A)
When this button is pressed, the audio and video
input changes to the component which is connected
to the A terminals at the rear of the monitor.
8. Monitor B serector button (B)
When this button is pressed, the audio and video
input changes to the component which is connected
to the B terminals at the rear of the monitor.
9. Monitor Y/C selector button (Y/C)
When this button is pressed, the audio and video
input changes to the component which is connected
to the Y/C terminals at the rear of the monitor.
10. Power indicator (POWER)
Lights when the power is on.
11. Power button (POWER)
Press this button to turn the power on and off.
2
4
5
6
7
1 0
1
SCAN
9
8
3
1 1
All manuals and user guides at all-guides.com


