background image

2

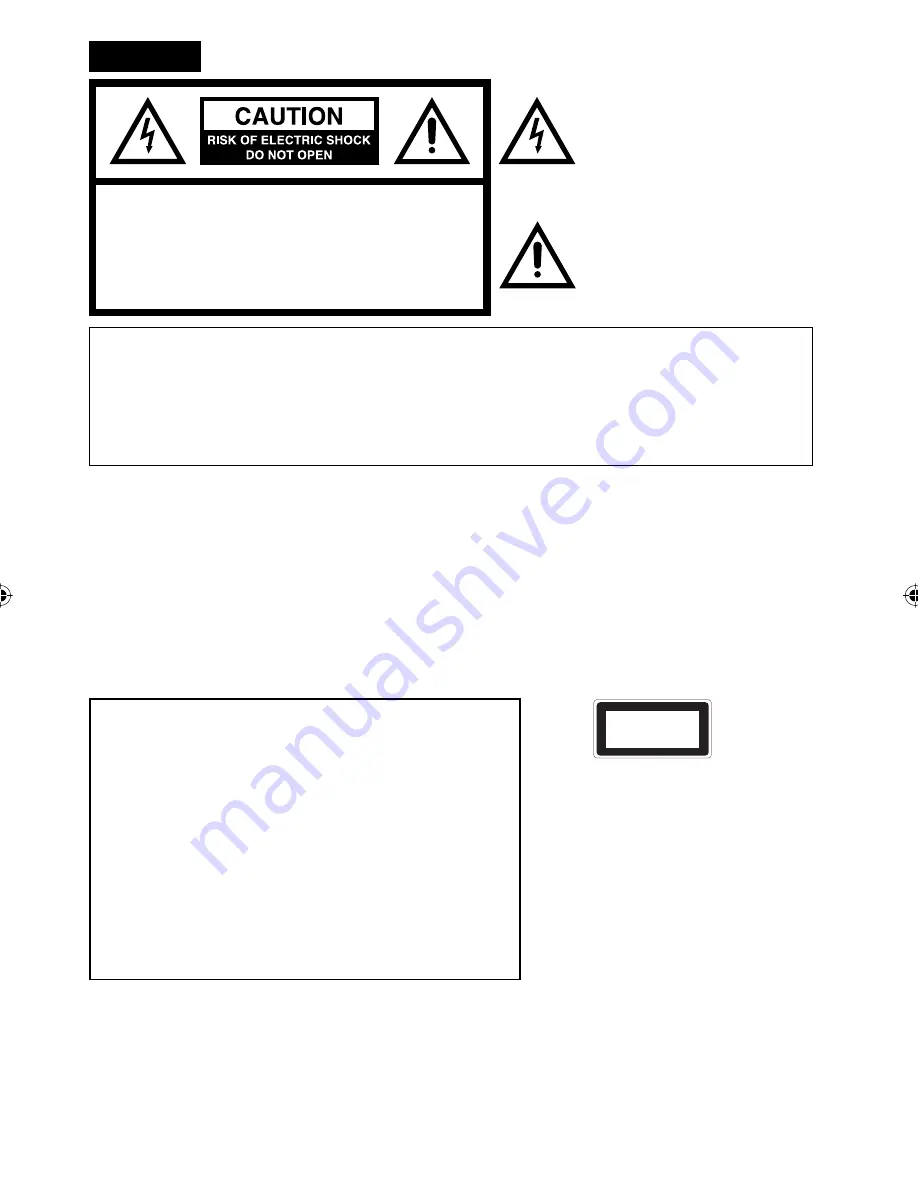
CAUTION:

THIS DIGITAL VIDEO PLAYER EMPLOYS A LASER SYSTEM.
TO ENSURE PROPER USE OF THIS PRODUCT, PLEASE 

READ THIS OWNER'S MANUAL CAREFULLY AND RETAIN 

FOR FUTURE REFERENCE. SHOULD THE UNIT REQUIRE 

MAINTENANCE, CONTACT AN AUTHORIZED SERVICE 

LOCATION-SEE SERVICE PROCEDURE.
USE OF CONTROLS, ADJUSTMENTS OR THE 

PERFORMANCE OF PROCEDURES OTHER THAN THOSE 

SPECIFIED HEREIN MAY RESULT IN HAZARDOUS 

RADIATION EXPOSURE.
TO PREVENT DIRECT EXPOSURE TO THE LASER BEAM, 

DO NOT TRY TO OPEN THE ENCLOSURE. RADIATION MAY 

BE PRESENT WHEN THE ENCLOSURE IS OPENED.  DO 

NOT STARE INTO THE BEAM.

Location of the required Marking

The rating sheet and the safety caution are 

on the rear of the unit.

CERTIFICATION: COMPLIES WITH FDA 

RADIATION PERFORMANCE STANDARDS, 21 

CFR SUBCHAPTER J.

Complies with FDA performance standards 

for laser products except for deviations 

pursuant to Laser Notice No. 50, dated 

June 24, 2007.

The lightning flash with arrowhead 

symbol, within an equilateral triangle 

is intended to alert the user to the 

presence of uninsulated dangerous 

voltage within the product's enclosure 

that may be of sufficient magnitude to 

constitute a risk of electric shock.

The exclamation point within an 

equilateral triangle is intended to 

alert the user to the presence of 

important operating and maintenance 

(servicing) instructions in the literature 

accompanying the appliance.


CAUTION:

 TO REDUCE THE RISK OF ELECTRIC 

SHOCK, DO NOT REMOVE COVER 
(OR BACK). NO USER-SERVICEABLE 
PARTS INSIDE. REFER SERVICING TO 
QUALIFIED SERVICE PERSONNEL. 


WARNING:

 TO PREVENT FIRE OR SHOCK HAZARD, DO NOT EXPOSE THIS APPLIANCE TO RAIN 

OR MOISTURE. 


 TO PREVENT THE SPREAD OF FIRE, KEEP CANDLES OR OPEN FLAMES AWAY 

FROM THIS PRODUCT AT TIMES.

 CAUTION:

 TO PREVENT ELECTRIC SHOCK, DO NOT USE THIS POLARIZED PLUG WITH AN 

EXTENSION CORD, RECEPTACLE OR OTHER OUTLET UNLESS THE BLADES CAN 

BE FULLY INSERTED TO PREVENT BLADE EXPOSURE.

WARNING:

  This equipment has been tested and found to comply with the limits for a Class B digital device, pursuant 

to Part 15 of the FCC Rules. These limits are designed to provide reasonable protection against harmful 

interference in a residential installation. This equipment generates, uses and can radiate radio frequency 

energy and, if not installed and used in accordance with the instructions, may cause harmful interference to 

radio communications.


However, there is no guarantee that interference will not occur in a particular installation. If this equipment does 

cause harmful interference to radio or television reception, which can be determined by turning the equipment 

off and on, the user is encouraged to try to correct the interference by one or more of the following measures:


-  Reorient or relocate the receiving antenna.


-  Increase the separation between the equipment and receiver.


-  Connect the equipment into an outlet on a circuit different from that to which the receiver is connected.


-  Consult the dealer or an experienced radio/TV technician for help.

CAUTION: 

  Changes or modifications not expressly approved by the partly responsible for compliance with the FCC Rules 

could void the user’s authority to operate this equipment.

Record the model number and serial number.

Model number _______________   Serial number _______________

ENGLISH

CLASS 1
LASER PRODUCT

55D0121A.indb   2

55D0121A.indb   2

7/7/10   9:14:57 AM

7/7/10   9:14:57 AM

Summary of Contents for SLEDVD198

Page 1: ...ode If not using Cable TV set this menu option to the Air position Lorsque l appareil sort de l usine l option Signal Type est en mode Cable c blodistribution Si vous n utilisez pas la c blodistributi...

Page 2: ...REVENT FIRE OR SHOCK HAZARD DO NOT EXPOSE THIS APPLIANCE TO RAIN OR MOISTURE TO PREVENT THE SPREAD OF FIRE KEEP CANDLES OR OPEN FLAMES AWAY FROM THIS PRODUCT AT TIMES CAUTION TO PREVENT ELECTRIC SHOCK...

Page 3: ...harges Section 810 of the National Electrical Code ANSI NFPA 70 provides information with respect to proper grounding of the mast and supporting structure grounding of the lead in wire to an antenna d...

Page 4: ...is may cause skin inflammation If the liquid gets in your mouth immediately gargle and consult with your doctor Also if the liquid gets in your eyes or touches your skin consult with your doctor after...

Page 5: ...t ghost images This type of damage is NOT COVERED BY YOUR WARRANTY Never leave your LCD Panel on for long periods of time while it is displaying the following formats or images Fixed Images such as st...

Page 6: ...ttach the stand slowly as shown in Figure 1 Finally secure the bottom plate with 2 screws supplied as indicated by the arrows in Figure 2 Be sure to follow the instructions Incorrect installation of t...

Page 7: ...t in MPEG decoder the MPEG audio of DVD discs recorded in this format can be enjoyed The Linear PCM sound of a 48 kHz 24 bit through 96 kHz 24 bit exceeds audio CD sound Convenience Features Direct se...

Page 8: ...o inputs 19 Setting the V Chip 20 Closed Caption 21 CC advanced 21 Setting the picture size 22 DVD operation Preparation 23 Status display of disc 23 Playback procedure 23 Special playback 24 Zooming...

Page 9: ...gion number 1 or ALL of DVD video discs can be used on this unit Title When two or more movies are recorded on a disc the disc is divided into two or more sections Each section is called a TITLE Chapt...

Page 10: ...Files with extensions jpg or JPG can be played Progressive JPEG formatted files do not work It may take some more time to start to play larger files than usual JPEG files with different aspect ratio m...

Page 11: ...CHANNEL buttons VOL VOLUME buttons and INPUT ENTER button can be used to select the desired setting during the menu screen operations PC DVI AUDIO IN jack VIDEO IN jacks VIDEO AUDIO L MONO R COMPONEN...

Page 12: ...Screen menu Reset information in the menu VOL Adjust volume of TV INPUT SELECT Display source selection menu RECALL ZOOM Switch between present last channel Zoom CH Select channel of TV DVD MENU Disp...

Page 13: ...cad ni mh etc batteries Remove batteries if the remote control will not be operated for an extended period of time Power source TO USE AC POWER Connect the AC cord plug into this unit s AC IN jack Con...

Page 14: ...subscribers to unscrambled Cable TV service with scrambled premium channels If you subscribe to a Cable TV service in which basic channels are unscrambled and premium channels require the use of a Co...

Page 15: ...will be delayed for a few seconds TO SELECT ANALOG CHANNELS 1 9 Press 1 9 as needed Example to select channel 2 press 2 then press ENTER 10 99 Press the 2 digits in order Example to select channel 12...

Page 16: ...TV s sound will be silenced and Mute will appear on the screen The sound can be switched back on by pressing this button again or the VOL or SLEEP To set the TV to turn off after a preset amount of t...

Page 17: ...re provides high fidelity stereo sound MTS also can transmit a second audio program SAP containing a second language or other audio information When the TV receives a stereo or SAP broadcast the word...

Page 18: ...vance for several minutes please be patient NOTE Memorizing channels is best accomplished during evening PRIMETIME hours as more stations are broadcasting digital signals Memorizing channels can only...

Page 19: ...or to select a channel you want to label then press Ch Label Label Clear Adjust Ch Label Channel Number 15 1 Select 4 Press or repeatedly until the character you want appears in the first space Label...

Page 20: ...ars old and above TV MA 17 years old and above Genre ALL All D Dialogue L Language S Sex V Violence FV Fantasy Violence Movie Rating G PG PG 13 R NC 17 X ENTER Set Movie Rating Select G All ages PG Pa...

Page 21: ...2 Press or to select Closed Caption then press or ENTER The Closed Caption menu will appear 3 Press or to set CC Setting to On On Captions will be displayed on the screen Off Captions will not be dis...

Page 22: ...Natural 4 Full 3 Cinema Wide3 NOTE Selectable picture sizes may vary depending on the input source or broadcast signal Picture Size menu also can be displayed by pressing PICTURE SIZE on the remote c...

Page 23: ...nit When you set a single faced disc label downwards i e the wrong way up Loading will appear on the display and then Can t play disc will be displayed Some playback operations of DVDs may be intentio...

Page 24: ...1 Press ZOOM during playback The center part of the image will be zoomed in Each press of ZOOM will change the ZOOM magnification Zoom 2 and Zoom 4 2 Press to view a different part of the frame You m...

Page 25: ...DVD Changing soundtrack language You can select the language when you play a multilingual disc 1 Press AUDIO during playback The current soundtrack language will appear Current Total Audio 1 2 English...

Page 26: ...g playback Play Mode screen will appear A Start Point B End Point Off A B Repeat Repeat Random Program Search Mode Play Mode 2 Press to select A B Repeat then press or ENTER 3 Press to select A Start...

Page 27: ...ode in HOME MENU Locating desired scene 1 Press PLAY MODE during playback or stop mode Play Mode screen will appear 2 Press to select Search Mode then press or ENTER 3 Press to select desired search m...

Page 28: ...est part and the darkest part Gamma Emphasize dark part of images Hue Adjust a balance between green and red Chroma Level Adjust color density It is effective with animation or something with high col...

Page 29: ...the image fills the screen 16 9 Wide Set if you have a widescreen TV Language settings Audio Language English French Spanish If there is an English French or Spanish soundtrack on the disc then it wi...

Page 30: ...ssword Change Level Change Country Code 2 Press Number buttons 0 9 to input the current password then press ENTER Digital Audio Out Video Output Language Display Options 1 2 3 4 5 6 7 8 Off Initial Se...

Page 31: ...Moldavian mo 1315 Marathi mr 1318 Malay ms 1319 Maltese mt 1320 Burmese my 1325 Nauru na 1401 Nepali ne 1405 Norwegian no 1415 Occitan oc 1503 Oromo om 1513 Oriya or 1518 Panjabi pa 1601 Polish pl 161...

Page 32: ...onent OUT Audio cord not supplied Component video cord not supplied To COMPONENT AUDIO IN Left of the unit To COMPONENT IN To Audio OUT NOTE Component Video input of the unit are for use with a device...

Page 33: ...nnect one end of a male to male VGA cable to the video cord of the computer and the other end to the VGA connector PC MONITOR on the rear of the TV Attach the connectors firmly with the screws on the...

Page 34: ...plied To DVI output To HDMI out or HDMI device DVI device To HDMI IN To PC DVI AUDIO IN NOTE When using HDMI to connect your HDMI or DVI devices you must select the corresponding audio input source HD...

Page 35: ...ARIATION A slight picture size variation is normal when you adjust the CONTRAST or BRIGHTNESS settings Most types of television interference can be remedied by adjusting the height and position of the...

Page 36: ...icture wobbles or drifts Station or Cable TV experiencing problems tune to another station Make sure channels are set into memory Cable TV company is scrambling signal Check antenna orientation 15 18...

Page 37: ...med Some discs may not allow some functions No surround sound The setup does not match your stereo system 33 The unit or remote operation key is not functioning Turn off the unit and unplug the AC pow...

Page 38: ...0p HDMI Audio 2 channel PCM 32 44 1 48 kHz sampling frequency 16 20 24 bits per sample PC Monitor Mini Dsub 15pin x 1 Antenna VHF UHF In 75 ohms coaxial Outputs Digital audio out 0 5 Vp p 75 ohms term...

Page 39: ...ufacturers This warranty does not cover a Damage to video disc b Damage to equipment not properly connected to the product c Costs incurred in the shipping of the product to an ORION authorized Indepe...

Page 40: ...PAS CET APPAREIL LA PLUIE NI L HUMIDIT POUR VITER QU UN INCENDIE NE SE PROPAGE GARDEZ LES CHANDELLES OU LES FLAMMES NUES L CART DE CE PRODUIT EN TOUT TEMPS ATTENTION POUR PR VENIR LES CHOCS LECTRIQUES...

Page 41: ...on d une antenne ext rieure toutes les pr cautions doivent tre prises pour ne pas toucher ces lignes ou ces circuits lectriques Tout contact avec eux pourrait tre mortel 17 Ne surchargez pas les prise...

Page 42: ...areillement si le liquide entre en contact avec les yeux ou la peau il faut tout d abord rincer les parties touch es l eau pure pendant au moins 15 minutes puis consulter un m decin S CURIT DES ENFANT...

Page 43: ...e subtiles mais permanentes Ce type de dommage n est PAS COUVERT PAR VOTRE GARANTIE Ne gardez jamais votre cran ACL allum pour une longue p riode de temps quand il affiche les formats ou les images su...

Page 44: ...unit et fixez lentement le socle tel que montr dans la Figure 1 Comment enlever le socle Pour transporter ce produit d montez le socle et posez le plat contre l arri re de l appareil dans le carton Po...

Page 45: ...es DVD enregistr s dans ce format La reproduction sonore de type PCM lin aire de 48 kHz 24 bits 96 kHz 24 bits est de qualit sup rieure celle obtenue avec un CD audio Fonctions pratiques S lection dir...

Page 46: ...ribution d un nom aux diff rents canaux 19 tiquetage des entr es vid o 19 Utilisation de la Puce V 20 Sous titrage 21 Sous titrage avanc 22 R glage du format d image 22 Fonctionnement du lecteur DVD P...

Page 47: ...eil et aux DVD vid o Les DVD vid o au num ro de r gion 1 ou ALL sont utilisables avec cet appareil Titre Lorsque qu un DVD contient deux films ou plus il est subdivis en tant de sections On appelle ch...

Page 48: ...les extensions jpg ou JPG est possible La lecture des fichiers format s en JPEG progressif est impossible La lecture des fichiers anormalement volumineux n cessite davantage de temps Les fichiers JPE...

Page 49: ...F ANT IN Prise PC MONITOR IN Pour afficher le menu l cran du t l viseur Touche MENU pour afficher le menu des fonctions l cran du t l viseur Les touches CH CHANNEL VOL VOLUME et INPUT ENTER peuvent se...

Page 50: ...cran Pour r initialiser l information dans le menu VOL Pour r gler le volume du t l viseur INPUT SELECT Pour afficher le menu de s lection de source RECALL ZOOM Pour commuter entre le canal actuel et...

Page 51: ...de pendant un certain temps retirez en les piles Source d alimentation POUR BRANCHER L APPAREIL SUR UN R SEAU LECTRIQUE DE COURANT ALTERNATIF CA Branchez la fiche du cordon CA dans la prise d entr e C...

Page 52: ...ion sans brouillage avec des canaux payants brouill s Si vous tes abonn un service de c blodistribution dont les canaux de base ne sont pas brouill s et les canaux payants exigent l utilisation d un c...

Page 53: ...le volume augmente le nombre de barres bleues augmente aussi l cran et vice versa 3 R glez l option de s lection du type de signal Signal Type la position appropri e consultez la rubrique S lection du...

Page 54: ...out de quelques secondes l cran DISPLAY r tablit automatiquement le fonctionnement normal du t l viseur RAPPEL DE CANAL La touche RECALL vous permet de retourner au dernier canal s lectionn Appuyez de...

Page 55: ...si de transmettre un programme secondaire audio SAP contenant une deuxi me langue ou d autres donn es sonores Lorsque le t l viseur re oit une mission st r ophonique ou en SAP le mot Stereo ou SAP est...

Page 56: ...barre peut rester immobile pendant plusieurs minutes veuillez donc patienter REMARQUE Il est pr f rable de r aliser la m morisation des canaux pendant les heures de grande coute de la soir e puisque d...

Page 57: ...entifier un canal Pour cr er des noms de canaux 1 S lectionner Channel puis sur ou ENTER 2 Appuyez sur ou pour s lectionner Ch Label puis sur ou ENTER Le menu Ch Label appara t 3 Appuyez sur ou pour s...

Page 58: ...puis sur ou ENTER Le menu V Chip Set appara t 5 Appuyez sur ou pour s lectionner la classification utiliser puis sur ou ENTER Chacune des classifications ci dessous s affiche TV Rating Classification...

Page 59: ...tenu et le format peuvent varier Vous ne pouvez pas s lectionner cette fonction si le t l viseur ne re oit pas de signal num rique la station actuelle Pour effacer tous les r glages de la puce V 1 S l...

Page 60: ...C Advanced puis sur ou ENTER Le menu CC Advanced appara t 6 Appuyez sur ou pour s lectionner l l ment d sir puis sur ou pour modifier le r glage CC Advanced Text Size Auto Text Type Auto Text Edge Aut...

Page 61: ...lettres avec sous titres Pour remplir la largeur de l cran l image est tir e l horizontale Cependant elle est tr s peu tir e vers le haut et le bas Les bords sup rieur et inf rieur de l image peuvent...

Page 62: ...P pour arr ter la lecture L appareil peut enregistrer le point d arr t de lecture des vid os mais uniquement pour certains disques Appuyez sur PLAY pour reprendre la lecture partir du point d arr t L...

Page 63: ...ferez un zoom avant sur la partie centrale de l image Chaque pression de ZOOM modifie le facteur d agrandissement ZOOM 2x et 4x 2 Appuyez sur pour afficher une autre partie de l image Il vous est poss...

Page 64: ...enregistr s sur le DVD Changement de langue de la bande son Vous pouvez s lectionner la langue quand vous passez un disque multilingue 1 Appuyez sur AUDIO pendant la lecture La langue actuelle de la...

Page 65: ...MODE pendant la lecture L cran Play Mode appara t A Start Point B End Point Off A B Repeat Repeat Random Program Search Mode Play Mode 2 Appuyez sur pour s lectionner A B Repeat puis appuyez sur ou EN...

Page 66: ...ran Play Mode en s lectionnant Play Mode dans HOME MENU Mode recherche 1 Appuyez sur PLAY MODE pendant la lecture ou mode Arr t Play Mode screen will appear 2 Appuyez sur pour s lectionner Search Mode...

Page 67: ...s plus sombres Gamma Renforce les zones sombres des images Hue Ajustez l quilibre entre le vert et le rouge Chroma Level Ajustez la densit de couleurs Cette fonction est efficace pour les animations o...

Page 68: ...les images remplissent tout l cran 16 9 Wide r gler si vous poss dez un t l viseur cran large Langue settings Audio Language English French Spanish Si le disque comporte une plage sonore en Anglais Fr...

Page 69: ...Change Country Code 2 Appuyez sur les touches num rot es 0 9 pour entrer le mot de passe puis appuyez sur ENTER Digital Audio Out Video Output Language Display Options 1 2 3 4 5 6 7 8 Off Initial Set...

Page 70: ...ms 1319 Maltese mt 1320 Burmese my 1325 Nauru na 1401 Nepali ne 1405 Norwegian no 1415 Occitan oc 1503 Oromo om 1513 Oriya or 1518 Panjabi pa 1601 Polish pl 1612 Pashto Pushto ps 1619 Quechua qu 1721...

Page 71: ...0p Gauche de l appareil Vers la sortie Vid o Audio C ble Vid o Audio non compris Vers l entr e VIDEO AUDIO Vers la sortie de vid o en composantes C ble Audio non compris C ble de Vid o en composantes...

Page 72: ...viseur un PC ordinateur personnel Avant de connecter le pr sent t l viseur votre PC ajustez la r solution et le taux de rafra chissement de votre PC 60 Hz Raccordez un bout de c ble VGA m le m le la...

Page 73: ...enu reportez vous la page 17 Sinon vous verrez l image mais n entendrez pas le son Si vous raccordez un appareil externe d codeur de c blodistribution r cepteur satellite etc au t l viseur LED au moye...

Page 74: ...l cran est normale lorsque vous ajustez les r glages du contraste et de la luminosit BRIGHTNESS Il est possible de rem dier la plupart des interf rences subies par le t l viseur en r glant la hauteur...

Page 75: ...17 14 36 L image tremble ou d rive Probl me la station ou au r seau de c blodistribution syntonisez une autre station Assurez vous que les canaux sont m moris s Le c blodistributeur brouille les sign...

Page 76: ...certaines fonctions Pas de reproduction sonore ambiophonique Les r glages ne conviennent pas la cha ne st r o 34 Les touches de l appareil ou de la t l commande ne fonctionnent pas teignez l appareil...

Page 77: ...de r ception VHF 2 13 UHF 14 69 CATV 14 36 A W 37 59 AA WW 60 85 AAA ZZZ 86 94 86 94 95 99 A 5 A 1 100 135 100 135 01 4A Entr e Vid o RCA 1 V p p 75 ohms Audio RCA 8 dBm 50K ohms Vid o en composantes...

Page 78: ...Memo...

Page 79: ...Memo...

Page 80: ...J55D0121A SH10 07 K Printed in Thailand Imprim en Thailande...

Reviews: