


10
Connecting your radio to your network
1. Place your radio on a surface and plug the mains lead into the Mains
input socket located on the rear of your radio (marked ) ensuring
that the plug is pushed fully into the socket.
2. Plug the other end of the mains lead into a wall socket and switch on
the wall socket.
There are 2 days of connecting your radio to the network,
wired and wireless:
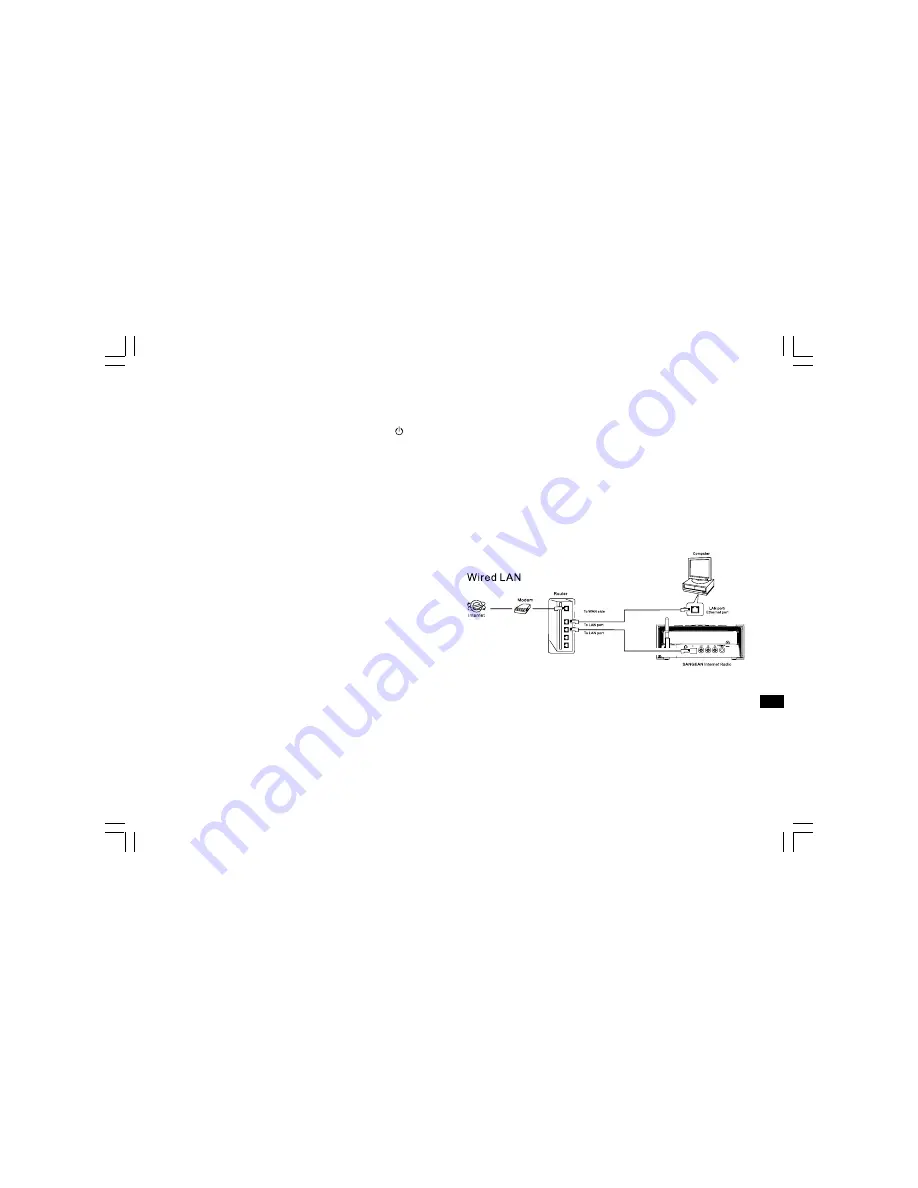
When using a wired (LAN) network (For RCR-7WF only)
1. Connect the Ethernet cable into the RJ-45 socket at the back of
the radio. If a wired connection is present then the radio will use this
in preference to a wireless connection.
There are two indicator lights incorporated into the RJ-45 connector.
If you have problems with your wired connection, they may help you
to identify the possible cause of the problem.
Green ON = Link established, Flashing = Data transfer
Yellow ON = 100M bps link, OFF = 10M bps link.
2. Turn on the radio by pressing the Power button, and you can start to
operate the radio. And the display will show <Internet Radio>.
GB
Summary of Contents for RCR-8WF
Page 9: ...8 GB 26 USB slot RCR 7 only SD card slot RCR 7 only 27 Controls Right hand side...
Page 41: ...40...
Page 81: ...80...
Page 121: ...120...
Page 129: ...128 26 USB sleuf alleen RCR 7 SD kaart sleuf alleen RCR 7 27 Bedieningsknoppen RECHTERKANT NL...
Page 161: ...160...
Page 201: ...200...


