background image

0

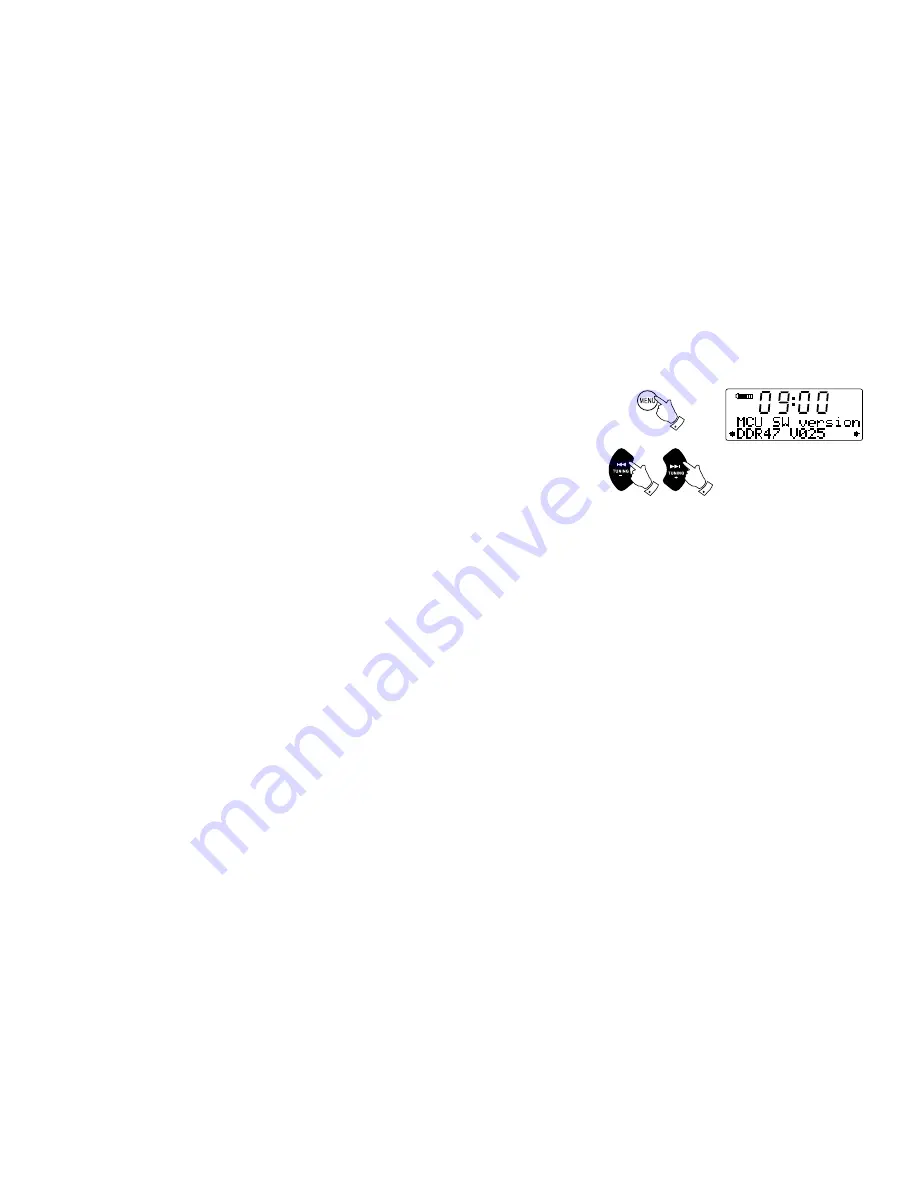
Software version

The software version display cannot be altered and is provided for reference only.

. To view all the software version installed in your system, press and hold he Menu button so 
    that "Set brightness" appears on display.

. Press the Tuning Up or Down buttons until "SW version" appears on the display. Press the 
    Tuning Up or Down buttons to view different items’ software version. The software version will 
    appear on the display.

Note: 
Software version can be viewed when the radio is in Standby mode.

2

2

DAB

1

Summary of Contents for DDR-47BT

Page 1: ...Version 1 DDR 47BT GB...

Page 2: ...21 29 Compact discs 21 22 Playing a CD 23 CD search and repeat 24 CD track programming 25 MP3 WMA CD mode 26 MP3 WMA file and folder selection 27 29 SD USB playback and recording 30 36 SD USB file an...

Page 3: ...button Record button 14 Sleep Clock set button 15 Equalizer Bluetooth pair button 16 Folder button 17 Info Menu button 18 Media button for CD SD USB 19 Source button for DAB FM AUX Bluetooth 8 Select...

Page 4: ...nections Rear 20 Telescopic aerial 21 SD card socket 22 USB playback socket 23 Mains input socket 24 USB charging socket 25 USB socket for software upgrade 26 Auxiliary input socket 27 Line out socket...

Page 5: ...button Record button Media button Sleep Clock button Repeat button EQ Bluetooth pair button Random button Alarm button Source button Auto tune button Play Pause button Folder down button Tuning up Fa...

Page 6: ...me indicator AM PM indicator Clock digits FM indicator DAB indicator CD indicator Stereo indicator SD indicator USB indicator MP3 indicator WMA indicator Repeat all files indicator Repeat folder indic...

Page 7: ...se the battery cover by inserting the retaining lugs first then apply pressure to the free end such that the catch latches the cover securely 4 If the remote is not to be used for an extended period o...

Page 8: ...trol your sound system See also the section of Touch Panel Sensitivity Control The panel may be cleaned using a dry cloth Do not use abrasives cleaning fluids or solvents Remote control functions Most...

Page 9: ...socket and switch on the wall socket IMPORTANT The mains plug is used as the means of connecting the sound system to the mains supply The mains socket used for the sound system must remain accessible...

Page 10: ...own buttons to select an alternative station See selecting a station on the following page The display will show the station name on the upper line of the text display and broadcast information on the...

Page 11: ...he chosen station The display may show Now tuning while your radio finds the new station The use of memory presets is described in the later section 4 Adjust the Volume to the required setting If afte...

Page 12: ...B reception c Programme type Displays the type of station being listened to e g Pop Classic News etc d Multiplex Name Displays the name of the multiplex to which the current station belongs e Frequenc...

Page 13: ...ound the station counter on the right hand side of the display will increase and stations will be added to the list 2 Alternatively press and release the Menu button 3 Press the Tuning up or down butt...

Page 14: ...release the Select button 3 Press the Tuning Up or Down buttons to select the required DAB channel 4 Press and release the Select button to select the channel A signal strength display will appear The...

Page 15: ...lease the Select button to enter the DRC adjustment mode 5 Press and release the Tuning Up or Down buttons to select the required DRC setting the default is off DRC off DRC is switched off Broadcast D...

Page 16: ...ppears on the display 2 Press the Tuning Up or Down buttons until Prune appears on the display 3 Press and release the Select button to cause the stations list to be pruned eliminating unavailable sta...

Page 17: ...frequency of the signal found If the signal is strong enough and there is RDS data present then the radio will display the station name 6 To find additional stations press and release the Auto tune b...

Page 18: ...each second 4 When the end of the waveband is reached the radio will recommence tuning from the opposite end 5 Set the Volume to the desired setting 6 To switch off your sound system press the On Sta...

Page 19: ...nd RDS indicator St and RDS 1 Press the Info button to cycle through the various modes a Radio text Displays radio text messages such as news items etc b Programme type Displays the type of station be...

Page 20: ...down the required Preset button 1 to 10 until the display shows for example Preset 1 stored The station will be stored using the chosen preset number Repeat this procedure for the remaining presets as...

Page 21: ...tem press and hold he Menu button so that Set brightness appears on display 2 Press the Tuning Up or Down buttons until SW version appears on the display Press the Tuning Up or Down buttons to view di...

Page 22: ...rom the centre towards the edge Cleaning agents may damage the CD Do not expose the CD to rain moisture sand or to excessive heat e g from heating equipment or in motor cars parked in the sun CD R CD...

Page 23: ...eject a CD press and release the CD Eject button To reload a CD that has just been ejected press the Eject button a second time 4 Insert a disc with printed side facing up into the CD slot The disc w...

Page 24: ...on it will return to the previously played track 5 To take out the CD press the CD Eject button The display will show EJECT In order to protect the disc if it is not removed the unit will reload the C...

Page 25: ...pears in the display The current track will be repeated Repeat all tracks 3 While the CD is playing press the Repeat button until the repeat all tracks symbol appears in the display All of the tracks...

Page 26: ...track into the programme 5 Choose another track using the Fast forward or Rewind buttons and enter it into the programme using the Menu button track 6 in example shown 6 Repeat step 5 to store as many...

Page 27: ...coding software or by the hardware settings of the PC s CD writer or by the CD being used Should such problems arise contact the customer services of your CD writer or software manufacturer or look in...

Page 28: ...he display will show EJECT In order to protect the disc if it is not removed the unit will reload the disc after 10 seconds and then enter standby mode To reload a CD that has just been ejected press...

Page 29: ...ering 15 will play the fifth file in the second folder Search function 1 While the MP3 WMA CD is playing press and hold the Fast forward or Rewind buttons Release the button when the desired part of t...

Page 30: ...DDR 47BT SD card and USB slots are located behind the panel beneath the volume control This is opened by pushing and releasing the right hand top corner of the panel To close the panel press the right...

Page 31: ...ut pressing the Stop button then the next time the unit is switched on it will return to the previously played file Selecting a file 1 While the SD card USB memory device is playing press either the F...

Page 32: ...ll play the fifth file in the second folder Search function 1 While the SD card USB memory device is playing press and hold the Fast forward or Rewind buttons Release the button when the desired part...

Page 33: ...recorded files will be added to those already present on the media Making a recording 1 Select the desired source for the recording DAB FM CD etc AUX IN is shown in the illustration Set the volume to...

Page 34: ...USB LINEIN for recordings from DAB FM Aux etc The illustration shows the folders as they may appear on a PC running Windows with files in the LINEIN folder being shown to the right Other folders on th...

Page 35: ...ia that the files will be recorded on to SD or USB 4 Press the Record button on the remote control The display will show Record init 5 If only one media type is present the audio will stop while the s...

Page 36: ...he display will show Delete as the default option 3 In order to delete a single file the file which is currently displayed press the Select button once more The display will show Cancel as the default...

Page 37: ...l show Cancel as the default option 5 If you do not wish to delete all of the files on the media press the Select button with Cancel displayed Alternatively to delete all of the files press one of the...

Page 38: ...with your DDR 47BT 4 Once connected the Bluetooth icon will remain illuminated You can now play the music in your Bluetooth enabled device via DDR 47BT Note a If there are 2 Bluetooth devices searchin...

Page 39: ...uning Up down button to go to the next or previous track Note If a phone call is received while a Bluetooth music is playing the music will go mute automatically Disconnecting your Bluetooth device Pr...

Page 40: ...clock manually please follow these steps 1 Press and hold the Clock Set button The hour digits on the display will flash 2 Press the Tuning Up or Down button to highlight the 12 24 hour time format P...

Page 41: ...Tuning Up or Down buttons until the desired month is set Keep the button pressed to cause the month to change more quickly 10 Press and release the Select button to confirm the month setting The day n...

Page 42: ...larm On Off will show on the upper line of the text display 4 Press the Tuning Up or Down buttons to choose whether to set the alarm to On or Off 5 Press and release the Select button If the previous...

Page 43: ...utton to confirm the setting Your alarm can be set to the following options Once will sound once in the next 24 hours only Daily will sound everyday Weekdays will sound only on weekdays Weekends will...

Page 44: ...our sound system can be set to turn off after a preset time has elapsed The sleep setting can be adjusted between 0 and 120 minutes in 10 minute increment 1 To use the sleep timer press and release th...

Page 45: ...lay shows Set Brightness on the lower line of the text display 2 Press and release the Select button to show the current setting 3 Press and release the Tuning Up or Down buttons to change the standby...

Page 46: ...k d Classic e Pop f News g Treble tone setting may be adjusted h Bass tone setting may be adjusted Treble control 2 Press the Equalizer button to cycle through the modes until Treble appears on the up...

Page 47: ...e play mode display To quickly cancel the effect of the treble or bass settings press the Equalizer button until Flat appears on the upper line of the text display The treble and bass settings will be...

Page 48: ...t 3 Adjust the volume setting on your iPod MP3 or CD player if necessary to ensure an adequate signal level and then use the Volume Up or Down buttons on the sound system as needed for comfortable lis...

Page 49: ...ions if reception conditions are poor an external antenna may be more suitable For this purpose the telescopic aerial may be removed to allow connection to an external aerial using a coaxial cable Fir...

Page 50: ...elative to the standard setting 1 Press and hold the Menu button so that the display shows Set Brightness on the lower line of the text display 2 Press and release the Tuning Up or Down buttons until...

Page 51: ...show Press SELECT to reset 4 Press and release the Select button again to confirm the reset operation 5 After a system reset all radio station presets will be set to empty Alarms will be cancelled au...

Page 52: ...is recommended to you by Sangean Customer Services Updating the software may remove all network settings radio station presets and alarm settings from your radio Software updates for your radio may be...

Page 53: ...dripping or splashing and that no objects filled with liquids such as vases shall be placed on the sound system It is recommended to operate the product such that there is a minimum distance 10cm reco...

Page 54: ...eck with your Local Authority or retailer for recycling ad vice Waste Electrical and Electronic Equipment Directive Specification Power Requirement Mains AC 230 volts 50 Hz only Battery Remote control...

Reviews: