background image

5

Mains operation

1. Place your clock radio on a flat surface.

2. Plug the mains lead into the Socket located on the rear of your clock

    radio ensuring that the plug is pushed fully into the socket.

3. Plug the other end of the mains lead into a wall socket and switch on

    the wall socket.
Summary of Contents for DDR-31+

Page 1: ...GB...

Page 2: ...14 Recalling a preset station DAB and FM 14 Scan sensitivity setting 15 Stereo Mono setting FM 16 Clock display 17 Setting the time and the date manually 18 21 Setting the alarm times 22 25 Stop the...

Page 3: ...t 7 Advanced INFO button 8 Infra red sensor 9 Volume knob 10 On StandBy button 11 Tuning control Select knob 12 Preset buttons 1 Loudspeaker 2 Light button 3 Band button 4 Auto tune button 5 Alarm but...

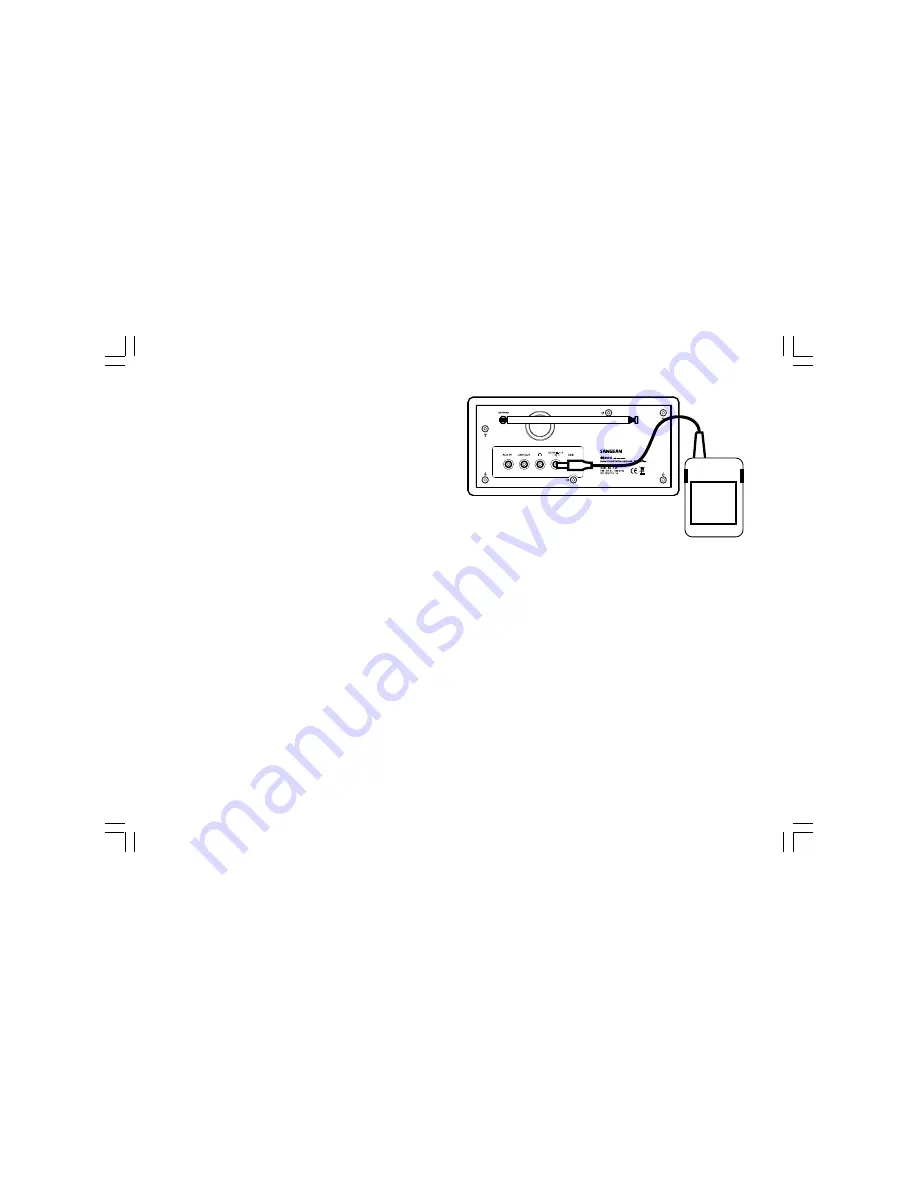
Page 4: ...3 Controls rear 13 Telescopic aerial for DAB FM 14 USB socket for software upgrade 15 DC power in socket 16 Headphone socket 17 Line Out socket 18 Auxiliary input socket...

Page 5: ...own buttons on the remote control 2 Press and hold in the Tuning Knob on the panel is the same as pressing and release the Select button on the remote control 3 Press and hold in the Info button on th...

Page 6: ...o on a flat surface 2 Plug the mains lead into the Socket located on the rear of your clock radio ensuring that the plug is pushed fully into the socket 3 Plug the other end of the mains lead into a w...

Page 7: ...me will appear on the display 3 Press and release the On StandBy button to switch on your clock radio 4 During the scanning process the lower line of the display shows a bar graph indicating progress...

Page 8: ...you wish to hear 3 Press and release the Select button to select the station The display may show Now Tuning while your clock radio finds the new station 4 Adjust the Volume Up or Down buttons to the...

Page 9: ...received Displays the type of station being listened to e g Pop Classic News etc Displays the name of DAB multiplex to which the current station belongs Displays the frequency and channel of the DAB m...

Page 10: ...tations will be added to the list stored in the radio Secondary services DAB 1 Certain radio stations have one or more secondary services associated with them If a station has a secondary service asso...

Page 11: ...tton the display shows Manual tune 2 Press and release the Select button to enter manual tuning mode 3 Press the Tuning Up or Down buttons to select the desired DAB channel 4 Press and release the Sel...

Page 12: ...switch on your clock radio 2 Press and release the Advanced button The display will show Manual tune 3 Press the Tuning Up or Down buttons until the display shows DRC 4 Press and release the Select b...

Page 13: ...on low frequency to high frequency or high frequency to low frequency i e clockwise or counter clockwise press and hold down the Tuning Up or Down buttons for 0 5 seconds and then release the Tuning U...

Page 14: ...if there is no scrolling text available and NO PTY if there is no programme type information Displays the current time Displays the current date Displays scrolling text messages such as artist track n...

Page 15: ...ired Preset button until the display shows e g Preset 1 stored The station will be stored under the chosen preset button Repeat this procedure for the remaining presets 4 Stations stored in preset mem...

Page 16: ...and by pressing Band button 2 Press and release the Advanced button The display will show FM scan zone 3 Press and release the Select button to enter FM Scan Zone set 4 Press the Tuning Up or Down but...

Page 17: ...buttons and then Press and release the Select button to switch on the Mono override While the setting is stored the radio will play the current station in mono whether listening via headphones or the...

Page 18: ...display normally show the current time date month and year 2 During StandBy mode the clock will receive updates from the last station tuned to before entering StandBy mode When in StandBy mode your r...

Page 19: ...s 1 Press and release the On StandBy button to switch on the radio 2 Select the required waveband by pressing the Band button 3 Press and release the Advanced button The display will show FM scan zone...

Page 20: ...d release the Select button to confirm the minutes setting 15 The day digits on the display will flash Press the Tuning Up or Down buttons until the desired day is set 16 Press and release the Select...

Page 21: ...wn buttons to switch Auto update 22 Press and release the Select button to enter the Auto update menu 23 Press the Tuning Up or Down buttons to switch the Auto update mode There are four Auto update m...

Page 22: ...at menu 27 Press the Tuning Up or Down buttons to switch the Set date format mode There are two Set date format modes as DD MM YYYY and MM DD YYYY 28 Press and release the Select button to confirm you...

Page 23: ...button to enter the Alarm 1 Wizard or Alarm 2 Wizard menu 4 The hour digits on the display will flash Press the Tuning Up or Down buttons to change the hour digits as needed 5 Press and release the S...

Page 24: ...eekdays and Daily Once will sound at one time only Weekends will sound only at weekends Weekdays will sound only on weekdays Daily will sound everyday 13 Press and release the Select button to confirm...

Page 25: ...19 The lower line of the display will show a bar graph indicating sound level of the alarm Press the Tuning Up or Down buttons until the desired volume is set Note The default minimum volume level of...

Page 26: ...te If the above alarm setting procedures are not completed the display will show Alarm Not saved You may have to start over above procedures again 25 The alarm has now been set and the unit will rever...

Page 27: ...ms 1 The alarm can be set either the radio is on or standby 2 If the radio is switched on press and release the Alarm button to switch the Alarm 1 Setup or the Alarm 2 Setup meau 3 Press the Tuning Up...

Page 28: ...io is switched on 1 Press and hold down the Sleep button until desired sleep time appears on the display Release the Sleep button 2 The display will show an indicating sleep timer is set 3 Press and r...

Page 29: ...eble and bass levels to your own preferences 1 Press and release repeatedly the EQ button to cycle through the various modes until desired equalizer mode appears on the display Release the EQ button F...

Page 30: ...on to cycle through the modes until Bass appears on the display The current bass setting will be shown on the display 2 To adjust the bass setting press and release the Tuning Up or Down buttons until...

Page 31: ...display will show Volume Muted 2 Press the Mute button again or one of the Volume Up or Down buttons to un mute the sound output Display backlight dimmer 1 In order to adapt the intensity of the displ...

Page 32: ...the adjustment mode 5 Press the Tuning Up or Down buttons until the display shows Factory reset 6 Press and release the Select button to enter the Factory reset menu 7 Press the Tuning Up or Down butt...

Page 33: ...lay will show Manual tune Note Press and release the Advanced button When the DDR 31 Plus is tuned to an FM station the display will show FM scan zone 3 Press the Tuning Up or Down buttons until the d...

Page 34: ...adphones or an earpiece Inserting a plug automatically mutes the internal loudspeaker IMPORTANT Excessive sound pressure from earphones and headphones can cause hearing loss Auxiliary Input socket A 3...

Page 35: ...ot be exposed to dripping or splashing and that no objects filled with liquids such as vases shall be placed on the radio It is recommended to operate the product such that there is a minimum distance...

Page 36: ...ia Line out socket 3 5mm dia Aerial System FM Telescopic aerial DAB Telescopic aerial The Company reserves the right to amend the specification without notice If at any time in the future you should n...

Reviews: