S&S Global Net IPGW410 User Manual Download Page 3

2. Connect the UTP cable from your PCs’ Ethernet port(LAN card) to one of the 

LAN ports on the rear of the IPGW410® 

3. If you need, expand your network by connecting the hub to Uplink port of the 

IPGW410® 

4. Connect the power adapter to the power port on the rear of the IPGW410 


5. In the Windows 

Click the 

Start

 button, select 

Settings

, then 

Control Panel

 and double click 

the 

Network

 icon 


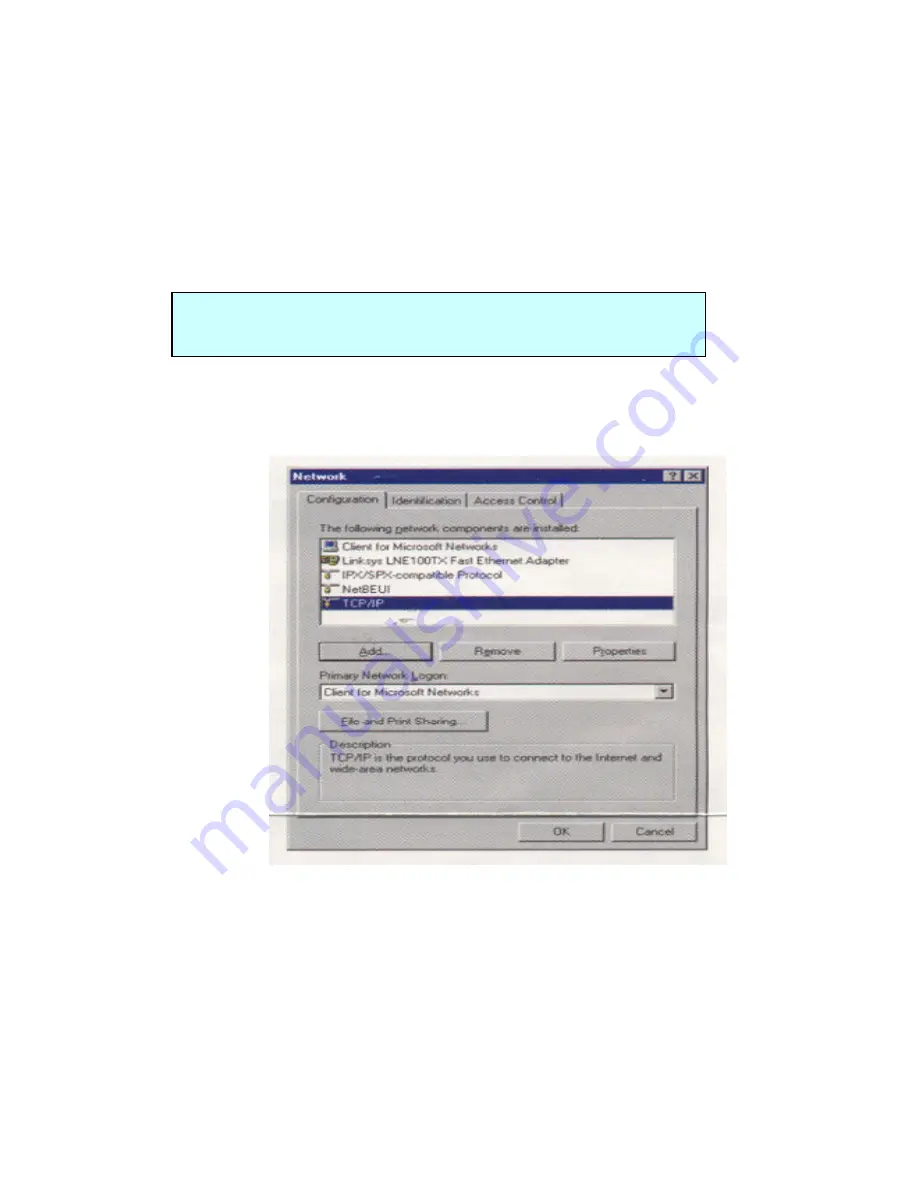
6. In the configuration Windows 

Select the 

TCP/IP Protocol line

 and click the 

Properties

 button 


Notice> select the TCP/IP that has been associated with your network card or 

adapter 


Configuring Your PCs to connect to the IPGW410® 
(Windows95 and 98 machines) 

Summary of Contents for IPGW410

Page 1: ...S S Global Net Inc Broadband Internet Sharing Device IPGW410 User Manual...

Page 2: ...ith Ethernet terminal 10Base T or a dedicated leased line with Ethernet terminal 10Base T CABLE UTP Cable for connecting to another PCs Front of the IPGW410 Rear of the IPGW410 1 Connect the UTP cable...

Page 3: ...r adapter to the power port on the rear of the IPGW410 5 In the Windows Click the Start button select Settings then Control Panel and double click the Network icon 6 In the configuration Windows Selec...

Page 4: ...f 192 168 10 xxx 9 Type Subnet Mask of 255 255 255 0 Click OK button 10 Click the Gateway tab 11 Type 192 168 10 1 in the New Gateway field then click the ADD button Click OK button After close your P...

Page 5: ...n in the password field Click the OK button You will see the IPGW410 s the Basic set up page 14 The Basic setup screen is for using IPGW410 The Device Name Domain Name remain unchanged The Device IP A...

Page 6: ...cally 2 If you are using static IP address Select the Specify an IP Address and then type values IP Address Network Mask Gateway IP Address are assigned by your ISP DNS Domain Name Server IP Address T...

Page 7: ...Enter a number of DHCP users Click the Submit button Click the Disable button Click the Submit button 16 Click the PPPoE on the left menu You will see the following page Click the Enable button Type...

Page 8: ...ick the Submit button Notice The status get settuped Disconnected in the first setup but You will make it a rule to get settuped connected Don t need to setup PPPoE 17 You have completed the client se...

Reviews: