


5. Check the position of the NTSC/PAL switch on the back of the V-Mate. The selected
position should match with the type of TV. Please consult the manual/specifications of
the TV for details.
6. Move the power switch on the back of the V-Mate into the ON position.
7. Pull the plastic strip out of the remote control to activate the battery.
8. Press the power button on the remote and the V-Mate will start up (the blue slot LEDs
blink and the green power LED stays on).
9. Turn on the TV and the video source box and change the input source on the TV.
Depending on the TV, the input source may be called TV/Video, Input, or Source
(consult the TV manual for more information). When the correct source is selected, you
will see a message to insert a memory card. When the V-Mate is turned off (standby)
from the remote control or on the back of the unit, the video signal from the video
source box will be displayed on the TV screen. The V-Mate is now correctly connected
Setting the V-Mate
1. Make sure a compatible memory card is inserted. Only insert one memory card at a time.
2. In the next screen set the date and time (accurate time and date settings are required
for scheduled recordings). When the power supply is disconnected, the clock in the
V-Mate will reset. When the V-Mate is turned on again, a message will come up
requesting to set the clock. After the time is set, the main menu will appear.
3. In order to record a video recording file that is compatible with your playback device,
you need to set the appropriate recording settings. You can do this manually or by
selecting your playback device from a list. To select from a list, select SETTINGS
and then RECORDING FORMAT. Select the appropriate category for you playback
device, then its brand and finally its model number. Settings can be manually adjusted
by selecting SETTINGS
→
RECORDING FORMAT
→
MANUAL SETTINGS. The
following settings can be manually adjusted:
• Quality (the higher the quality, the sharper the video)
• Format (different playback devices often work with different video formats)
• Resolution (the higher the resolution, the bigger the video width and height)
• Frame rate (the higher the frame rate, the smoother the video runs)
4. In order to schedule recordings and to let the V-Mate record programs while you are
not present, the Infrared Emitter needs to use an infrared code that is compatible with
the cable/satellite/terrestrial receiver box or VCR.
A. Go to SETTINGS
→
IR EMITTER.
B. Select the Device Type of the video source box that is connected to the V-Mate.
C. Input the code associated with the device type and the device brand from the table
in the back of this user guide. Check www.sandisk.com for the most recent list of
infrared codes for video source boxes.
D. Run the test to make sure V-Mate communicates properly with your video source box.
5. To adjust the Date and time, go to SETTINGS
→
Date & Time
6. To change the language of the user interface, go to SETTINGS
→
Language
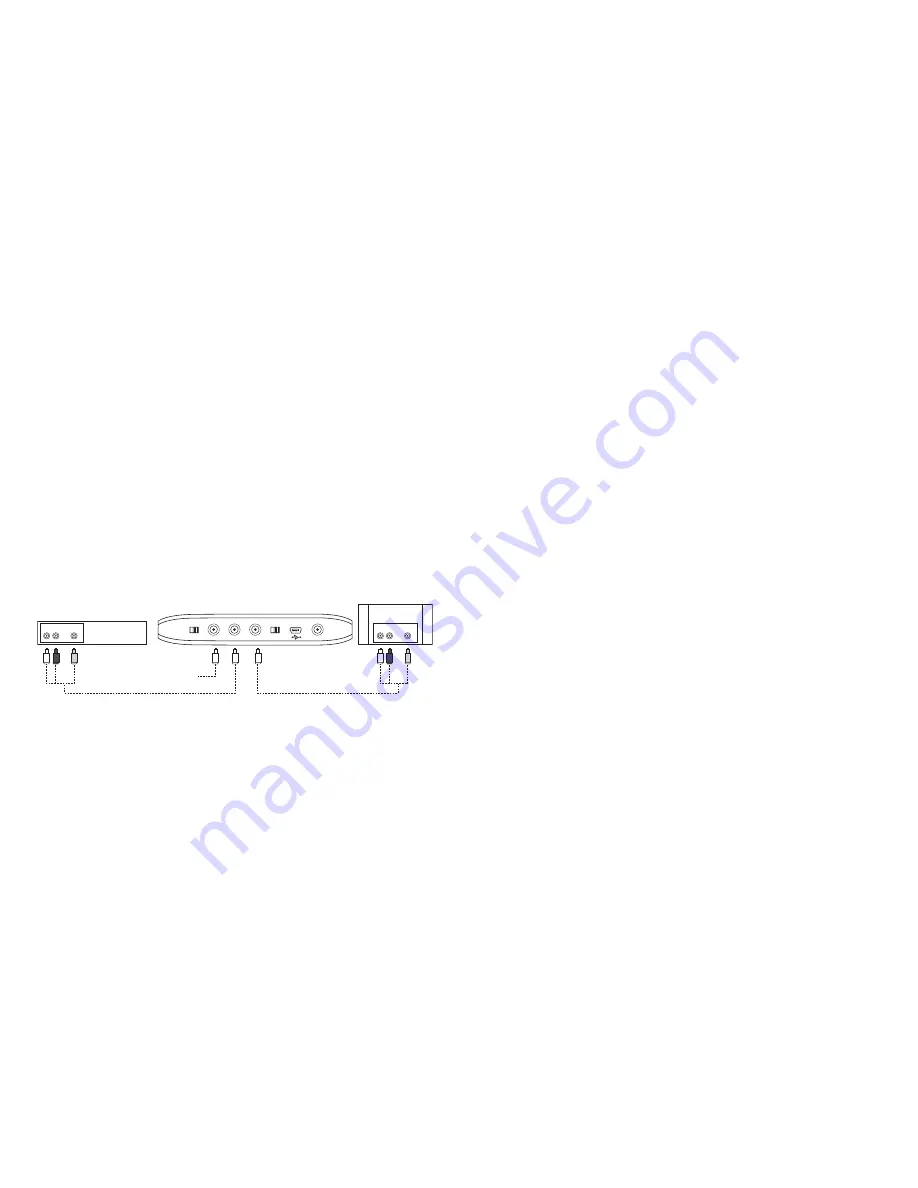
AUDIO OUT
OFF/ON
5v DC
IN
OUT AV
PAL/NTSC
IR Emitter
Video Source
Box (back)
TV
AV Cable (IN)
AV Cable (OUT)
AC Adapter
VIDEO OUT
AUDIO IN
VIDEO IN