


9
8
1
With the VCR on, press the MENU button.
Press
▼
and
❿
to select “Channel setup.”
2
If you have a cable system hooked up to your VCR,
leave CABLE TV displayed in the Ant/Cable screen.
3
If you have an antenna hooked up to your VCR, press
❿
until ANTENNA appears. Press the MENU button
when you have selected the correct signal source.
Memorizing the Channels
1
Press the MENU button. Press
▼
and
❿
to select
“Channel Setup.”
2
Press
▼
and
❿
to start Auto channel memory function.
3
Your VCR will begin memorizing all available channels.
To interrupt, press the MENU button on the remote con-
trol. When the channel number on screen stops chang-
ing, the VCR has finished.
Setting the Channels
1
Press the MENU button. Press
▼
and
❿
button to select
“Channel Setup.”
2
Press
▼
and
❿
button to select “Channel Add/Delete.”
3
Press two number buttons or press CH/TRK
▼▲
for
the channel you want to add or delete. For numbers
over 100, press the 100 button on the remote control
first.
For example : To add channel 7, press 0 then 7.
For example : To delete channel 121, press the 100 button,
then 2 and 1.
4
To ADD the selected channel: Press
❿
button on the
remote control.
To DELETE the selected channel: Press
➛!
button on
the remote control.
When you have finished, press the MENU button twice.
Once the VCR memorizes all the available channels, you can use the CH/TRK
▼ ▲
buttons to select channels.
Setting the Source
Before the VCR can memorize available channels, you must set the signal source for your VCR.
Adding or Deleting Memorized Channels
You can add or delete channels that have been memorized with the Automatic Channel Memory function. The Auto
Channel Memory function must be performed before Channel Add/Delete can be used.
Note: • A deleted channel can be accessed with the number buttons, but the CH/TRK
▼▲
buttons skip past it.
• To add the LINE input to channel memory, select LINE using the INPUT SEL button on the remote
control, then press
❿
button on the remote control.
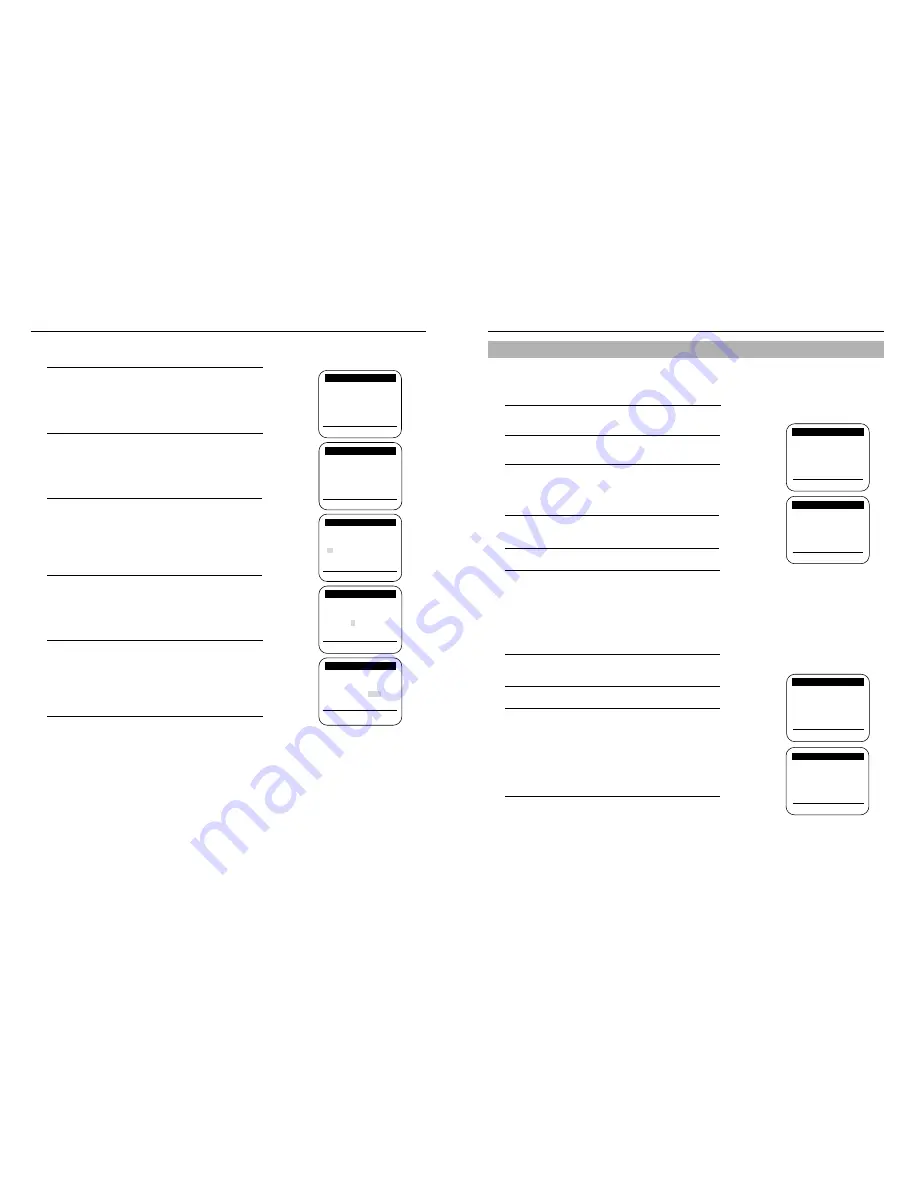
VCR Setup
Ant/Cable: [CABLE TV]
❿
Auto channel memory
Channel add/delete
[
❷
%
/
❿
]
[MENU/EXIT]
CHANNEL SETUP
CHANNEL SETUP
Ant/Cable: [CABLE TV]
Auto channel memory
❿
Channel add/delete
[
❷
%
!
/
❿
]
[MENU/EXIT]
CHANNEL SETUP
❿
Select channel:
[ 01]
and press [
❿
] to ADD
press [
➛
] to DELETE
[
❷
%
!
/
➛❿
]
[MENU/EXIT]
CHANNEL ADD/DELETE
Manually Setting the Clock
1
Press MENU on the remote control. Press
▼
and
❿
to
select “Clock set/adjust.”
2
Use
▼
and
❿
on the remote control to select MANUAL.
3
The first clock setting display appears.
To enter the current time, press
▼
or
▲
and press
❿
to
move to the the next setting.
4
To enter the current month and date, press
▼
or
▲
and
press
❿
to move to the next setting.
5
To enter the current year, press
▲
or
▼
.
The day of the week is automatically added after you set
the year.
6
Press the MENU button to start the clock.
Press the MENU button again when you finish setting
the clock.
VCR Setup
❿
Ant/Cable: [CABLE TV]
Auto channel memory
Channel add/delete
[
❷
%
/
❿
]
[MENU/EXIT]
MAIN MENU
Timer recording
❿
Clock set/adjust
Channel setup
VCR function setup
Language/Lengua/Langue
[
❷
%
/
❿
]
[MENU/EXIT]
TIME DATE YEAR
12:00 1/01
2002 TUE
[
❷
%
!
/
➛❿
] [MENU/EXIT]
TIME DATE YEAR
9:00 5/05
2002 SUN
[
❷
%
!
/
➛❿
] [MENU/EXIT]
CLOCK SET/ADJUST
AUTO
❿
MANUAL
Select [
❷
!
%
!
] and press [
❿
]
[
❷
%
/
❿
]
[MENU/EXIT]
CLOCK SET/ADJUST
CLOCK SET/ADJUST
A
M
TIME DATE YEAR
9:00 5/05
2002 SUN
[
❷
%
!
/
➛❿
] [MENU/EXIT]
CLOCK SET/ADJUST
P
M
P
M


