background image

8

Basic Recording

Making your First Recording

1. Connect a Power source to the camcorder.

(see page 23)
(A battery pack or a AC power adapter) 

Insert a cassette. (see page 27)

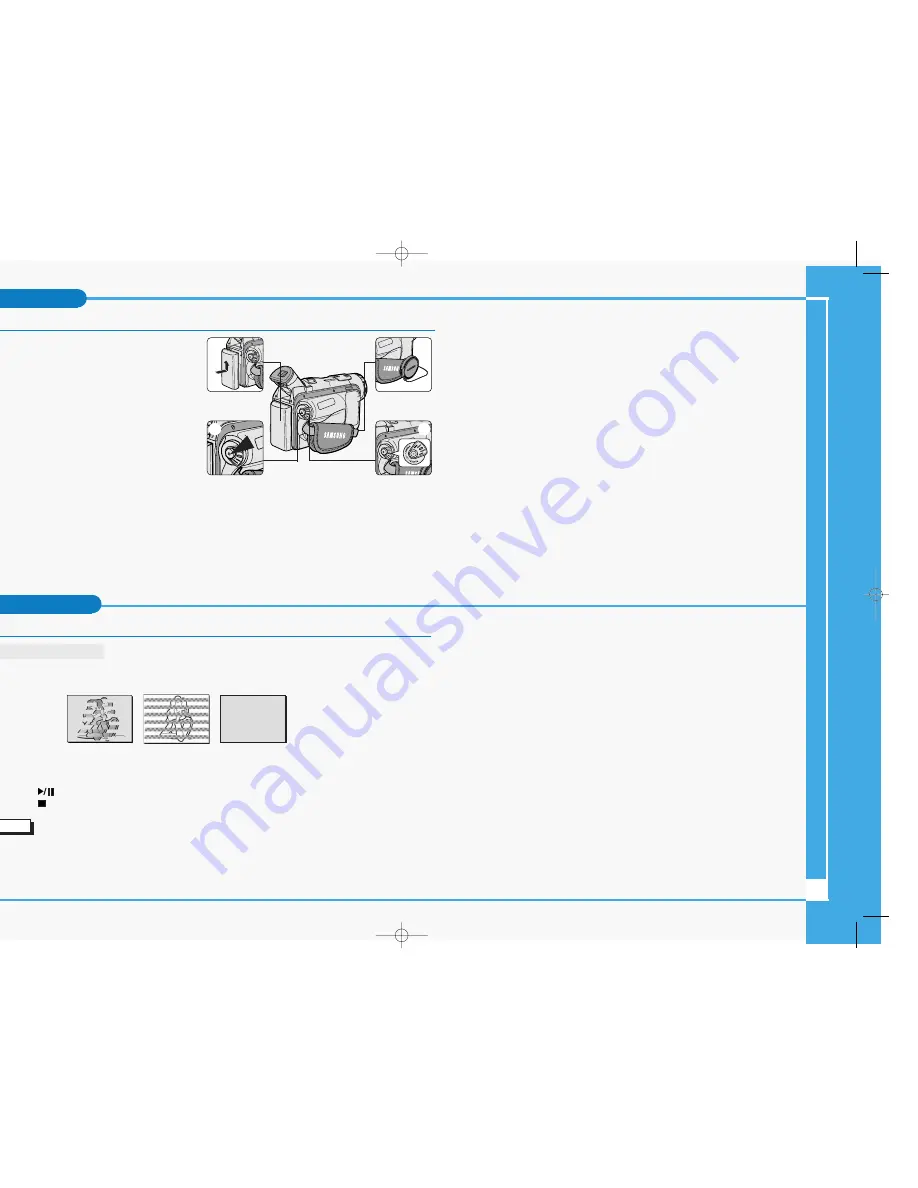
2. Remove the LENS CAP.
3. Set the power switch to the CAMERA position.

Open the LCD monitor. 

Set the mode switch to the TAPE position. 
(VP-D103(i)/D105(i) only)
Make sure that STBY is displayed. 

If the protection tab of the cassette is open,
STOP and PROTECTION! will be displayed.

Make sure the image you want to record appears in the LCD monitor or viewfinder.

Make sure the battery level indicates that there is enough remaining power for your expected
recording time.

4. To start recording, press the START/STOP button.

REC is displayed in the LCD.
To stop recording, press the START/STOP button again.

STBY is displayed in the LCD.

Maintenance

Cleaning and Maintaining the Camcorder

Cleaning the Video Heads

To ensure normal recording and clear pictures, clean the video heads 
when the playback pictures display square block-shaped noise or distortion

,

or a blue screen appears.

1. Set the power switch to PLAYER mode.
2. Insert the cleaning tape.
3. Press the 

(PLAY/STILL) button.

4. Press the 

(STOP) button after 10 seconds.

Notes

Check the quality of the picture using a videocassette. 
If the picture quality has not improved, repeat the operation.
If the problem continues, contact your local authorized service center.

Clean the video heads with a dry type cassette cleaner.

(blue screen)

4

1

3

2

£¥‹º

≥∏

̺

 (D103)  1/4/05 10:28 AM  Page 8

Summary of Contents for VP-D101

Page 1: ...g to Know Your Camcorder 4 Playback 7 Basic Recording 8 Maintenance 8 Digital Video Camcorder VP D101 i D102D i D103 i D105 i Troubleshooting 9 ung Electronics Internet Home Page Kingdom http www sams...

Page 2: ...Digital Special Effects allows you to give your films a special look by adding various special effects Back Light Compensation BLC The BLC function compensates for the bright background behind a subje...

Page 3: ...the LCD uses up more battery power ces regarding COPYRIGHT VP D101i D102Di D103i D105i only es regarding moisture condensation es regarding CAMCORDER es regarding the battery pack When the battery re...

Page 4: ...oulder strap Optional Accessories 12 S VIDEO Cable 13 Scart adapter 14 Memory Stick hium Ion Battery pack 4 AUDIO VIDEO Cable 7 Remote Control VP D103 i D105 i only 10 Lens Cover 3 AC cord 6 Lithium b...

Page 5: ...ction buttons 2 PB ZOOM MACRO 3 DISPLAY 4 V LIGHT P D103 i D105 i only 7 MENU button 8 MENU dial VOL MF 9 ENTER button 10 DC jack 6 Speaker REC SEARCH FADE BLC REV FWD S SHOW EASY MULTI DISP 5 Mode sw...

Page 6: ...e 74 11 F ADV see page 75 12 STOP 13 STILL 14 SLOW 15 DATE TIME 16 X2 see page 75 17 Zoom 18 Display VP D103 i Memory Stick VP D105 i Memory Stick Memory Stick PRO SD MMC Memory Card slot Usable Memor...

Page 7: ...e cable to the AV Jack you will not hear sound from the Camcorder s speakers yback Connecting to a TV which has no Audio and Video input jacks You can connect your camcorder to a TV through a VCR 1 Co...

Page 8: ...g time To start recording press the START STOP button REC is displayed in the LCD To stop recording press the START STOP button again STBY is displayed in the LCD ntenance eaning and Maintaining the C...

Page 9: ...mory Card is record protected Release the write protect tab on the Memory Card CT slow When you try to delete to protected image Cancel the protect of image CT slow The camera can not playback Format...

Reviews: