background image

English - 19

Cautions about the Eco Sensor and Screen 
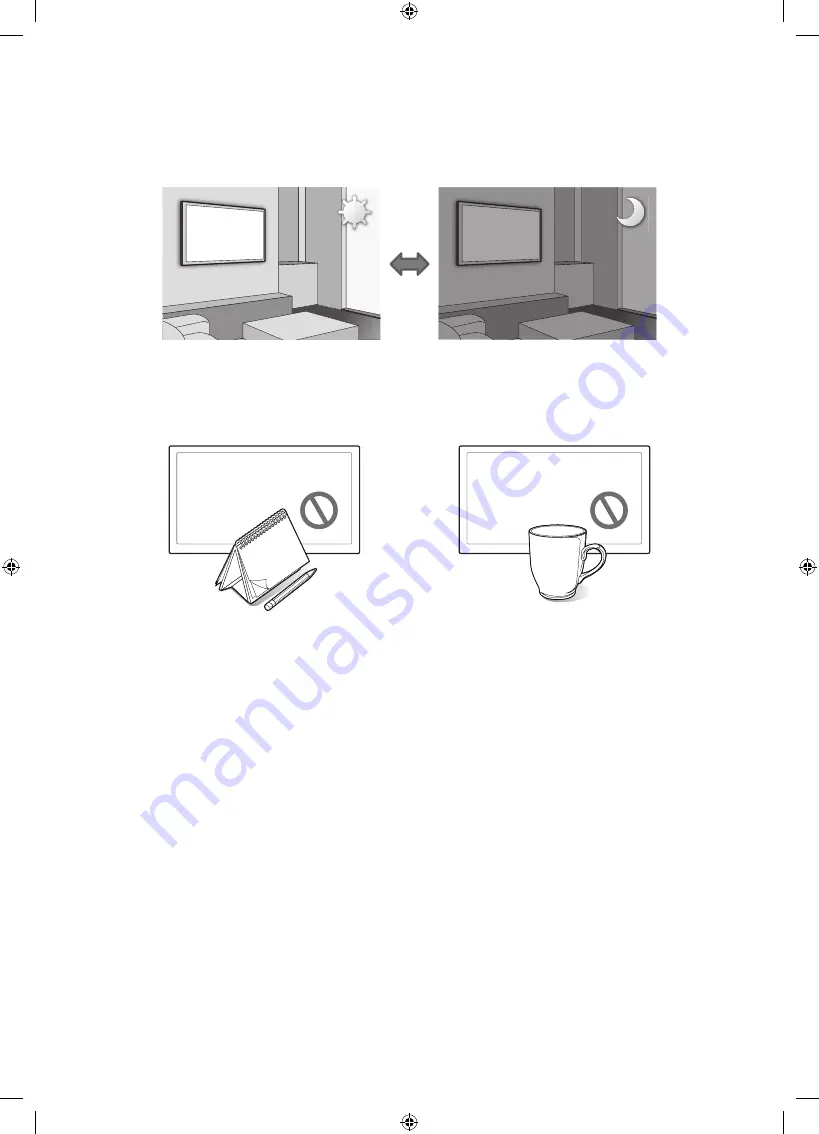
Brightness

The Eco Sensor measures the light in the room and optimizes the brightness of the TV automatically to reduce power 
consumption. This causes the TV to brighten and dim automatically. To turn this function off, go to 

System

 > 

Eco Solution

 > 

Eco Sensor

.


Do not block the sensor with any material. This may decrease the picture brightness.

1. 

Eco Sensor

: This power-saving feature automatically adjusts the screen brightness of the TV according to the ambient light 

detected by the Light Sensor.

2. 

To enable or disable the 

Eco Sensor

, go to 

System

 > 

Eco Solution

 > 

Eco Sensor

 and select 

On

 or 

Off

.

3. 

Please note: If the screen is too dark while watching TV in a dark environment, this may be due to the 

Eco Sensor

.

[UH8000-XA-KE]BN68-05841P-03ENG.indb   19

2014-08-27     2:46:46

Summary of Contents for UA55H8000

Page 1: ...b Site NIGERIA 0800 726 7864 www samsung com africa_en support GHANA 0800 10077 0302 200077 COTE D IVOIRE 8000 0077 www samsung com africa_fr support SENEGAL 800 00 0077 CAMEROON 7095 0077 KENYA 0800 545 545 www samsung com support UGANDA 0800 300 300 TANZANIA 0800 755 755 RWANDA 9999 BURUNDI 200 DRC 499999 SUDAN 1969 SOUTH AFRICA 0860 SAMSUNG 726 7864 www samsung com support BOTSWANA 8007260000 N...

Page 2: ...c into the open parts of this apparatus Doing so may create a danger of electric shock To avoid electric shock never touch the inside of this apparatus Only a qualified technician should open this apparatus Make sure to plug the power cord in until it is firmly inserted When removing the power cord make sure to hold the power plug when pulling the plug from the outlet Do not touch the power cord w...

Page 3: ...e make sure the following items are included with your TV If any items are missing contact your dealer The items colours and shapes may vary depending on the models Cables not included can be purchased separately Check for any accessories hidden behind or in the packing materials when opening the box Warning Screens can be damaged from direct pressure when handled incorrectly We recommend lifting ...

Page 4: ... injury to yourself or others if you select to install the wall mount on your own TV Wall mount Bracket C Wall mount Adapter Wall mount Adapter Depending on the Model Before installing any other wall mounting kit assemble the wall mount adapter provided separately with the TV Refer to Install manual included in our wall mounting kit Wall Mount Kit Specifications VESA The wall mount kit is not supp...

Page 5: ...it while your TV is turned on It may result in personal injury due to electric shock Providing Proper Ventilation for Your TV When you install your TV maintain a distance of at least 10 cm between the TV and other objects walls cabinet sides etc to ensure proper ventilation Failing to maintain proper ventilation may result in a fire or a problem with the product caused by an increase in its intern...

Page 6: ...ase these additionally 2 Remove the screws from the centre back of the TV put the screws into the clamps and then fasten the screws into the TV again Screws may not be supplied with the product In this case please purchase screws of the following specifications Screw Specifications For a 55 65 inches M8 3 Connect the clamps fixed into the TV and the clamps fixed onto the wall with a strong cable a...

Page 7: ...to the two holes on the product 1 Please locate the two holes at the back of the TV next to the COMMON INTERFACE port 2 Connect the CI CARD Adapter to the COMMON INTERFACE port on the product 2 3 Insert the CI or CI CARD We recommend that you attach the CI Card adapter and insert the CI card viewing card before you mount the TV on the wall because it may be difficult and dangerous to do this when ...

Page 8: ...rial settings The screen will be distorted or will not be visible Connecting to a Network Connecting the TV to a network gives you access to online services such as the Smart Hub as well as software updates Network Connection Wireless Connect the TV to the Internet using a standard router or modem Wireless IP Router or Modem with a DHCP Server LAN Cable Not Supplied The LAN Port on the Wall Networ...

Page 9: ...ds on the specific model and area While connecting to the mobile network some functions might be unavailable Refer to the diagram and insert the Mobile Dongle sold separately into the USB port The Mobile Dongle must be connected to the TV in order to connect to the mobile network However the Mobile Dongle is sold separately and is not available from Samsung If you have any problems using online se...

Page 10: ...r focus RETURN Returns to the previous menu Additionally when you press this button while watching TV you can return to the previous channel EXIT Press and hold this button to exit all currently running applications Use these buttons with specific features Use these buttons according to the directions on the TV screen Launches Smart Hub Pressing SMART HUB while an application is running terminates...

Page 11: ...r into the remote control 4 Press the catches on both sides of the battery cover in the order shown so that the cover is completely attached to the remote control Turning on the TV Turn on the TV using the P button on the remote control or TV panel The product colour and shape may vary depending on the model The TV s Controller a small joystick like button at the right back of the TV lets you cont...

Page 12: ...ted external device using the SOURCE button For example to switch to a gaming console connected to the second HDMI connector press SOURCE From the Source list select HDMI2 to change the input signal to HDMI mode Connector names may vary depending on the model The following options are available in the Source screen TOOLS Button Select a port connected to an external device and press and hold the E...

Page 13: ...te control receiver s location may vary depending on the model Reconnecting Samsung Smart Control If the Samsung Smart Control stops operating or works abnormally replace the batteries as this may be due to insufficient battery power If the problem persists the Samsung Smart Control restores pairing with the TV 1 Press both the RETURN button and the GUIDE button simultaneously for more than 3 seco...

Page 14: ...ption to learn how to use the touchpad following the on screen instructions Moving the Focus Pointer Press the directional buttons up down left and right to move the pointer or focus in the direction Menu Access Item Selection Press the touchpad This lets you access a TV menu or select an item Displaying the Context sensitive Menu on Smart Hub Press and hold on the touch pad from the Smart Hub scr...

Page 15: ...devices connected to the TV may not support the universal remote feature Setting Up the Universal Remote Control Connect the IR extender cable to the TV s IR output connector as shown in the diagram and place the transmitter end within 10 cm of the external device s receiver pointing in the direction of the remote receiver However there must be no obstacles between the IR extender cable and the ex...

Page 16: ...Manual The e Manual loads 2 Select a category from the side of the screen Once a selection has been made the contents of the selected category appear 3 Select an item from the list This opens the e Manual on the corresponding page If a description doesn t fit on a single screen You can scroll pages in one of the following ways Position the focus on the page to display on the screen Press button Ad...

Page 17: ...ual in the same way as updating apps 1 Select the e Manual item in the SAMSUNG APPS screen 2 Press and hold the Enter button The Options menu appears 3 From the Options menu on the screen select Update apps A popup window appears Update apps is shown on the screen only when an update is required 4 Select e Manual in the popup window and then select Update You can update the e Manual to the latest ...

Page 18: ...connected devices are powered on Be sure to select the correct input source Reboot the connected device by unplugging it and then reconnecting the device s power cable The remote control does not work Replace the remote control batteries Make sure the batteries are installed with their polarities in the correct direction Clean the sensor s transmission window on the remote Try pointing the remote ...

Page 19: ...r Do not block the sensor with any material This may decrease the picture brightness 1 Eco Sensor This power saving feature automatically adjusts the screen brightness of the TV according to the ambient light detected by the Light Sensor 2 To enable or disable the Eco Sensor go to System Eco Solution Eco Sensor and select On or Off 3 Please note If the screen is too dark while watching TV in a dar...

Page 20: ...agent 4 The agent will then access your TV That s it Storage and Maintenance If a sticker was attached to the TV screen some debris may remain after you remove the sticker Please clean the debris off before watching TV The exterior and screen of the product can get scratched while cleaning it Be sure to wipe the exterior and screen carefully using a soft cloth to prevent scratches Do not spray wat...

Page 21: ...Screen Size Diagonal 55 inches 65 inches Dimensions W x H x D Body With stand 1232 8 x 713 3 x 89 8 mm 1232 8 x 759 4 x 236 8 mm 1451 0 x 838 4 x 10⁷ 3 mm 1451 0 x 893 7 x 307 8 mm Weight Without Stand With Stand 17 4 kg 18 9 kg 24 0 kg 27 2 kg The design and specifications are subject to change without prior notice For information about the power supply and about power consumption refer to the la...

Page 22: ... 3 image format Constantly displaying still pictures can cause image burn in on the LED screen which will affect the image quality To reduce risk of this occurring please follow the recommendations below Avoid displaying the same TV channel for long periods Always try to display any image in full screen Use the TV set s picture format menu for the best possible match Reduce brightness and contrast...

Page 23: ...This page is intentionally left blank UH8000 XA KE BN68 05841P 03ENG indb 23 2014 08 27 2 46 47 ...

Reviews: