background image

Shooting options

  56

Improving your photos

Learn how to improve your photos by applying photo styles or colors, or make some adjustments.

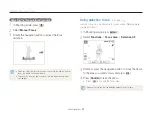
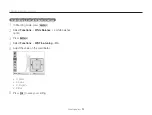
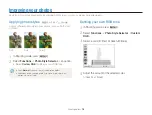
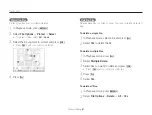
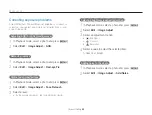
Defining your own RGB tone

In Shooting mode, press [

m

].

Select 

Functions


“

Photo Style Selector 

“

Custom 

RGB

.

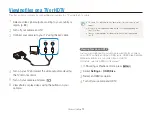
Select a color (R: Red, G: Green, B: Blue).

Back

Move

Adjust the amount of the selected color.  

(-: less or +: more)

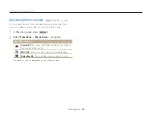
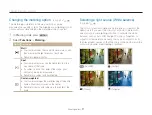
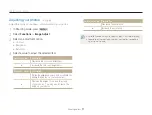
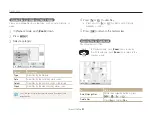
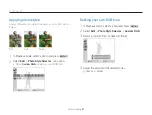
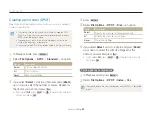
Applying photo styles

Apply a different photo style to your photos, such as Soft, Vivid, 
or Forest.

Soft

Vivid

Forest

In Shooting mode, press [

m

].

Select 

Functions


“

Photo Style Selector


“

 an option.

Select 

t

Custom RGB

 to define your own RGB tone.

Select 

t

Normal

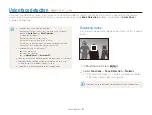
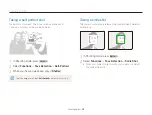
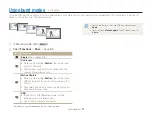
 if you want to use face detection options.

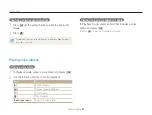
Depending on the selected photo style, some image adjustment 

t

options are not available.

    a p A h n d s v

Summary of Contents for TL320 - Digital Camera - Compact

Page 1: ...s detailed usage instructions for your camera Please read this manual thoroughly Quick reference Contents Basic functions Extended functions Shooting options Playback Editing Appendixes Index User Man...

Page 2: ...injury if swallowed Moving parts and accessories may present physical dangers as well Safety warnings Prevent damage to subjects eyesight Do not use the ash in close proximity closer than 1 m 3 ft to...

Page 3: ...rger battery or memory card t Do not expose the camera to direct sunlight or high t temperatures for an extended period of time Prolonged exposure to sunlight or extreme temperatures can cause permane...

Page 4: ...lens Do not expose the lens to direct sunlight as this may discolor t the image sensor or cause it to malfunction Protect your lens from ngerprints and scratches Clean your t lens with a soft clean d...

Page 5: ...trademarks or registered trademarks of Apple Computer Inc used under license Organization of the user manual Basic functions 10 Learn about your camera s layout icons and basic functions for shooting...

Page 6: ...used in this manual Icon Function Additional information Safety warnings and precautions Camera buttons for example Shutter represents the shutter button Page number of related information The order...

Page 7: ...t of a scene such as a person animal or still life Background t the objects around the subject Composition t the combination of a subject and background Background Subject Composition Exposure Brightn...

Page 8: ...sensitivity to light t 43 EV to adjust exposure t 50 ACB to compensate for subjects against bright t backgrounds 50 Metering t 51 AEB to take three photos of the same scene with t different exposures...

Page 9: ...face detection 47 Detecting faces 47 Taking a self portrait shot 48 Taking a smile shot 48 Detecting eye blinking 49 Basic functions 10 Unpacking 11 Camera layout 12 Icons 14 Turning your camera on o...

Page 10: ...emos 65 Editing a photo 66 Resizing photos 66 Rotating a photo 66 Applying photo styles 67 De ning your own RGB tone 67 Correcting exposure problems 68 Creating a print order DPOF 69 Viewing les on a...

Page 11: ...15 Selecting options 16 Setting the display and sound 18 Changing the display type 18 Setting the sound 19 Taking photos 20 Zooming 21 Reducing camera shake OIS 22 Tips for getting a clearer photo 23...

Page 12: ...User manual included AD46 00252A Quick Start Manual AD68 03887A The illustrations may differ from your actual items Optional accessories Camera case Memory cards A V cable AD39 00163A Sold as a set HD...

Page 13: ...e pre set d DUAL IS Take a photo with options suitable for reducing camera shake s Scene Take a photo with options preset for a speci c scene v Movie Record a video Icon Mode Description S Smart Auto...

Page 14: ...ophone Button Description o Con rm the highlighted option or menu Playback Enter Playback mode Function Access options in Shooting mode t Delete les in Playback mode t Referred to Navigation button in...

Page 15: ...mized ISO speed Photo resolution Video resolution Photo quality Frame rate Metering option Burst type Icons The icons displayed will change according to the mode you select or the options you set A In...

Page 16: ...ra to a hot and humid environment t condensation can form on the gauges If the hand of a gauge keeps spinning around contact a service t center The gauge and the battery and memory card icon on the di...

Page 17: ...ot available Going back to the previous menu Press m again to go back to the previous menu Press Shutter to return to Shooting mode In Shooting mode press 1 m Rotate or press the navigation button to...

Page 18: ...ck Rotate the navigation button or press 5 F or t to scroll to a white balance option Daylight Back Move Press 6 o E g Selecting a white balance option in the P mode Rotate the mode dial to 1 p Press...

Page 19: ...ted to color information The more of a particular color the taller the peak Underexposed Well Exposed Overexposed Changing the display type Select a style of display for Shooting or Playback mode Pres...

Page 20: ...ther your camera emits a speci ed sound when you operate your camera In Shooting or Playback mode press 1 m Select 2 Sound Beep Sound an option Option Description Off The camera does not emit any soun...

Page 21: ...ake photos easily and quickly in the Auto mode Rotate the mode dial to 1 a Align your subject in the frame 2 Half press 3 Shutter to focus A green frame means the subject in focus t Press 4 Shutter to...

Page 22: ...not available when using t S d s in some scenes and v modes and when used with Face Detection It may take longer to save a photo when using the digital zoom t Zooming You can shoot close up photos by...

Page 23: ...a tripod your images may be blurred t by the vibration of the OIS sensor Deactivate the OIS function when you use a tripod If the camera is impacted the display will be blurry In this case turn t off...

Page 24: ...if displayed in green Change the frame and half press Shutter again if displayed in red Reducing camera shake Set the Optical Image Stabilization option to reduce camera shake optically p 22 Select th...

Page 25: ...d the subject is too bright the subject is shiny the subject includes horizontal patterns such as blinds the subject is not positioned in the center of the frame Use the focus lock Half press Shutter...

Page 26: ...Priority or Manual mode 31 Using the Aperture Priority mode 32 Using the Shutter Priority mode 32 Using the Manual mode 33 Using the User mode 34 Con guring your settings 34 Using your custom settings...

Page 27: ...f there is a face detected the camera may not select a portrait t mode depending on the subject s position or lighting The camera may not select the correct scene depending on shooting t environments...

Page 28: ...in this mode t The photo will be corrected optically only when taken with a light t source that is brighter than uorescent light If your subject is moving rapidly the photo may be blurry t Set the Op...

Page 29: ...evel 2 Back Move To hide 5 facial imperfections press m Rotate the mode dial to 1 s Select a scene 2 Frame Guide This mode is appropriate for shooting with pre composed scenes To change the scene mode...

Page 30: ...ame and press 3 Shutter Transparent guides will appear on the left and right of the t frame Cancel Frame OK Ask another person to take a photo 4 The person must align the subject in the frame by using...

Page 31: ...a list of options refer to 2 Shooting options EV Back Move Align your subject in the frame and half press 3 Shutter to focus Press 4 Shutter to take the photo Using the Program mode Set various option...

Page 32: ...through which light is admitted You can adjust the aperture value to control how much light reaches the lens when you capture a photo By decreasing the aperture value opening the aperture wider more l...

Page 33: ...list of options refer to 3 Shooting options Align your subject in the frame and half press 4 Shutter to focus Press 5 Shutter to take the photo Using the Aperture Priority mode The Aperture Priority...

Page 34: ...rame and half press 6 Shutter to focus Press 7 Shutter to take the photo Using the Manual mode The Manual mode allows you to manually adjust both the aperture value and the shutter speed Rotate the mo...

Page 35: ...on settings in the u mode Con guring your settings Rotate the mode dial to 1 p A h or n Set options For a list of options refer to 2 Shooting options Press 3 m Select 4 Functions User Registration and...

Page 36: ...gain to resume H 264 MPEG 4 part10 AVC is a high compression video format established by international standard organizations ISO IEC and ITU T Some memory cards may not support high definition record...

Page 37: ...ions Voice Memo Align your subject in the frame and take a photo 3 You will begin recording a voice memo right after taking the t photo Record a short voice memo 10 seconds maximum 4 Press t Shutter t...

Page 38: ...5 Adjusting the focus area 46 Using face detection 47 Detecting faces 47 Taking a self portrait shot 48 Taking a smile shot 48 Detecting eye blinking 49 Adjusting brightness and color 50 Adjusting the...

Page 39: ...cription Super Fine Fine Normal a p A h n d s Selecting a resolution As you increase the resolution your photo or video will include more pixels so it can be printed on larger paper or displayed on a...

Page 40: ...timer lamp blinks The camera will t automatically take a photo at the speci ed time Press t t to cancel the timer Depending on the selected face detection option the timer is not t available or some...

Page 41: ...e more than 3 m away from the camera t your movements are too subtle t there is too much light or backlight t Using the motion timer 1 In Shooting mode press t Select 2 Press 3 Shutter Stand within 3...

Page 42: ...de press 1 F Auto Select an option 2 Option Description Off The ash will not re t Camera shake warning t will be displayed when shooting in low light Auto The camera will select a proper ash setting f...

Page 43: ...shutter stays open longer t Select this when you want to capture ambient light to t reveal more details in the background Use a tripod to prevent your photos from blurring t Fill in The ash always res...

Page 44: ...r camera becomes With a higher ISO speed you can get a better photo without using the ash In Shooting mode press 1 m Select 2 Functions ISO an option Select t to use an appropriate ISO speed based on...

Page 45: ...n using zoom Macro Focus on a subject 5 40 cm 50 80 cm when using zoom Auto Macro Focus on a subject farther than 5 cm farther than 50 cm when using zoom Manual Focus Focus on a subject by manually ad...

Page 46: ...to focus and press o Press 4 Shutter to take the photo Press t o to change the focus area If you use this function the face detection options are not available p A h n d Adjusting the focus distance...

Page 47: ...bject s location in the scene In Shooting mode press 1 m Select 2 Functions Focus Area an option Option Description Center AF Focus on the center suitable when subjects are located in the center Multi...

Page 48: ...e to the subject the quicker your camera will detect faces Face detection may not be effective when t the subject is far from the camera The focus frame will appear orange for Smile Shot and Blink Det...

Page 49: ...hot When your subject smiles broadly your camera can detect t the smile more easily Taking a self portrait shot Take photos of yourself The focus distance will be set to close up and your camera will...

Page 50: ...eyes it will automatically take 2 photos in succession In Shooting mode press 1 m Select 2 Functions Face Detection Blink Detection Hold your camera still while t Capturing is displayed on the screen...

Page 51: ...ways on in the t a mode You cannot set burst options when this feature is on t p A h Adjusting the exposure manually EV Depending on the intensity of the ambient light your photos may be too bright or...

Page 52: ...metering mode refers to the way in which a camera measures the quantity of light The brightness and lighting of your photos will vary depending on the metering mode you select In Shooting mode press...

Page 53: ...pending on the lighting conditions Daylight Select when taking outdoor photos on a sunny day Cloudy Select when taking outdoor photos on a cloudy day or in shadows Fluorescent_H Select when shooting u...

Page 54: ...increases the color distribution becomes cooler Alternatively as the color temperature decreases the color distribution becomes warmer Clear sky Fluorescent_H Cloudy Daylight Fluorescent_L Halogen lam...

Page 55: ...et white balance options In Shooting mode press 1 m Select 2 Functions White Balance a white balance option Press 3 m Select 4 Functions WB Fine tuning On Adjust the value on the coordinates 5 Back Mo...

Page 56: ...unctions Drive an option Option Description Single Take a single photo Continuous t While you are pressing Shutter the camera takes photos continuously The maximum number of photos depends on the t ca...

Page 57: ...lue 3 Back Move Adjust the amount of the selected color 4 less or more Applying photo styles Apply a different photo style to your photos such as Soft Vivid or Forest Soft Vivid Forest In Shooting mod...

Page 58: ...arpness and saturation of your photos In Shooting mode press 1 m Select 2 Functions Image Adjust Select an adjustment option 3 Contrast t Sharpness t Saturation t Select a value to adjust the selected...

Page 59: ...B tone 67 Correcting exposure problems 68 Creating a print order DPOF 69 Viewing les on a TV or HDTV 70 Transferring les to your computer 72 For Windows users 72 For Mac users 77 Printing photos with...

Page 60: ...Folder name File name Histogram Starting Playback mode View photos or play videos and voice memos stored in your camera Press 1 P The most recent le you have taken or recorded will be t displayed If...

Page 61: ...gh les Rotate the navigation button or press D M F or t Delete les Press f and select Yes Viewing les by category in Smart Album View and manage les by categories such as date le type or week In Playb...

Page 62: ...ltiple Delete Select les you want to delete and press 3 o Press t o again to cancel your selection Press 4 f Select 5 Yes To delete all les In Playback mode press 1 m Select 2 File Options Delete All...

Page 63: ...not be sent to the recycle bin To activate the recycle bin In Playback mode press 1 m Select 2 File Options Recycle Bin On To restore les from the recycle bin In Playback mode press 1 m Select 2 File...

Page 64: ...ransition effect t Select t Off for no effects Interval Set the interval between photos t This is available when t Off is selected in the effect option When used with effect options other than t Off t...

Page 65: ...oom up Press 2 o to resume playback Press 3 o at the point where you want the new video to end and push Zoom up Select 4 Yes The original video should be at least 10 seconds long t The edited video wi...

Page 66: ...o at the point where you want to save a still image Press 2 M A captured image will have the same le size as the original video le and will be saved as a new le Playing voice memos Playing a voice mem...

Page 67: ...o In Playback mode select a photo and press 1 m Select 2 Edit Rotate an option Back Right 90 Move Depending on the original photo size the rotated photo may be resized to a lower resolution Resizing p...

Page 68: ...a color R Red G Green B Blue 3 Back Move Adjust the amount of the selected color 4 less or more Applying photo styles Apply a different photo style to the photo such as Soft Vivid or Forest Soft Vivid...

Page 69: ...m Select 2 Edit Image Adjust Red eye Fix Hiding facial imperfections In Playback mode select a photo and press 1 m Select 2 Edit Image Adjust Face Retouch Select a level 3 As the number increases the...

Page 70: ...nt order DPOF Select photos to be printed and set options such as number of copies or paper size The memory card can be taken to a print shop that supports DPOF t Digital Print Order Format or you can...

Page 71: ...r videos on an HDTV using the optional HDMI cradle HDMI High Definition Multimedia Interface is supported by most HDTVs For details see the HDMI cradle manual In Shooting or Playback mode press 1 m Se...

Page 72: ...cable Turn on your camera 6 The HDTV will be powered on automatically and the camera t screen will be displayed View les using the buttons on your camera or a remote 7 control of your camera or HDTV...

Page 73: ...XP and Vista Programs contained on the CD Program Purpose Samsung Master Edit photos and videos QuickTime Player 7 5 View videos H 264 MPEG 4 AVC les on a PC Adobe Reader View the user manual For Win...

Page 74: ...h the USB cable 1 You must plug the end of the cable with the indicator light S into your camera If the cable is reversed it may damage your les The manufacturer is not responsible for any loss of dat...

Page 75: ...king wait until 1 it stops Click 2 on the tool bar at the bottom right of your PC screen Click the pop up message 3 Remove the USB cable 4 Turn on the camera 2 The computer recognizes the camera autom...

Page 76: ...ils of les click an image to download Using Samsung Master You can download les or edit photos or videos stored on your PC For details see the Help menu This program does not support editing of video...

Page 77: ...tion about the program Click to enlarge or reduce the thumbnails in the list Change the mode t View mode t Edit mode for photos t Edit mode for videos Preview information about the selected le The pho...

Page 78: ...omatically You can transfer les directly from the camera to the computer without installing any programs Requirements for QuickTime Player 7 5 1 8 GHz Power Mac G5 1 83 GHz Intel Core Duo or higher t...

Page 79: ...rinting quality Date Set to print the date File Name Set to print the name of the le Reset Reset the print options Some options are not supported by some printers With the printer on connect your came...

Page 80: ...ings 82 Error messages 85 Camera maintenance 86 Cleaning your camera 86 About memory cards 87 About the battery 88 Before contacting a service center 90 Camera speci cations 93 FCC notice 97 Index 98...

Page 81: ...the previous screen Accessing the settings menu In Shooting or Playback mode press 1 m Select a menu 2 Functions Sound Display Settings Exit Change Volume Start Sound Shutter Sound Beep Sound AF Sound...

Page 82: ...htness Adjust the brightness of the screen Auto Dark Normal Bright Normal is xed in Playback mode even if Auto is selected Quick View Set the duration for reviewing a captured image or video before re...

Page 83: ...ed in t one folder is 9999 The camera de nes le names according to the t Digital rule for Camera File system DCF standard If you change the names of les intentionally the camera may not play back the...

Page 84: ...with an HDTV remote control Off t View les without using an HDTV remote control Default Item Description Imprint Set whether to display the date and time on your photos when printing Off Date Date Tim...

Page 85: ...0p 576p If the HDTV does not support the selected resolution the HDTV automatically selects the next lower resolution USB Set the function to use via a USB connection with a computer or printer Auto t...

Page 86: ...2 Card Locked Unlock the memory card DCF Full Error File names do not match the DCF standard Transfer the les on the memory card to your computer and format the card p 82 File Error Delete the damaged...

Page 87: ...solutions can damage the camera or cause it to malfunction Do not press on the lens cover or use a blower brush on the lens t cover Cleaning your camera Camera lens and display Use a blower brush to r...

Page 88: ...n Approx 13 57 Approx 25 min Approx 24min Approx 46 min Approx 49 min Approx 70 min Approx 91 min The recordable time may vary if you use the zoom Several videos were recorded in succession to determi...

Page 89: ...n or out 3 Perform steps 1 and 2 for 30 seconds and repeat for 5 minutes Then turn off the camera for 1 minute 4 Repeat steps 1 to 3 Videos Approx 130 min Record videos at 640 x 480 resolution and 30...

Page 90: ...e indicator light blinks in red or does not illuminate reconnect the t cable or remove the battery and insert it again If you charge the battery when it is warm the indicator light may turn t orange C...

Page 91: ...work The ash option may be set to t Off p 41 You cannot use the ash in the t d v or some s modes The ash res unexpectedly The ash may re due to static electricity This is not a malfunction of the came...

Page 92: ...ed The wide angle lens may create distortions on the image This is the normal feature of the wide angle lens Situation Suggested remedies The date and time are incorrect Set the date and time in the d...

Page 93: ...mended Install QuickTime t Player 7 5 or K Lite Codec Pack Full on Windows XP SP2 or later Depending on your computer t environment the video playback may be intermittent Situation Suggested remedies...

Page 94: ...Recharging time Approx 5 sec Shake reduction DUAL IS Optical Image Stabilization OIS Digital Image Stabilization DIS Image sensor Type 1 2 33 Approx 1 09 cm CCD Effective pixels Approx 12 2 mega pixe...

Page 95: ...x Face Retouch Brightness Contrast Saturation Add Noise Voice recording Voice Recording Max 10 hours Voice Memo in a photo Max 10 sec Stereo recording Effect Shooting mode Photo Style Selector Normal...

Page 96: ...emory Approx 76 MB External memory Optional SD card up to 4 GB guaranteed SDHC card up to 8 GB guaranteed MMC Plus up to 2 GB guaranteed 4 bit 20 MHz Internal memory capacity may not match these speci...

Page 97: ...Appendixes 96 Camera specifications Operating humidity 5 85 Software Samsung Master QuickTime Player 7 5 Adobe Reader Specifications are subject to change without prior notice...

Page 98: ...eption which can be determined by turning the equipment off and on the user is encouraged to try to correct the interference by one or more of the following measures Reorientate or relocate the receiv...

Page 99: ...rst Auto Exposure Bracket AEB 55 Continous 55 Motion capture 55 C Camera shake 23 Capturing an image 65 Cleaning Body 86 Display 86 Lens 86 D Date and time 82 Deleting les 61 Digital Image Stabilizati...

Page 100: ...C 87 MENU button 13 Metering Center weighted 51 Multi 51 Spot 51 Mini dashboard 15 Motion timer 40 Movie mode 35 Muting Camera 15 Video 35 N Navigation button 13 O Optical Image Stabilization OIS 22 2...

Page 101: ...0 Scene 28 Shutter Priority 32 Smart Auto 26 User 34 Shutter Priority mode 32 Shutter speed 31 Slide show 63 Smart Album 60 Smart Auto mode 26 Smile shot 48 Start image 81 T Timer 39 Transferring les...

Page 102: ...se refer to the warranty that came with your product or visit our website http www samsung com for after sales service or inquiries The CE Mark is a Directive conformity mark of the European Community...

Reviews: