Samsung SyncMaster 400UX-2 Quick Start Manual Download Page 14


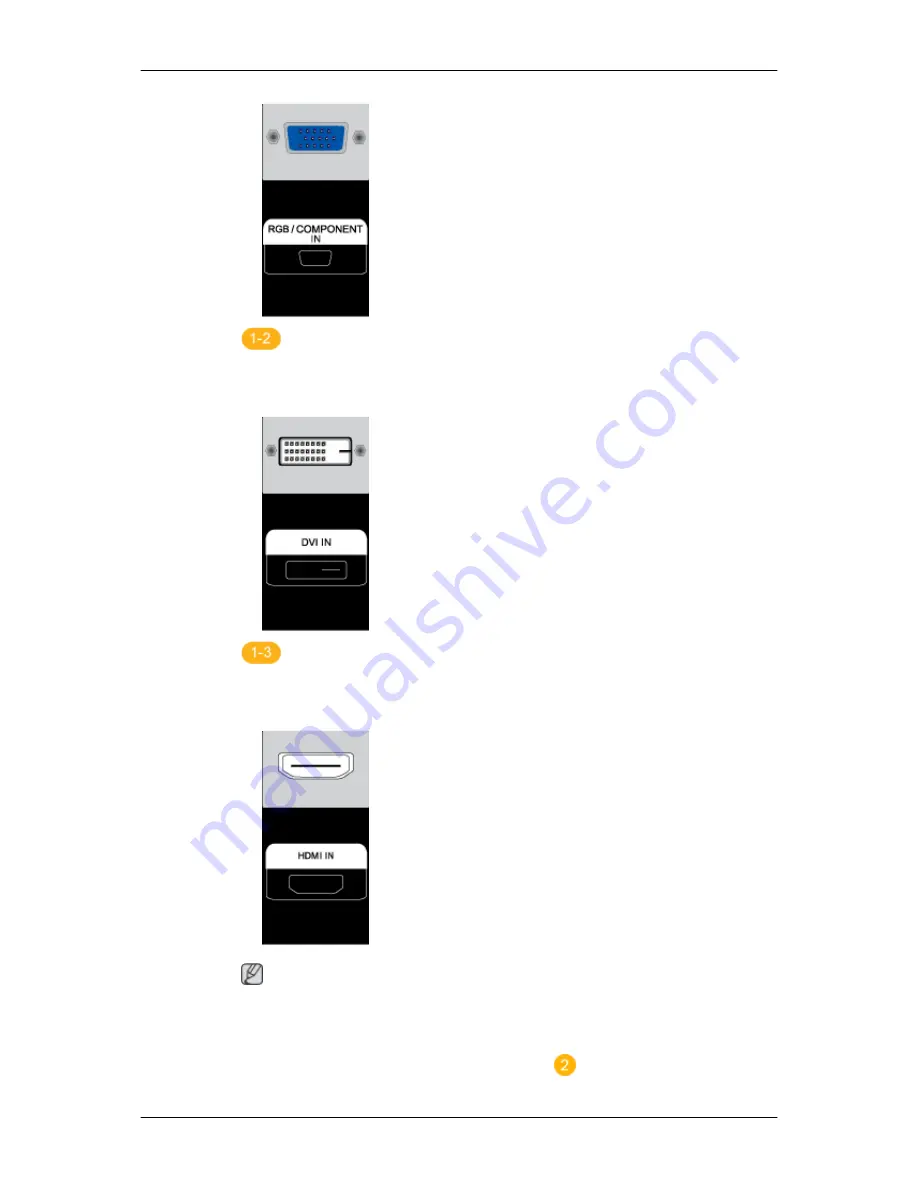
 Using the DVI (Digital) connector on the video card.

Connect the DVI Cable to the DVI port on the back of your LCD Display
and the DVI port on the computer.


Using the HDMI (digital) output on the graphics card.

Connect the HDMI IN port on the monitor to the HDMI port on the PC
using the HDMI cable.

 Note

When the HDMI cable to the PC, ensure that you select 

HDMI

 from both

the 

Source List

 and 

Edit Name

 before selecting 

PC

 or 

DVI

 device so that

normal PC screen and sound can be outputted. Note that sound is only

available when connected according to the option 

 that follows.

Connections

Summary of Contents for SyncMaster 400UX-2

Page 1: ...ii LCD MONITOR quick start guide 400UX 2 400UXN 2 460UX 2 460UXN 2...

Page 2: ...nts of the Package Remove the lock from the package box as shown in the figure above Lift up the package box by holding the grooves on both sides of the package box Check the contents of the package R...

Page 3: ...D MagicInfo Manual CD Applicable to the UXN 2 model only Cables Power Cord Others Remote Control BP59 00138A Batteries AAA X 2 Not available in all loca tions BNC to RCA Adaptor Jack Applicable to the...

Page 4: ...o use to exit the OSD menu or return to the previous menu Navigate buttons Up Down buttons Moves from one menu item to another vertically or adjusts selected menu values Adjust buttons Left Right butt...

Page 5: ...Brightness Sensor Optional Automatically detects the surrounding brightness it accordingly Note This function is activated only on the models equipped with an auto bright ness sensor Power indicator...

Page 6: ...32C Serial PORT MDC Multiple Display Control Program Port RGB COMPONENT IN PC COMPO NENT Connection Terminal Input Use a D Sub Cable 15 pin D Sub PC mode Analog PC Connect the RGB COMPONENT IN port on...

Page 7: ...the monitor to the HDMI IN port on the other monitor using the DVI to HDMI cable DVI HDMI and network signals sent via the DVI OUT port are displayed on the second display which has the DVI IN port No...

Page 8: ...ation up to 10 LCD Displays can be connected May not be supported depending on the connected cable Note Applicable to the UX 2 model only BNC Component Connection Terminal input During component input...

Page 9: ...purchased separately Note The location of the Kensington Lock may be different depending on the model Using the Anti Theft Kensington Lock 1 Insert the locking device into the Ken sington slot on the...

Page 10: ...GUIDE but ton The button is used to select Digital channels Electronic Program Guide EPG display This function does not work for this LCD Display 5 VOL Adjusts the audio volume 6 SOURCE Press the but...

Page 11: ...lt FM Stereo Mono Mono Manual Change Stereo Mono Stereo SAP Mono SAP Mono DUAL STEREO MONO DUAL l DUAL ll and MONO NICAM MONO NICAM STEREO can be operated depending on the broadcasting type by using t...

Page 12: ...20 EXIT Exits from the menu screen 21 MagicInfo MagicInfo Quick Launch Button Introduction...

Page 13: ...connecting AV input devices refer to the contents under Adjusting Your LCD Display 400UXN 2 460UXN 2 400UX 2 460UX 2 There are several ways to connect the computer to the monitor Choose one from the...

Page 14: ...graphics card Connect the HDMI IN port on the monitor to the HDMI port on the PC using the HDMI cable Note When the HDMI cable to the PC ensure that you select HDMI from both the Source List and Edit...

Page 15: ...he LCD Display Turn on the power switch Note Turn on both your computer and the LCD Display Contact a local SAMSUNG Electronics Service Center to buy optional items Connecting to Other devices Note AV...

Page 16: ...R Y G PB B PR ports on the monitor to the BNC port on the external device using the BNC to BNC cable 2 Select BNC for the Camcorder connection using the Source button on the front of the LCD Display o...

Page 17: ...eo consult your DVD manual Connecting using a Component Cable 1 Connect a set of audio cables between the AV COMPONENT AUDIO IN L AUDIO R on the LCD Display and the AUDIO OUT jacks on the DVD player o...

Page 18: ...AV IN VIDEO on the LCD Display 3 Select AV for the Camcorder connection using the Source button on the front of the LCD Display or on the remote control 4 Then start the Camcorder with a tape inserte...

Page 19: ...nput port on another monitor using a DVI cable 2 Connect between the AUDIO OUT port on the LCD Display and the audio input port on another monitor using a stereo cable 3 Select DVI using the SOURCE bu...

Page 20: ...llite Box Applicable to the UX 2 model only 1 Connect a Component cable between the BNC COMPONENT IN R Y G PB B PR port on the LCD Display and the PR Y PB jacks on the Set Top Box 2 Connect a set of a...

Page 21: ...n explanation of Component video see your Set Top Box owner s manual Connecting to an Audio System 1 Connect a set of audio cables between the AUX L R jacks on the AUDIO SYSTEM and AUDIO OUT on LCD Di...

Page 22: ...Connect the LAN cable Note Applicable to the UXN 2 model only Connecting a USB device Note You can connect USB devices such as a mouse or keyboard Applicable to the UXN 2 model only Connections...

Page 23: ...and reconnect the video cable then turn on both your com puter and the LCD Display If your LCD Display screen remains blank after using the previous procedure check your video controller and computer...

Page 24: ...ps more than 3 times when booting If it does request service 3 If you installed a new video card or if you assembled the PC check if you installed the Adaptor video 4 Check if the scanning ratio of th...

Page 25: ...ly A Check if the signal cable is securely connected Re connect it if necessary Refer to Connecting a Computer Q The image is not clear picture is blurred A Run Frequency Coarse and Fine tuning A Turn...

Page 26: ...nection between the LCD Display and the computer to en sure that the connector is properly connected Problems related to Audio Note Problems related to audio signals and their solutions are listed bel...

Page 27: ...r details Q How can I set the Power Saving function A Windows XP Set the resolution in the Control Panel Appearance and Themes Display Screen Saver Set the function in the BIOS SETUP of the computer R...

Page 28: ...or assistance check the information in this section to see if you can remedy any problems yourself If you do need assistance please call the phone number on the In formation section or contact your de...

Reviews: