background image

SAMSUNG

Washing Machine Owner

s Instructions   

3

Selecting a location

Before you install the washing machine, select a location with the following characteristics:

A hard, level surface (if the surface is uneven, see "Adjusting the leveling feet," below)

Away from direct sunlight.

Adequate ventilation 

Room temperature that will not fall below 0 

˚

C

Away from sources of heat such as coal or gas

Make sure that the washing machine does not stand on its power cord.

Ventilation openings must not be obstructed by carpeting when the washing machine is

installed on a carpeted floor.

Adjusting the leveling feet

If the floor is uneven, adjust the feet (do not insert pieces of wood or any other objects under

the feet):

1.

Loosen the leg bolt by turning it with your hand until it is at the desired height.

2.

Tighten the locking nut by turning it with the supplied wrench.

Place the washer on a sturdy, flat surface.

If the washer is placed on an uneven or weak surface, noise or vibration occurs. 

(Only a l degrees angle is allowed.)

Removing the shipping bolts

Before using the washing machine, you must remove the five shipping bolts from the back

of the unit.  To remove the bolts:

1.

Loosen all bolts with the supplied wrench before removing them.

2.

Take each bolt head and pull it through the wide part of the hole.

Repeat for each bolt.

3.

Fill the holes with the supplied plastic covers.

4. 

Keep the shipping bolts for future use.

Connecting the water supply hose(Option)

NOTICE 

After completing connection, if water leaks from the hose, then repeat the same steps.  Use

the most conventional type of faucet for water supply.  In case the faucet is square or too

big, remove the spacing ring before inserting the faucet into the adaptor.

Installing the Washing Machine

a

b

a

b

c

1. Remove the adaptor

from

the

water supply hose.

2. First, using a “+” type screw driver, loosen the

four screws on the adaptor.  Next, take the
adaptor and turn part(b) following the arrow until
there is a 5mm gap.

4. Connect the water supply hose to the adaptor.

Pull down part (c) of the water supply hose.

When you release part (c) the hose automatically

connects to the adaptor making a ’click’ sound.

5. Connect the other end of the water supply hose

to the inlet water valve at the top of the washer.

Screw the hose clockwise all the way in.

If the water tap has a screw type faucet, connect

the water supply hose to the tap as shown.

3. Connect adaptor to the water tap by tightening

the screws firmly.

Then, turn part (b) following the arrow and put(a)

and (b) together.

SWE800~1400-00672A-GB-dw  2/27/03 2:41 PM  Page 3

Summary of Contents for SWE-1000

Page 1: ...Washing Machine Owner s Instructions SWE 1400 SWE 1200 SWE 1100 SWE 1000 SWE 800 ...

Page 2: ...cycle without clothes See Washing for the first time on page 8 Safety instructions Before cleaning or carrying out maintenance unplug the appliance from the electrical outlet or set the On Off button to Off Make sure that the pockets of all clothing to be washed are empty Hard sharp objects such as coins safety pins nails screws or stones can cause extensive damage to the appliance Always unplug t...

Page 3: ...the washing machine 8 Setting prewash 9 Selecting options 9 Operating instruction 10 Using delay start 10 Washing tips and hints 11 Maintaining the Washing Machine 12 Draining the washing machine in an emergency 12 Repairing a frozen washing machine 12 Cleaning the exterior 12 Cleaning the detergent drawer and recess 12 Cleaning the debris filter 13 Cleaning the water hose mesh filter 13 Troublesh...

Page 4: ...ceived all of the items shown below If the washing machine was damaged during shipping or you do not have all of the items contact your Samsung dealer immediately Overview of the washing machine Hose guide Plug Option Hot Water supply hose Cold Water supply hose Bolt hole covers Wrench Emergency drain tube Debris filter Worktop Control panel Detergent drawer Door Base cover Adjustable feet Drain H...

Page 5: ...ve the bolts 1 Loosen all bolts with the supplied wrench before removing them 2 Take each bolt head and pull it through the wide part of the hole Repeat for each bolt 3 Fill the holes with the supplied plastic covers 4 Keep the shipping bolts for future use Connecting the water supply hose Option NOTICE After completing connection if water leaks from the hose then repeat the same steps Use the mos...

Page 6: ...ose and retightening the fitting Option 1 Take the red L shaped arm fitting for the hot water supply hose and connect to the red hot water supply intake on the back of the machine Tighten by hand 2 Connect the other end of the hot water supply hose to your sink s hot water faucet and tighten it by hand 3 Use a Y piece if you only want to use cold water Positioning the drain hose The end of the dra...

Page 7: ...e display panel 6 Temperature selection button Press the button repeatedly to cycle through the available water temperature options cold water 30 C 40 C 60 C and 95 C When pressing this button during washing you can see the selected temperature in the display panel 7 Start Pause button Press to pause and restart programs 8 On Off button Press once to turn the washing machine on press again to turn...

Page 8: ...panel 6 Temperature selection button Press the button repeatedly to cycle through the available water temperature options cold water 30 C 40 C 60 C and 95 C When pressing this button during washing you can see the selected temperature in the display panel 7 Delay Start button Press the button repeatedly to cycle through the available delayed start options from 1 hour to 24 hours in one hour increm...

Page 9: ...tton during washing you can see the selected temperature in the display panel 7 Delay Start button Press the button repeatedly to cycle through the available delayed start options from 1 hour to 24 hours in one hour increments 8 Start Pause button Press to pause and restart programs 9 On Off button Press once to turn the washing machine on press again to turn the washing machine off If the washing...

Page 10: ...n 2 Pouralittledetergentintocompartment inthedetergentdrawer 3 Turnonthewatersupplytothewashingmachine 4 PresstheTemperaturebuttonrepeatedlyuntil40 C isdisplayed 5 PresstheStart Pausebutton Thiswillremoveany waterfromthemanufacturer stestrunremaininginthemachine 8 SAMSUNG Washing Machine Owner s Instructions Washing a Load of Laundry ...

Page 11: ... Press Start Pause to begin the cycle Selecting options Eco SWE 1400 1200 only Eco is available only with Cotton Colour Synthetic or Delicate programs Selecting this option reduces heating time and temperature Use this option to save energy when washing lightly soiled laundry Rinse Your machine will run through an additional rinsing cycle The washing duration will be prolonged accordingly No spin ...

Page 12: ...le you prefer Prewash for Cotton Colour Synthetic Delicate only Rinse Eco 10 Press the Start Pause button and the machine will begin the cycle When the cycle is finished 1 Open the door Note The door will not open until 3 minutes after the machine stops or the power turns off 2 Remove laundry Using Delay Start SWE 1400 1200 1100 1000 You can set the washing machine to start your wash automatically...

Page 13: ...washing machine combined with modern detergents will give perfect washing results thus saving energy time water and detergent However if your cotton is particularly dirty use a prewash with a protein based detergent Determining load capacity Do not overload the washing machine or your laundry may not wash properly Use the chart below to determine the load capacity for the type of laundry you are w...

Page 14: ...ove the water supply hose and soak it in warm water 4 Pour warm water into the washing machine drum and let it sit for 10 minutes 5 Reconnect the water supply hose to the water faucet and check if the water supply and drain operations are normal Cleaning the exterior 1 Wipe the washing machine surfaces including the control panel with a soft cloth and non abrasive household detergents 2 Use a soft...

Page 15: ...the filter is not blocked Replace the filter cap 5 Replace the base cover Cleaning the water hose mesh filter You should clean the water hose mesh filter at least one time per year or when you see the following error message on the display To do this 1 Turn off the water source to the washing machine 2 Unscrew the hose from the back of the washing machine 3 With a pair of pliers gently pull out th...

Page 16: ...3 Make sure that the shipping bolts are removed see page 3 Make sure the washing machine is not touching any other object Make sure the laundry load is balanced The washing machine does not drain and or spin Make sure the drain hose is not squashed or bent Make sure the water hose mesh filter is not clogged see page 15 Understanding error messages Error displayed Solution Close the door Make sure ...

Page 17: ...nly machine washable woolens with pure new wool label Quick Lightly soiled cottons or linen blouses shirts dark coloured terry cloth colour linen articles jeans etc 1 Programme with prewash lasts approx 15 minutes longer 2 The programme duration data has been measured under the conditions specified in Standard IEC 456 3 Consumption in individual homes may differ from the values given in the table ...

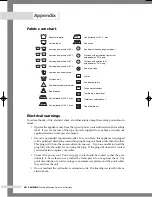
Page 18: ...r outlet Protect the power cord Power supply cords should be routed so that they are unlikely to be walked on or pinched by items placed on or against them Pay particular attention to cords at plugs convenience receptacles and the point where they exit from the unit Do not overload the wall outlet or extension cords Overloading can result in fire or electric shock Resistant material Delicate fabri...

Page 19: ...ycle only when strictly necessary Save water and electricity by only washing full loads the exact amount depends upon the program used Declaration of conformity This appliance complies with European safety standards EC directive 93 68 and EN Standard 60335 Specification TYPE FRONT LOADING WASHER DIMENSION W598mm D550mm H844mm WATER PRESSURE 50 kPa 800 kPa WEIGHT 75 kg WASHandSPINCAPACITY 5 5 kg DR...

Page 20: ...IN CASE THE NEED FOR SERVICING ARISES Don t hesitate to call any AS center nearby with your name address and telephone number when anything wrong with your product occurs Code No DC68 00672A DW XEN ...

Reviews: