

GB
35
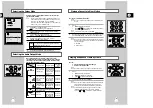
Your VCR remote control will work with Samsung televisions and
compatible brands.
To determine whether your television is compatible, follow the instructions
below.
1
Switch your television on.
2
Point the remote control towards the television.
3
Hold down the TV button and enter the two-figure code
corresponding to the brand of your television, by pressing the
appropriate numeric buttons.
Brand
Codes
Brand
Codes
SAMSUNG
01 to 06
PHILIPS
02, 20, 22
AKAI
09, 23
SABA
13, 14, 22 to 24
GRUNDIG
09, 17, 21
SONY
15, 16
LOEWE
02
THOMSON
13, 14, 24
PANASONIC
08, 23 to 27
TOSHIBA
07, 16 to 19, 21
Result:
If your television is compatible with the remote control, it
will switch off. It is now programmed to operate with the
remote control.
➢
If several codes are indicated for your television brand, try
each one in turn until you find one that works.
☛
When you change the batteries in the remote control, you
must reprogramme the code, following the same procedure.
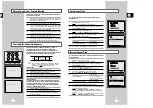
You can then control the television using the following buttons.
Button
Function
TV STANDBY/ON
➀
Used to switch the television on and off.
TV or VCR
➁
Used to switch between the TV and VCR modes.
Only the VOL (
+
or
–
) and TV STANDBY/ON
buttons are operational in VCR mode.
-/--
➂
Used to enter a two-figure programme number.
Example: For programme 12, press -/-- followed
by numeric buttons 1 and 2.
INPUT
➃
Used to select an external source.
VOL
+
or
–
➄
Used to adjust the volume of the television.
PROG/TRK
➅
Used to select the required programme.
(
"
or
❷
)
DISP./
➆
Used to switch between an external source and
the television tuner.
➢
The various functions will not necessarily work on all
televisions. If you encounter problems, operate the
television directly.
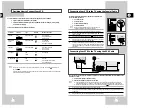
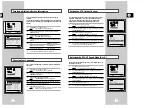
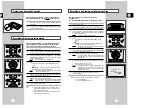
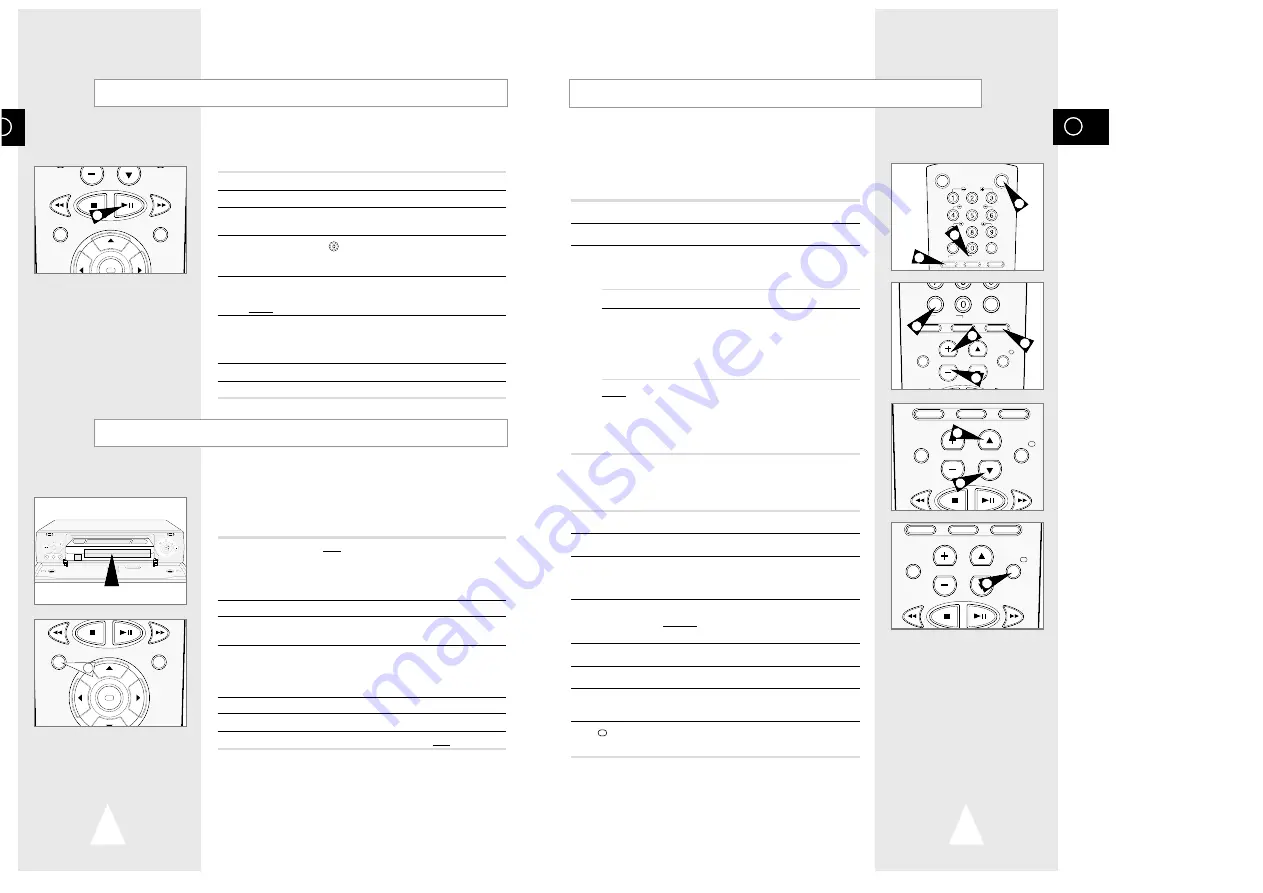
Using the TV Buttons on the Remote Control
VCR STANDBY/ON TV STANDBY/ON
SLOW
SHUTTLE
V-LOCK
CLR/RST F.ADV INDEX
TV VCR INPUT
REPEAT
SELECT
-/--
TV VCR INPUT
REPEAT
VOL PROG/TRK
AUDIO
DISP./
CLR/RST F.ADV INDEX
TV VCR INPUT
REPEAT
VOL PROG/TRK
AUDIO
DISP./
SELECT
-/--
TV VCR INPUT
REPEAT
VOL PROG/TRK
AUDIO
DISP./
1
2
2
6
6
7
3
5
5
4
GB
34
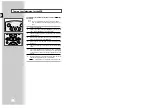
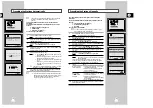
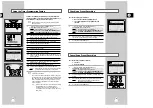
F.ADV
This function allows you to start a new recording at a specific
position on the cassette while maintaining a very smooth scene
change.
1
Insert the cassette to be edited in your VCR.
2
Press the
❿
ll button to start playback.
3
When you reach the position from which you wish to start the new
recording, press the
❿
ll button.
4
Press the F.ADV ( ) button again as often as necessary to
advance frame by frame, until the exact recording position is
located.
5
While the VCR is in still mode, hold the REC button down for
a while to activate the Assemble Edit function.
Result:
Record symbol flashes in the display.
6
Select the source from which you wish to record by pressing:
◆
The PROG/TRK (
"
or
❷
) buttons for television channels
◆
The INPUT button for the LINE IN 1 or LINE IN 2 input
sources
7
Press the
❿
ll button to start recording.
8
When you have finished recording, press
■
.
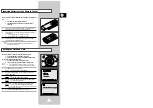
You can copy a cassette to your VCR from another video source,
such as another VCR or a camcorder.
☛
It is an infringement of copyright laws to copy
prerecorded cassettes or to re-record them in any form
without the permission of the owners of the
corresponding copyright.
1
Connect the VCR, from which the cassette is to be copied, to the
appropriate RCA audio and video input connectors on the rear of
your VCR, as indicated on page 10.
You can also use an RCA audio and video cable to connect the
LINE IN 2 input on the front of your VCR.
2
Insert a blank cassette in your VCR.
3
Insert the pre-recorded cassette in the other video source (VCR or
camcorder).
4
Press the INPUT button to select the appropriate input on your
VCR:
◆
LINE IN 1 for the rear input
◆
LINE IN 2 for the front input
5
Start playing back the cassette to be copied.
6
Hold REC down for a while to start recording on your VCR.
7
When you have finished recording, press
■
on both VCRs.
➢
If you wish to view the cassette being copied:
◆
Your VCR must be connected as usual to the
television (see page 9 for further details)
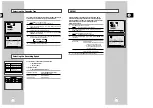
Using the Assemble Edit Function
Recording from Another VCR or Camcorder
OK
REC
MENU
LINE IN 2
VIDEO L - AUDIO - R
STANDBY/ON
EJECT
PROG
REC II P/S
RE
W
F.F
STOP
OK
REC
MENU
2
6


