background image

GB

29

GB

28

Audio Dubbing a Pre-recorded Cassette

(SV-657GX Only)

Using the TV Buttons on the Remote
Control 

(SV-657GX/SV-655GX Only)

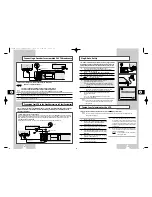
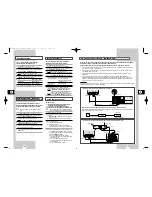
With the Audio Dubbing function, you erase the
previously recorded sound and replace it with a
new soundtrack from:

A CD player

A microphone connected to a sound system

A cassette player

Restriction:
Audio dubbing is applicable only to the longitudinal
audio track (normal audio).
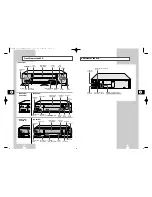
Connect an RCA audio cable to the appropriate 

output on your sound system (CD/cassette player for 
example).

Connect the other end of the RCA audio cable to the 

audio input connectors (L, R) on the front of your 
VCR.

Insert the pre-recorded cassette on which the audio 

track is to be replaced, and press the 

ll to start 

playback.

Find the scene that you want to over-dub and press 

ll on the remote control.

Press DUB.

Result: Your VCR is now in the Audio dubbing Pause 

mode.

On the sound system, locate the point on the CD or 

cassette at which you wish to start playback.
Example:  The track that you wish to record on the 

cassette.

When you are ready:

Start playback on the sound system

Press REC on the remote control.

Result:  The soundtrack is replaced on the pre-

recorded cassette.

The new sound will be recorded on the
normal sound track of the tape, and the
original sound will remain on the Hi-Fi
sound track.
To hear the new sound and original sound
mixed together, press the Audio button on
the remote control until the MIX option is
displayed (see page 33).

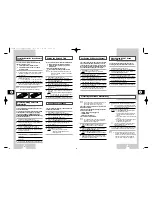
Your VCR remote control will work with Samsung
televisions and compatible brands. 

To determine whether your television is compatible,
follow the instructions below.

Switch your television on.

Point the remote control towards the television.

Hold down the TV button and enter the two-figure 

code corresponding to the brand of your television, 
by pressing the appropriate numeric buttons.
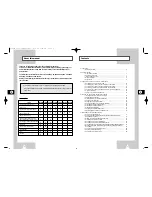
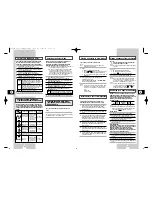
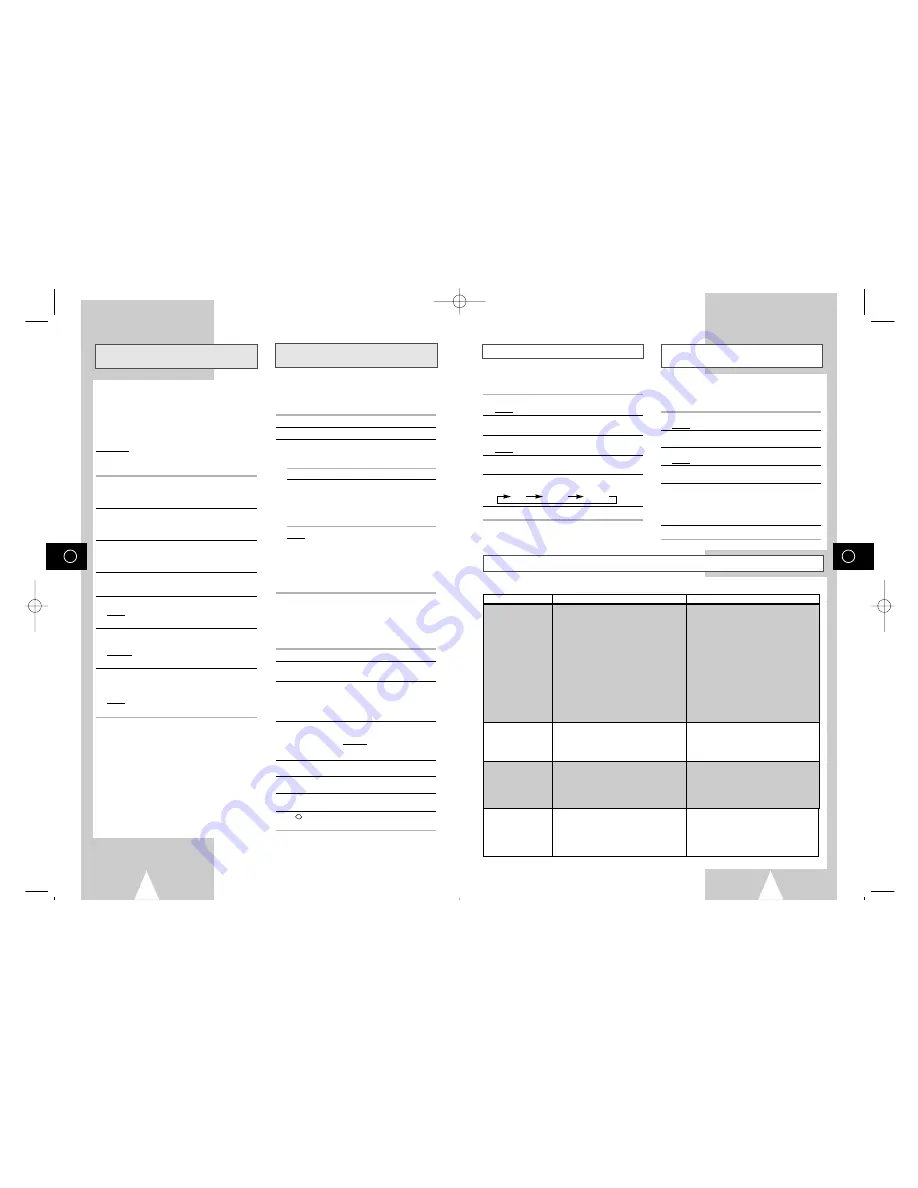
Brand Codes

Brand

Codes

SAMSUNG

01 to 06

PHILIPS

02, 20, 22

AKAI 

09, 23

SABA

13, 14, 22 to 24

GRUNDIG

09, 17, 21

SONY

15, 16

LOEWE

02

THOMSON 13, 14, 24

PANASONIC 08, 23 to 27

TOSHIBA

07, 16 to 19, 21

Result: If your television is compatible with the 

remote control, it is switched off. It is now 
programmed to operate with the remote 
control.

If several codes are indicated for your television 
brand, try each one in turn until you find one that 
works.

When you change the batteries in the remote
control, you must reprogramme the code,
following the same procedure.

You can then control the television using the following
buttons.

Button

Function

TV STANDBY/ON

Used to switch the television on 
and off.

TV or VCR 

Used to switch between the TV 
and VCR modes. Only the VOL 
(

+

or 

) and TV STANDBY/ON 

buttons are operational in VCR
mode.

-/--  Used to enter a two-figure 

programme number.
Example: For programme 12, 
press -/-- followed by numeric 
buttons 1 and 2.

INPUT  

Used to select an external 

source.

VOL 

+

or 

Used to adjust the volume of the 
television.

PROG/TRK   

Used to select the required

(

"

or

)

programme.

DISP./

Used to switch between an external 
source and the television tuner.

The various functions will not necessarily
work on all televisions. If you encounter
problems, operate the television directly.

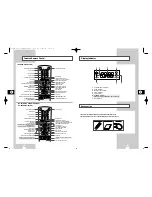
The Auto Power Off feature automatically turns off
your VCR if no signal is received and you do not
press any button for the selected time.  

Press MENU on the remote control.

Result:   The programming menu is displayed.

Press the corresponding 

"

,

or 

buttons to 

select the 

EASY OPERATION

option.

Press the OK button to select this option.

Result: The 

EASY OPERATION

menu is displayed.

Press the corresponding 

"

or

buttons, until the 

AUTO POWER OFF

option is selected.

Press the 

button, until you select the time of Auto 

Power off interval. 

OFF           2HOUR           3HOUR

On completion, press MENU twice to exit the menu.

Auto Power Off

ECO Mode-Reducing Standby power

consumption

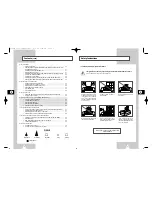
Technical Specifications

Low Power Mode reduces the Standby power

consumption of the VCR when in Standby mode. 

Useful, for example, when you are away from the

house on holiday. It saves actually turning the VCR off. 

Press MENU on the remote control.

Result:  The programming menu is displayed.

Press the corresponding 

"

,

or 

buttons to 

select the 

USER SET

option.

Press the OK button to select this option.

Result:   The 

USER SET

menu is displayed.

Press the corresponding 

"

or

buttons, until the 

ECO. MODE 

is selected.

Press the 

❿!

button to turn LOW(3Watts) mode on. 

Now, when the VCR is standby mode the front 
display panel will shut off. Even the clock disappears. 
By pressing the VCR STANDBY/ON (STANDBY/ON) 
button again the display panel will reappear.

On completion, press MENU twice to exit the menu.

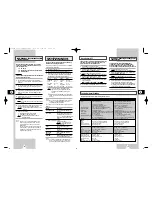
MODEL                                 SV-657GX/SV-655GX/SV-651GX                               SV-455GX/SV-451GX/SV-255GX/SV-251GX

Design and specifications are subject to change without notice.

Format

VHS PAL standard

VHS PAL standard

Heads

Video: 4 rotary heads

Video: 4 rotary heads (SV-445G/SV-441G)
Video: 2 rotary heads (SV-245G/SV-241G)

Hi-Fi audio: 2 rotary heads
Audio/Control: 1 stationary head

Audio/Control: 1 stationary head

Erase: 1 full track erase head

Erase: 1 full track erase head

Receiving channel

VHF-I, VHF-III, UHF, Interband/Hyperband

VHF-I, VHF-III, UHF, Interband/Hyperband

Television system

STANDARD B/G-D/K-A2/NICAM

STANDARD B/G-D/K

Luminance

FM azimuth recording

FM azimuth recording

Colour system

PAL/MESECAM/NT4.43: Down converted subcarrier PAL/MESECAM/NT4.43: Down converted subcarrier 
phase shifted direct recording NTSC PB on PAL TV phase shifted direct recording NTSC PB on PAL TV

Tape speed

SP   23.39 mm/sec

SP   23.39 mm/sec

LP   11.69 mm/sec

LP   11.69 mm/sec  (SV-445G/SV-441G)

Recording/playback time

SP   3 hours (E-180 Tape)

SP   3 hours (E-180 Tape)

LP   6 hours (E-180 Tape)

LP   6 hours (E-180 Tape) (SV-445G/SV-441G)

REW time

About 60 sec in REW with E-180

About 60 sec in REW with E-180

VIDEO
Input

0.5 to 2.0 Vp-p; 75 ohm unbalanced

0.5 to 2.0 Vp-p; 75 ohm unbalanced

Output

1.0 ± 0.2 Vp-p; 75 ohm unbalanced

1.0 ± 0.2 Vp-p; 75 ohm unbalanced

Signal-to-noise ratio

Better than 43 dB (SP)

Better than 43 dB (SP)

Horizontal resolution

More than 240 lines

More than 240 lines

AUDIO
Input

-8 dBm, 47 Kohm unbalanced

-8 dBm, 47 Kohm unbalanced

Output

-8 ± 3 dBm, 1 Kohm unbalanced

-8 ± 3 dBm, 1 Kohm unbalanced

Wow and flutter (WTD)

0.4% max (SP)

0.4% max  (SP)

Signal-to-noise ratio

68 dB min (IHF A filter)

42 dB min (IHF A filter)

Frequency response

20Hz - 20kHz

100Hz - 8kHz

Power requirement

220-240V~ 50Hz

220-240V~ 50Hz

Power consumption

Approx. 17 watts

Approx. 15 watts

Operation temperature

41°F-104°F (5°C-40°C)

41°F-104°F (5°C-40°C)

Operation humidity

10%-75%

10%-75%

Weight

2.8 Kg (net)

2.8 Kg (net)

Dimensions (WxHxD)

360 x 94 x 240 mm

360 x 94 x 240 mm

01823H SV-657GX/EUR-GB2  4/19/02 5:02 PM  Page 28

Summary of Contents for SV-251GX

Page 1: ...fiíruãka Príruãka pre uÏívatel a VIDEO CASSETTE RECORDER KAZETOV VIDEOREKORDÉR VIDEOREKORDÉR SV 657GX SV 455GX SV 655GX SV 451GX SV 651GX SV 255GX SV 251GX PAL www samsungvcr com GB CZ SK 01823H SV 657GX EUR GB1 4 19 02 4 58 PM Page 1 ...

Page 2: ...Programme Immediately 18 Recording a Programme with Automatic Stop 18 Using the ShowView Feature SV 657XG SV 655GX SV 455GX SV 255GX 19 Modifying ShowView Programming SV 657GX SV 655GX SV 455GX SV 255GX 19 Using the Timer Programming Feature 20 Checking a Preset Recording 20 Cancelling a Preset Recording 20 GB 2 About this manual Thank you for purchasing a Samsung Video Cassette Recorder VCR Your ...

Page 3: ... 455GX SV 451GX SV 255GX SV 251GX 21 Format 16 9 WIDE SCREEN 22 Selecting the Colour Mode 22 Selecting the Audio Output Mode SV 657GX SV 655GX SV 651GX 22 Selecting the Audio Mute Mode SV 455GX SV 451GX SV 255GX SV 251GX 22 SEARCHING FOR A SEQUENCE Playing a Cassette in Slow Motion 23 Playing a Sequence Frame by Frame 23 Picture Search Fast Forward Rewind 23 Searching for a Specific Sequence 23 Au...

Page 4: ... COMPARTMENT PLAY BUTTON RECORD BUTTON PAUSE STILL BUTTON EJECT BUTTON F F BUTTON PROGRAMME SELECTION BUTTONS REW BUTTON EJECT STANDBY ON PROG STOP REC II P S REW PLAY F F AUX VIDEO L AUDIO R II II II II EJECT STANDBY ON II STANDBY ON BUTTON STOP BUTTON AUX VIDEO L AUDIO R STANDBY ON EJECT PROG REC II P S REW F F STOP VIDEO CASSETTE COMPARTMENT STOP BUTTON REW BUTTON F F BUTTON RECORD BUTTON EJECT...

Page 5: ...STANDBY ON BUTTON INDEX BUTTON FRAME ADVANCE BUTTON TUNER AV1 AV2 AUX SELECTION REPEAT SELECTION BUTTON PROGRAMME SELECTION TRACKING BUTTONS DISPLAY BUTTON PLAY PAUSE STILL BUTTON FAST FORWARD FORWARD SEARCH BUTTON MENU BUTTON MENU SELECTION UP BUTTON MENU SELECTION BUTTON OK BUTTON TIMER SHOWVIEW BUTTON TV VCR SELECTION BUTTON STANDBY ON BUTTON SLOW BUTTON SHUTTLE BUTTON V LOCK BUTTON CLEAR AND R...

Page 6: ... VCR SV 657GX SV 655GX SV 651GX only 1 Connect the coaxial cable as indicated in the above section 2 Connect one end of the SCART cable to the AV1 EURO AV socket on the rear of the VCR 3 Plug the other end into the appropriate connector on the television 4 Plug the RCA Audio cable with stereo system into the Audio out socket on the rear of the VCR SV 657GX SV 655GX SV 651GX only TV AV2 DEC EXT AV1...

Page 7: ...es 2 By means of RF Coaxial Cable After making this connection you must preset the station received through the satellite tuner Satellite Receiver or other Equipment Antenne Aerial Connector 2 TV AV2 DEC EXT AV1 EURO AV R D L G AUDIO OUT SORTIE SCART Cable TV 1 SCART Cable Connecting a Decoder for scrambled PAY TV broadcasts This VCR is fully equipped to receive scrambled Pay TV broadcasts Example...

Page 8: ...of the arrow to release the battery compartment cover on the rear of the remote control 2 Insert two AA R6 or equivalent batteries taking care to respect the polarities on the battery with on the remote control on the battery with on the remote control 3 Replace the cover by aligning it with the base of the remote control and pushing it back into place Do not mix different battery types manganese ...

Page 9: ...ocedure from Step 6 onwards until all the required stations have been stored 16 On completion press the MENU button three times to exit the menu Changing the Preset Station Table You can rearrange the preset TV stations according to your own preferences programme number assigned to the station 1 Press the MENU button on the remote control Result The programming menu is displayed 2 Press the corres...

Page 10: ...o set VPS ON by selecting ON in the right hand column on the screen then you must set up the start time EXACTLY according to the published TV schedule Otherwise the timer recording won t take place Select the recording Press the or buttons speed SV 657GX until the recording speed SV 655GX SV 455GX only selection flashes Press the or buttons until the correct indication is displayed AUTO Auto Tape ...

Page 11: ...efore that programme is to be broadcast Up to six programmes can be preset Before presetting a recording check that the date and time are correct 1 Insert the cassette Press the TIMER button Press the or buttons to select the STANDARD option and then press the button or Press MENU on the remote control Result The programming menu is displayed Press the OK button to select TIMER PROGRAMMING option ...

Page 12: ...re than about five minutes the VCR will automatically play to protect the cassette and video heads Vertical stability When playing back frame by frame interference may be seen on the screen Press the V LOCK buttons to minimize this effect SLOW V LOCK F ADV 2 1 1 2 etc etc Prev Seq Seq being played Next Seq GB 22 Format 16 9 WIDE SCREEN Selecting the Audio Mute Mode SV 455GX SV 451GX SV 255GX SV 25...

Page 13: ...ess or until Repeat play ON is displayed Do not wish to repeat play OFF is displayed 6 On completion press MENU twice to exit the menu To prevent delays or over runs the VCR has a function called ShowView EXTEND allowing you to extend the recording time by up to 60 minutes Only use if PDC is not available or set to OFF 1 Press the MENU button on the remote control 2 Press the corresponding or butt...

Page 14: ...s 1 Connect one end of the RCA audio video cable into the VIDEO socket on the front of the VCR 2 Plug the other end of the audio video cable into the appropriate output connector on the other system VCR or camcorder 3 Connect one end of the RCA audio cable into the AUDIO sockets on the front of the VCR Take care to respect the colour coding of the left and right channels 4 Plug the other end of th...

Page 15: ...o signal is received and you do not press any button for the selected time 1 Press MENU on the remote control Result The programming menu is displayed 2 Press the corresponding or buttons to select the EASY OPERATION option 3 Press the OK button to select this option Result The EASY OPERATION menu is displayed 4 Press the corresponding or buttons until the AUTO POWER OFF option is selected 5 Press...

Page 16: ...H Band Fp STD DISP CH Band Fp STD 001 R1 V L 49 75 OIRT 002 R2 V L 59 25 OIRT 003 R3 V L 77 25 OIRT 004 R4 V L 85 25 OIRT 005 R5 V L 93 25 OIRT 006 R6 V H 175 25 OIRT 007 R7 V H 183 25 OIRT 008 R8 V H 191 25 OIRT 009 R9 V H 199 25 OIRT 010 R10 V H 207 25 OIRT 011 R11 V H 215 25 OIRT 012 R12 V H 223 25 OIRT 013 A V L 53 75 Italy 014 B V L 62 25 Italy 015 C V L 82 25 Italy 016 D V H 175 25 Italy 017...

Page 17: ...THIS APPLIANCE IS DISTRIBUTED BY www samsungvcr com AC68 01823H ELECTRONICS 01823H SV 657GX EUR GB2 4 19 02 5 02 PM Page 32 ...

Reviews: