11
SPEED DOME CAMERA ACCESSORIES
10
SPEED DOME CAMERA ACCESSORIES
Installation Guide
STB-496PP(Ceiling Type Mount)
1. Fix the ceiling type mount STB-496PPV at the desired installation
location on the ceiling using 4 screws.
2. The remaining installation methods are the same as those for
indoor/outdoor housing.
10. Connect the video cable, the controller cable, the power
adapter cable and ID cable to the Camera Holder.
11. Fix the camera-mounted housing onto the inside groove
of the wall mount (STH-270PWV) and adjust the
direction so that the “SAMSUNG” logo faces the front.
12. After checking that all devices are properly connected to the
camera, check the camera function. If no error is found, fix the
housing to the Wall Type Mount using 3 screws.
•
Check out the input voltage of the power adapter before connecting the power.
•
It is necessary to tighten the screw to prevent unfastening.
•
If the screw to prevent unfastening is not tight, the camera installed may fall due to vibration or shock from the environment.
•
Set up the Camera ID, the Termination Resistance and the Protocol Selection Switch before installing the outdoor housing on
the ceiling type mount.
Note
STB-330PC(On-Ceiling Installation Mount)
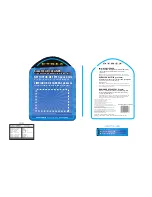
1. Attach the enclosed template to the desired location on the ceiling where you want to install the
Samsung 30x optical zoom Speed Dome Camera. Make an 88mm hole following the circular line
on the template, to allow space for the external cabling to be drawn through.
2. Fix the safety cable to the mount and pull the cable out of the hole at the bottom of the mount.
Then, match the arrow of the camera holder and the arrow (direction) on the surface within the
mount and assemble with 3 screws.
Ceiling
Template
Template
Extermal Service Cable
1. The installation method for the ceiling type flange STB-30PF is the same as for the ceiling type
mount. The use of a separate pipe and ceiling bracket is optional.
STB-30PF(Ceiling Flange)


