Samsung SPF-83H Installation Manual Download Page 9

The Default Mode of the Samsung Digital Photo Frame is a Photo Album. 
To use the Digital Photo Frame as a secondary USB Monitor or USB Mass-storage device, follow the instructions below.


How To Use Digital Photo Frame As Mini-Monitor

If USB cable is not connected and Digital Photo Frame is switched on, it starts working as a Photo Album. 

To use the Samsung Digital Photo Frame device as a secondary USB Monitor, first install the frame Manger 
on the Windows XP computer.

 (Follow the Frame Manger Installation Guide for installation). 

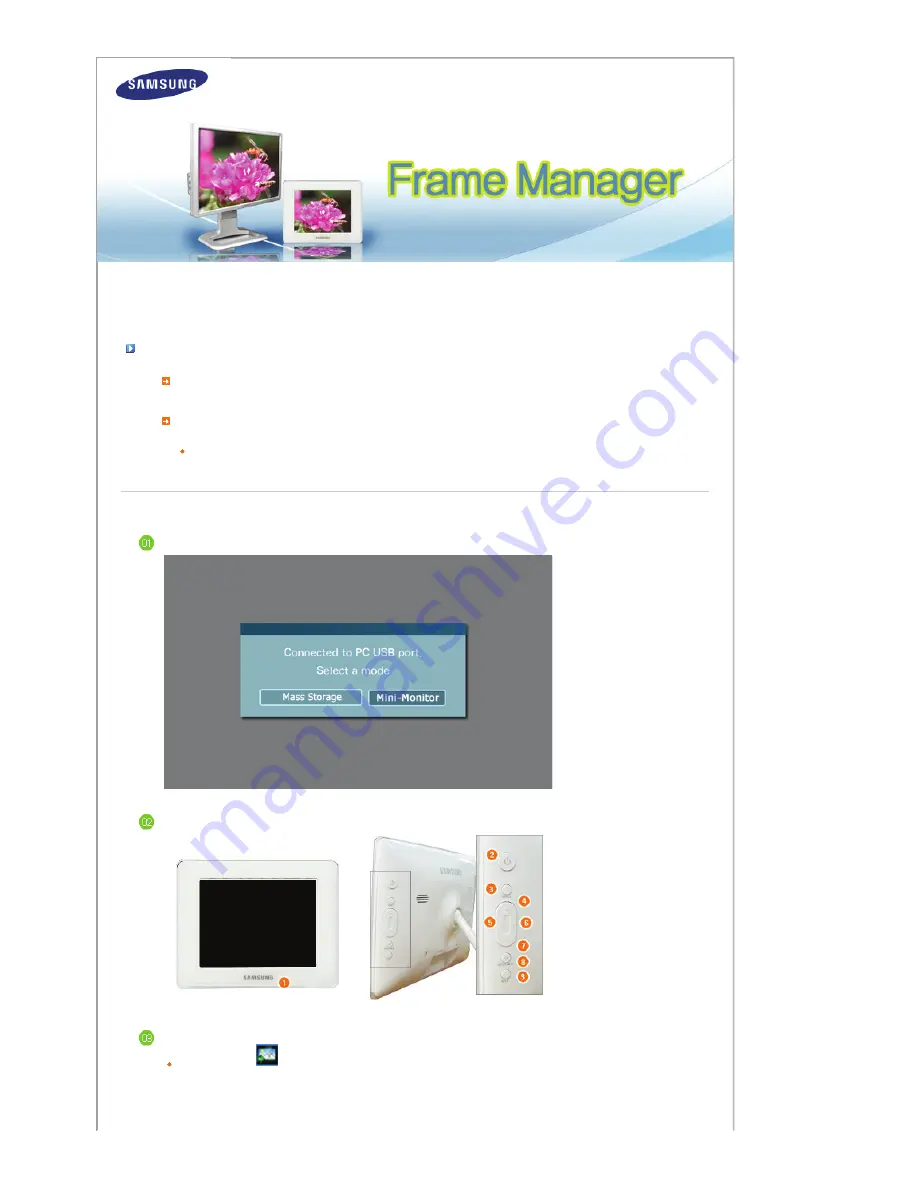
Use the USB cable to connect the computer’s USB port to the Digital Photo Frame’s USB port. 


On Samsung Digital Photo Frame, the following screen will appear:  


Select 

Mini-Monitor

 option by clicking the button.  


On the device desktop will appear.  

In Frame Manager 

 System tray menu, 

Mini-Monitor

menu item will appear disabled (i.e. the current mode) and 

Mass Storage

 menu item will appear enabled. 

Summary of Contents for SPF-83H

Page 1: ...bove System Requirements Installation Installing USB driver Installation 1 Click Frame Manager icon in the main page of the CD manual to run the install file 2 Press Next button 3 Click on Change button to Select the path on your PC where you want the software to be stored installed Install the Application first before connecting the Digital Photo Frame to a PC ...

Page 2: ...4 Press Install button to proceed 5 Press Yes Button ...

Page 3: ...6 Select Yes I want to restart my computer now to boot the system Click on Finish button ...

Page 4: ...will appear in system tray NOTE Applicable for Windows XP users only NOTE Never make this as primary monitor System Requirements Installation Installing USB driver Installing USB driver 1 Connect the larger standard USB connector to the USB port of the PC Connect the smaller mini USB connector to the PC connector of the Samsung Digital Photo Fame Now Switch on the device Samsung Digital Photo Play...

Page 5: ...2 Select No not this time button 3 Click on Next button 4 Click on Next button ...

Page 6: ... button 6 Select Search for the best driver in these locations option Check Include this location in the search Now click on Browse button to select the directory where the Frame Manger software is installed Refer to Frame Manager Installation step 3 7 Now press Next button ...

Page 7: ...8 Press Continue Anyway button 9 Press Finish button ...

Page 8: ...10 Now the system is ready to be used ...

Page 9: ...Digital Photo Frame device as a secondary USB Monitor first install the frame Manger on the Windows XP computer Follow the Frame Manger Installation Guide for installation Use the USB cable to connect the computer s USB port to the Digital Photo Frame s USB port On Samsung Digital Photo Frame the following screen will appear Select Mini Monitor option by clicking the button On the device desktop w...

Page 10: ...ENTER button button 8 in above figure on device A dialog box Window Default will appear and you can open the folder How to switch current mode to another 1 Mini Monitor To Mass Storage If the USB Cable is connected and Photo Frame is being used as Monitor 1 Right click on the Frame Manager System tray icon 2 From the Menu Click on menu item Mass Storage 2 Mass Storage To Mini Monitor If the USB Ca...

Page 11: ...pe to rotate the display back to normal 0 degrees position Brightness Control To control the brightness in MiniMo Mode i e when Digital Photo Frame is being used as USB Secondary Monitor Click Left Mouse Button on the Frame Manager Tray Icon Brightness slider will appear To Increase the brightness Drag the slider pointer to upward OR Press Up Arrow Left Arrow PgUp Key on keyboard To Decrease the b...

Page 12: ... SD MMC or CF card USB stick if inserted into device before running UPDATE All the files required for the update must be available on the PC Browse to the folder containing these files after PROCEED Click Right Mouse Button on the Frame Manager Tray Icon 1 Following tray menu will appear 2 Click on Update item 3 Following instruction dialog will appear 4 If you do not want to update firmware click...

Page 13: ...9 During the transfer of file files following progress bas will appear 10 After this please wait for completion of update on device ...

Reviews: