Disassembly and Reassembly
Samsung Electronics
1-9
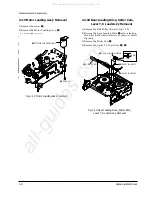
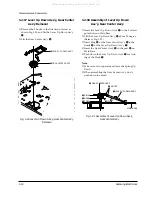
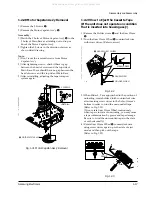
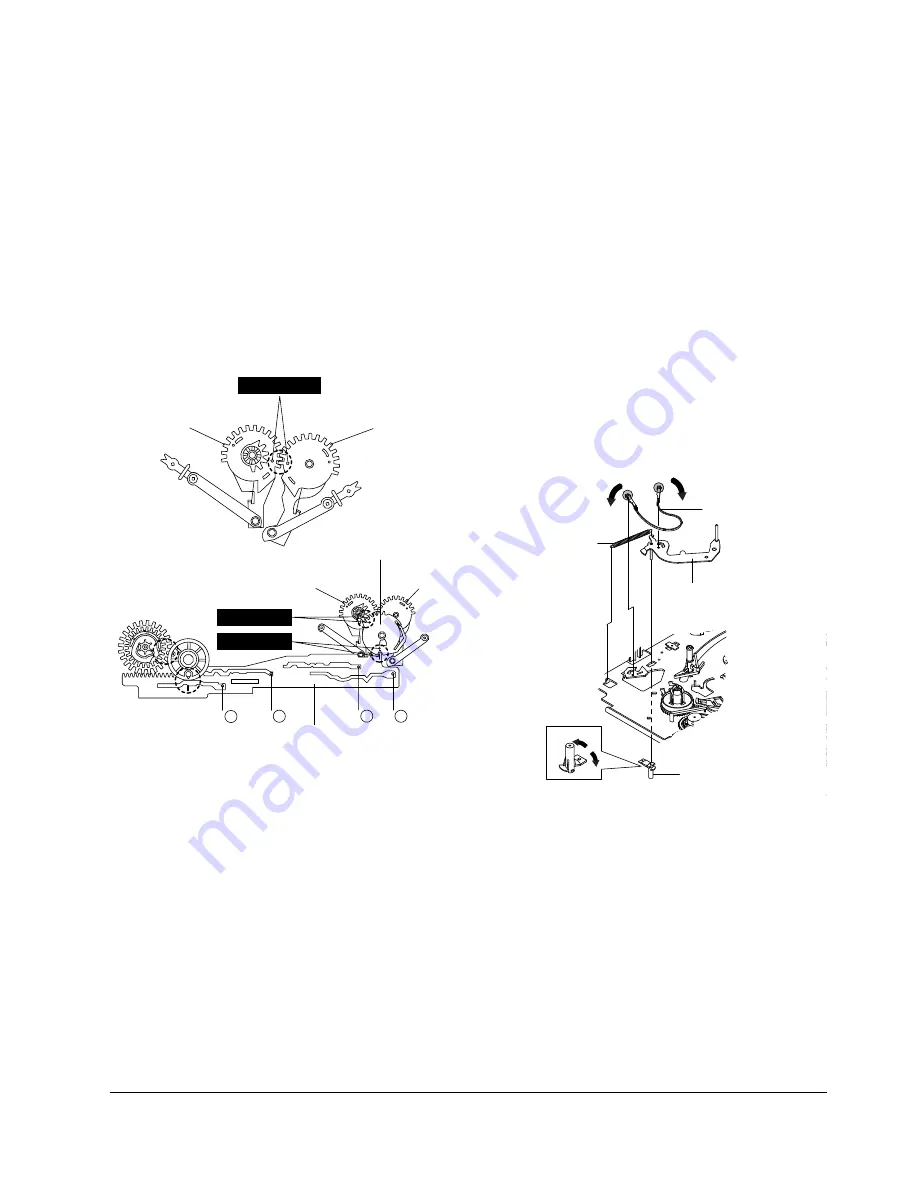
1-2-11 Assembly of Gear Loading Drive,
Slider Cam, Lever T, S Load Ass’y
1) When reinstalling, be sure to align dot of Lever T
Load AssÕy
Œ
with dot of Lever S Load AssÕy
´
as shown in drawing. (Refer to Timing Point 1)
2) Insert the Pin A, B, C, D into the Slider Cam
ˇ
hole.
3) Be sure to align dot of Lever T Load AssÕy and dot
of Gear Loading Drive
¨
. (Refer to Timing Point 2)
4) Align dot of Gear Loading Drive with mark of
Slider Cam as shown in drawing.
(Refer to Timing Point 3)
´
LEVER S LOAD ASS'Y
Œ
LEVER T LOAD ASS'Y
PIN A
PIN C
PIN B
PIN D
LEVER T
LOAD ASS'Y
LEVER S
LOAD ASS'Y
ˇ
SLIDER CAM
¨
GEAR LOADING DRIVE
TIMING POINT 1
TIMING POINT 2
TIMING POINT 3
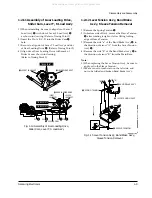
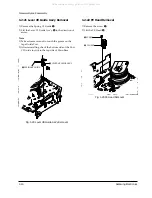
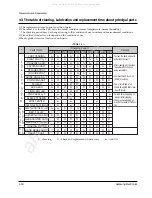
1-2-12 Lever Tension Ass’y, Band Brake
Ass’y, Sleeve Tension Removal
1) Remove the Spring Tension
Œ
.
2) In bottom side of Deck, remove the Sleeve Tension
´
after rotating it right or left as lifting locking
edge of Sleeve Tension.
3) Remove the side ÒaÓ of the Band Brake AssÕy
¨
in
the direction of arrow ÒAÓ from the Lever Tension
AssÕy
ˇ
.
4) Remove the side ÒbÓ of the Band Brake AssÕy
¨
in
the direction of arrow ÒBÓ from the Main Base.
Note
:
1) When replacing the Lever Tension AssÕy, be sure to
apply oil in the Sleeve Tension.
2) Take care not to touch stain on the felt side, and
not to be folded and broken Band Brake AssÕy.
¨
BAND BRAKE ASS'Y
´
SLEEVE TENSION
ˇ
LEVER TENSION ASS'Y
Œ
SPRING TENSION
"A"
"B"
a
b
Fig. 1-14 Assembly of Gear Loading Drive,
Slider Cam, Lever T, S Load Ass’y
Fig. 1-15 Lever Tension Ass’y, Band Brake Ass’y,
Sleeve Tension Removal
All manuals and user guides at all-guides.com

