3-6
Samsung Electronics
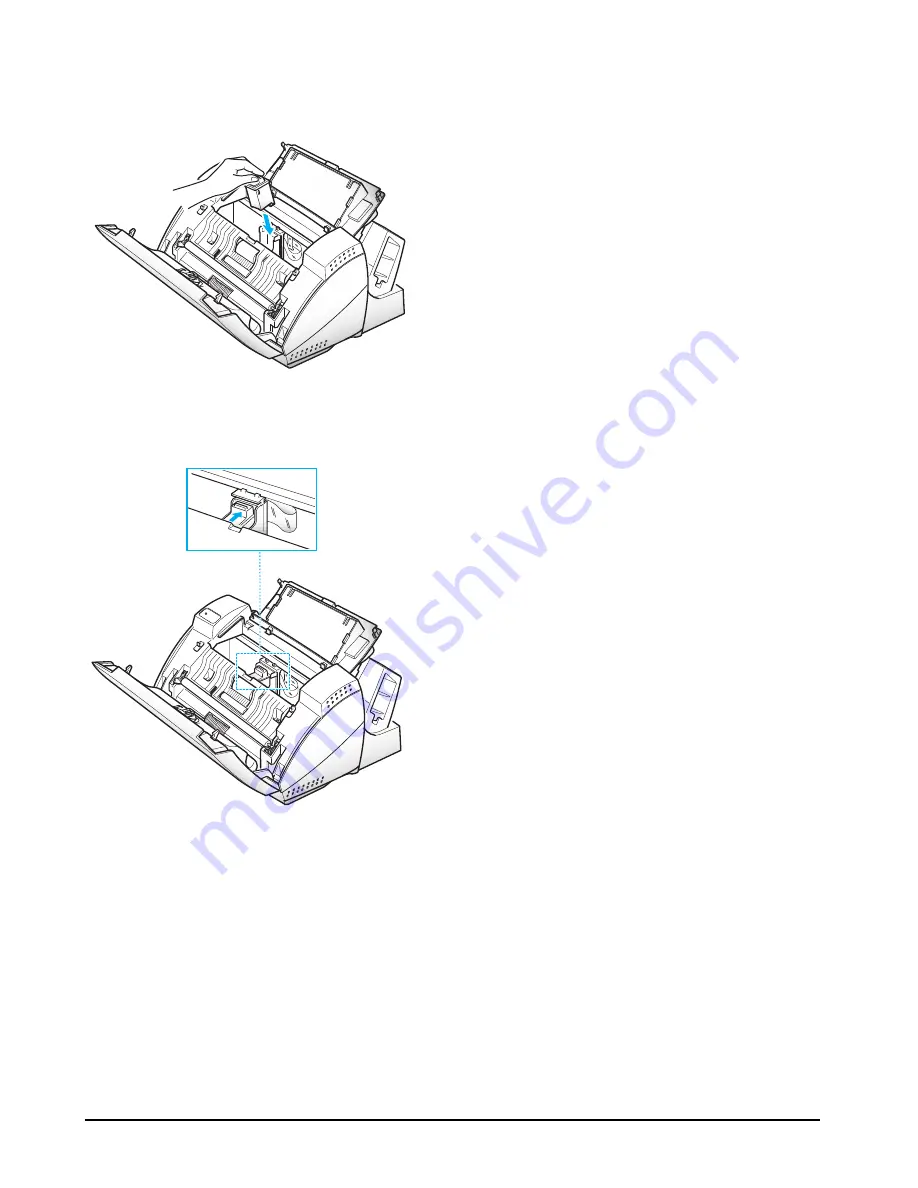
6. Insert the print cartridge in the carrier.
7. Push the cartridge firmly in the direction of the
arrow until it clicks into place.
8. After installing the print cartridge, close the cover
and replace the control panel.
9. Use ‘Install Cartridge’ tab on your PC for a color
cartridge.
The LCD displays
‘THE CARTRIDGE IS 1:NEW
2:USED’
.
10. Choose ‘1:NEW’ by using the
F
or
E
button, or by
pressing the 1 button.
11. Press the Cartridge button. The LCD displays
briefly
‘MONO INSTALLED’
(or
‘COLOR
INSTALLED’
for color print cartridge).
Use ‘Install Cartridge’ tab on your PC for a color
cartridge.
If the cartridge is not installed properly, the LCD
displays
‘CHECK CARTRIDGE! PLEASE
INSTALL’
. Remove the cartridge and re-insert it.
Notes :
• When you install a new cartridge, you must choose
‘1:NEW.’ When you install a used cartridge, select
‘2:USED’, which helps you check the amount of ink
remaining. If you mix up several used cartridges, it
will be difficult to check the amount of ink remain-
ing. Once a new print
cartridge is installed, use it until it has completely
run out of.
• If you want to install a color cartridge to print a file
from your PC, you should use ‘Install Cartridge’
tab in the SF4500 Control Program on your PC. If
you use the Cartridge button on this machine, the
machine beeps a warning tone and briefly displays
‘RE-INSTALL COLOR USING
PC-DRIVER’.
Press ‘Install Cartridge’ tab on your
PC, or the file may print using composite black.
Summary of Contents for SF4500
Page 2: ......
Page 50: ...Samsung Electronics 6 19 Fig 6 1 17 TIMING DIAGRAM FOR EACH NOZZLE...
Page 74: ...Samsung Electronics 9 1 9 Exploded Views and Parts List 9 1 Main Assembly Parts...
Page 76: ...Samsung Electronics 9 3 9 2 Unit OPE Ass y...
Page 78: ...Samsung Electronics 9 5 9 3 Unit Base Ass y...
Page 81: ...9 8 Samsung Electronics 9 4 Engine Ass y TOP...
Page 85: ...9 12 Samsung Electronics 9 5 Unit Handset...
Page 87: ...9 14 Samsung Electronics 9 9 6 Unit Cradle 7...
Page 89: ...Samsung Electronics 10 1 10 Packing Diagram and Parts List APPLICATIONMANUAL 22 23 24...
Page 112: ......
Page 113: ......
Page 114: ......
Page 115: ......
Page 116: ......
Page 117: ......
Page 118: ......
Page 119: ......
Page 120: ......
Page 121: ......
Page 122: ......
Page 123: ......
Page 124: ......
Page 125: ......
Page 126: ......
Page 127: ......


