


4-19
Samsung Electronics
Disassembly and Reassembly
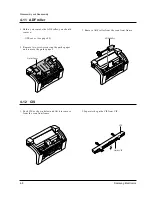
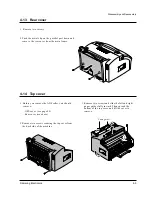
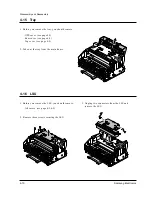
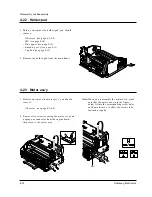
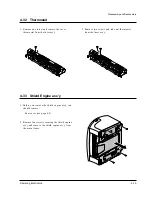
4-32 Thermostat
1. Remove one screw and remove the cover
thermostat from the fuser ass’y.
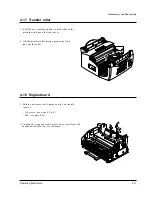
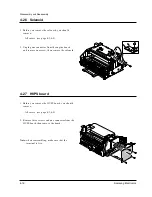
4-33 Shield Engine ass’y
1. Before you remove the shield engine ass’y, you
should remove:
– Rear cover (see page 4-9)
2. Remove four screws securing the shield engine
ass’y and remove the shield engine ass’y from
the main frame.
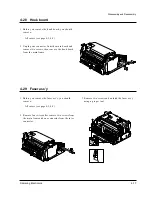
2. Remove two screws and take out thermostat
from the fuser ass’y.
Summary of Contents for SF 5100
Page 10: ...2 6 Samsung Electronics Specification Memo ...
Page 16: ...3 6 Samsung Electronics Tech Mode Memo ...
Page 40: ...4 24 Samsung Electronics Disassembly and Reassembly Memo ...
Page 115: ...MEMO Samsung Electronics 8 2 ...
Page 116: ...PCB Diagrams Samsung Electronics 10 1 10 1 Main PCB Diagram Top 10 PCB Diagrams ...
Page 117: ...PCB Diagrams Samsung Electronics 10 2 10 2 Main PCB Diagram Bottom ...
Page 118: ...PCB Diagrams Samsung Electronics 10 3 10 3Engine PCB Diagram Top ...
Page 119: ...PCB Diagrams Samsung Electronics 10 4 10 4Engine PCB Diagram Bottom ...
Page 120: ...PCB Diagrams Samsung Electronics 10 5 10 5LIU PCB Diagram ...
Page 121: ...PCB Diagrams Samsung Electronics 10 6 10 6OPE PCB Diagram ...
Page 123: ...MEMO Samsung Electronics 9 2 ...
Page 184: ...MEMO Samsung Electronics 8 2 ...
Page 186: ...MEMO Samsung Electronics 9 2 ...
Page 187: ...PCB Diagrams Samsung Electronics 10 1 10 1 Main PCB Diagram Top 10 PCB Diagrams ...
Page 188: ...PCB Diagrams Samsung Electronics 10 2 10 2 Main PCB Diagram Bottom ...
Page 189: ...PCB Diagrams Samsung Electronics 10 3 10 3Engine PCB Diagram Top ...
Page 190: ...PCB Diagrams Samsung Electronics 10 4 10 4Engine PCB Diagram Bottom ...
Page 191: ...PCB Diagrams Samsung Electronics 10 5 10 5LIU PCB Diagram ...
Page 192: ...PCB Diagrams Samsung Electronics 10 6 10 6OPE PCB Diagram ...