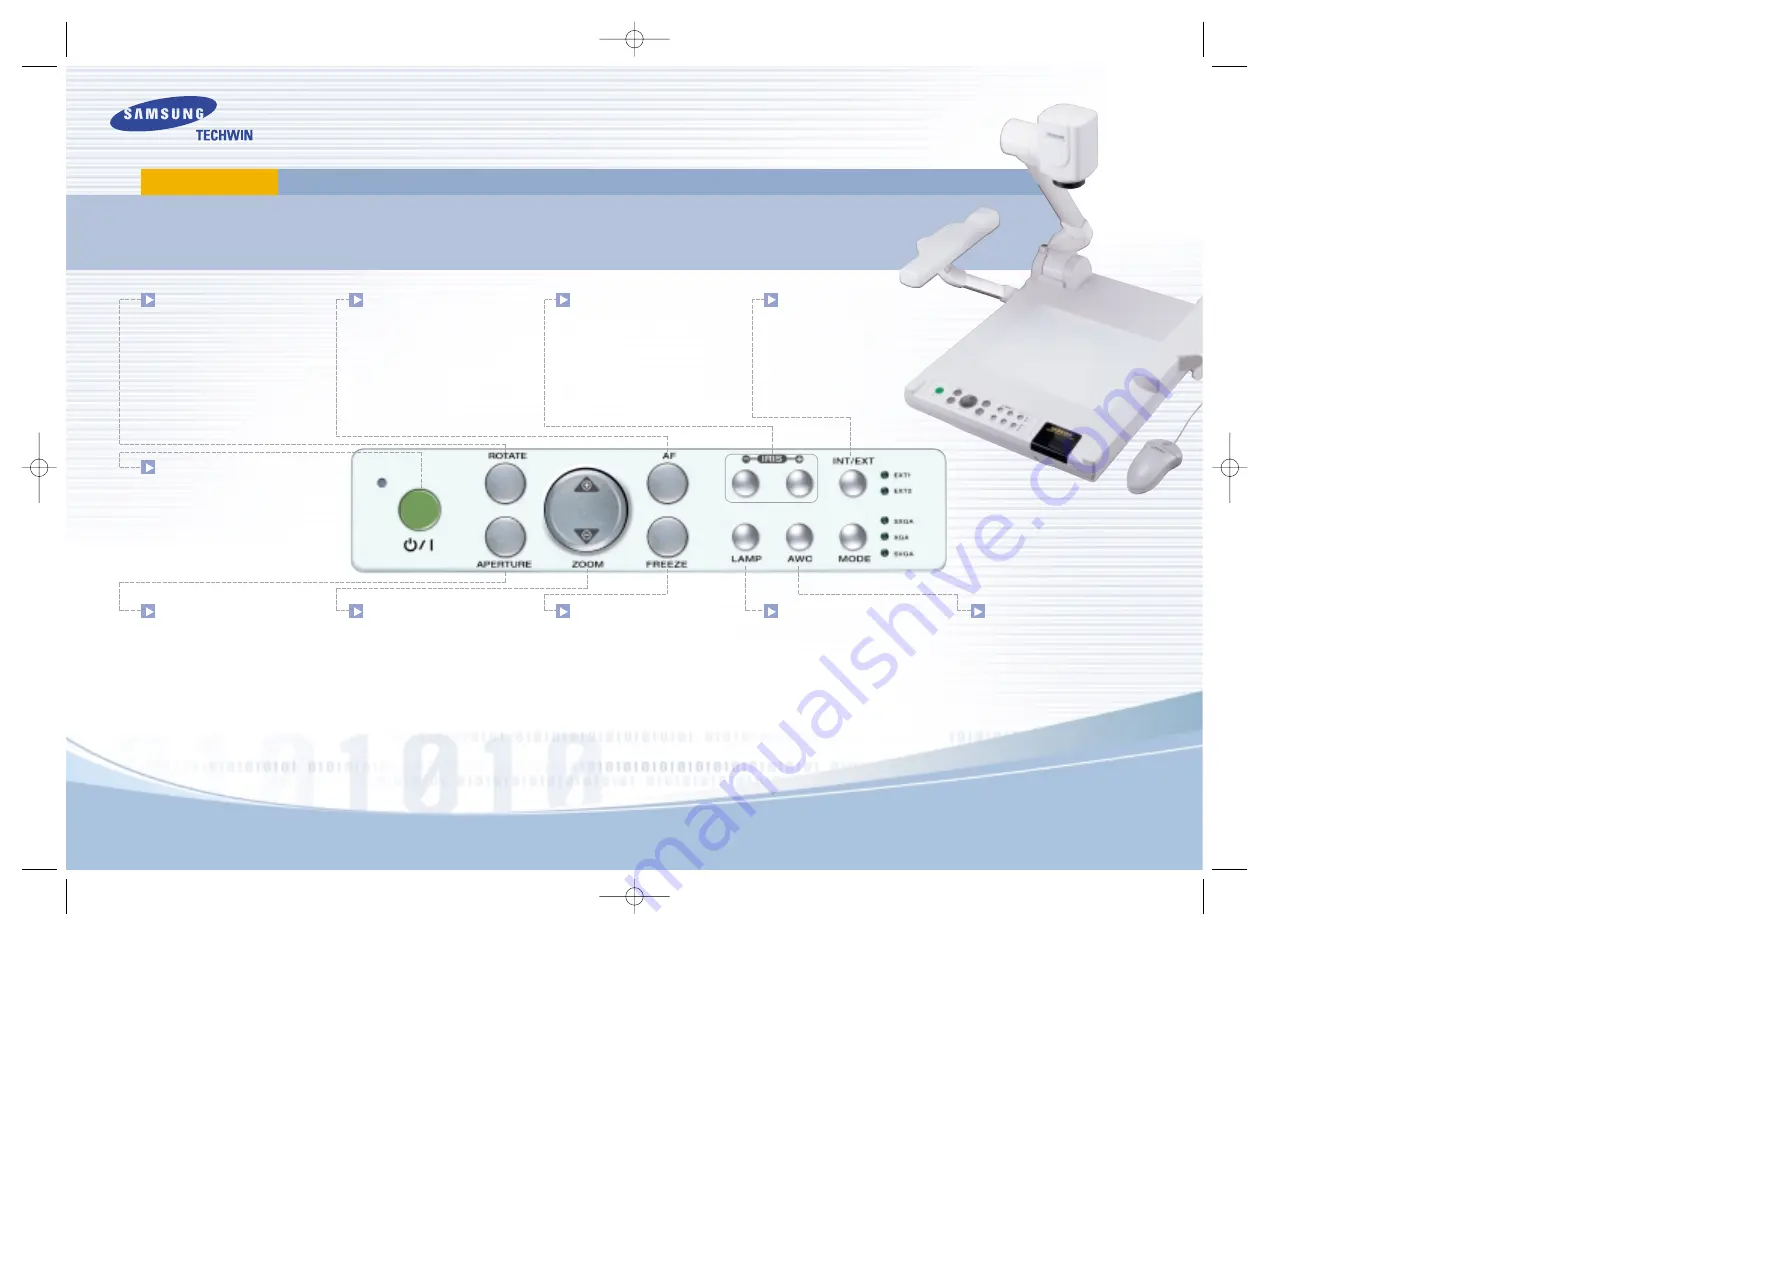
B A S I C O P E R A T I O N S
The Samsung SDP-6500DX provides control of the basic operations on the front panel of the Digital Presenter. Please note that you
can also access these features via the Remote Control or the PS/2 Mouse by right-clicking on the mouse button to access the menu.
Advanced features are found on both the remote and menu commands via the mouse.
SDP-6500DX
Quick Start Guide
www.samsung
presenter
.com
Turn on the main power switch of the
document camera. After the boot-up
screen, the presenter will perform an
automatic white balance or "Color
Adjustment."
Tip
: Make sure there is no subject matter
on the display surface to affect white bal-
ance. Printed text on white paper is OK.
Use the
Rotate
button to electronically
"flip" your portrait documents for sharper
results and better display. Place the docu-
ment on the surface in a landscape mode.
Left-hand users place the top of the docu-
ment towards the left. Right-hand users
place the top towards the right. Press the
Rotate
button once to flip the document
from left to right (for left-handed users) or
three times (for right-handed users).
The
Aperture
button will allow you to
switch between
Text
and
Image
settings.
In the
Text
mode, adjust the
Iris
buttons
to set the desired brightness for text
documents. In the
Image
mode, adjust the
Iris
to obtain the best results for image-
based materials such as photographs.
Tip
: Once you've adjusted your settings for
Text
and
Image
, they are automatically
stored in memory, allowing you to quickly
switch between a wide variety of materials
simply by pressing the
Aperture
button.
Press the
Wide (Zoom Out)
or
Tele
(Zoom In)
settings to reduce or enlarge the
image size. Auto focus will occur after
zooming has stopped.
Tip
: Make sure you're not moving the
subject during auto focus. If the subject is
blurry, press the
AF
button to re-focus.
Pressing the
AF
button will activate an
auto focus adjustment at any time. Manual
focus is available on the remote or menu
via the mouse.
Tip
: Use the mouse and the built-in menu
command for extremely accurate manual
focus control...especially good for 3-dimen-
sional subjects when at maximum zoom.
The
Iris
buttons (brightness control)
are used to lighten (+) or darken (-) the
overall image for the desired result.
To switch between input sources, such
as a computer, connect it to the Input 1 or 2
connections on the back of the Samsung
Digital Presenter. By pressing the
INT/EXT
button, you can cycle
between the presenter and any
two sources.
Upper Lamps automatically turn on.
To change lighting options, press the LAMP
button to cycle through the sequence (Top
Lights / Light box / No Lights)
Tip
: It will take approximately 1-2
seconds after the Lamps Off setting
before the top lamps will light.
Press the AWC button to activate an
automatic color adjustment at any time.
Tip
: Make sure there is no subject mat-
ter on the display surface to affect white
balance. Printed text on white paper is OK.
Use the
Freeze
button to "hold" any
image on screen while you change your
subject or to Freeze an object in any
position.
Tip
: The
Freeze
button is used to freeze
a live image or divided image in order to
activate the
Draw
menu command for
annotation.


